Mike's Astrophotos
Here are my astronomy photos. Nothing exciting, mostly works in progress as I learn how to do this.
First, the "good" stuff: (click on them for larger versions)
|
|
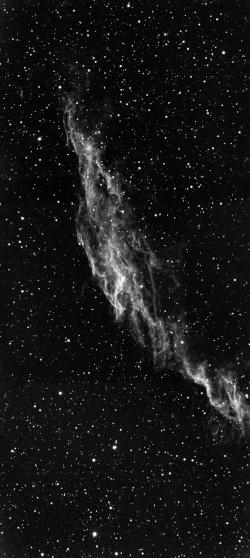 NGC6992 - East Veil Nebula 3 panel mosaic |
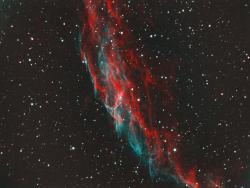 NGC6992 - East Veil Nebula |
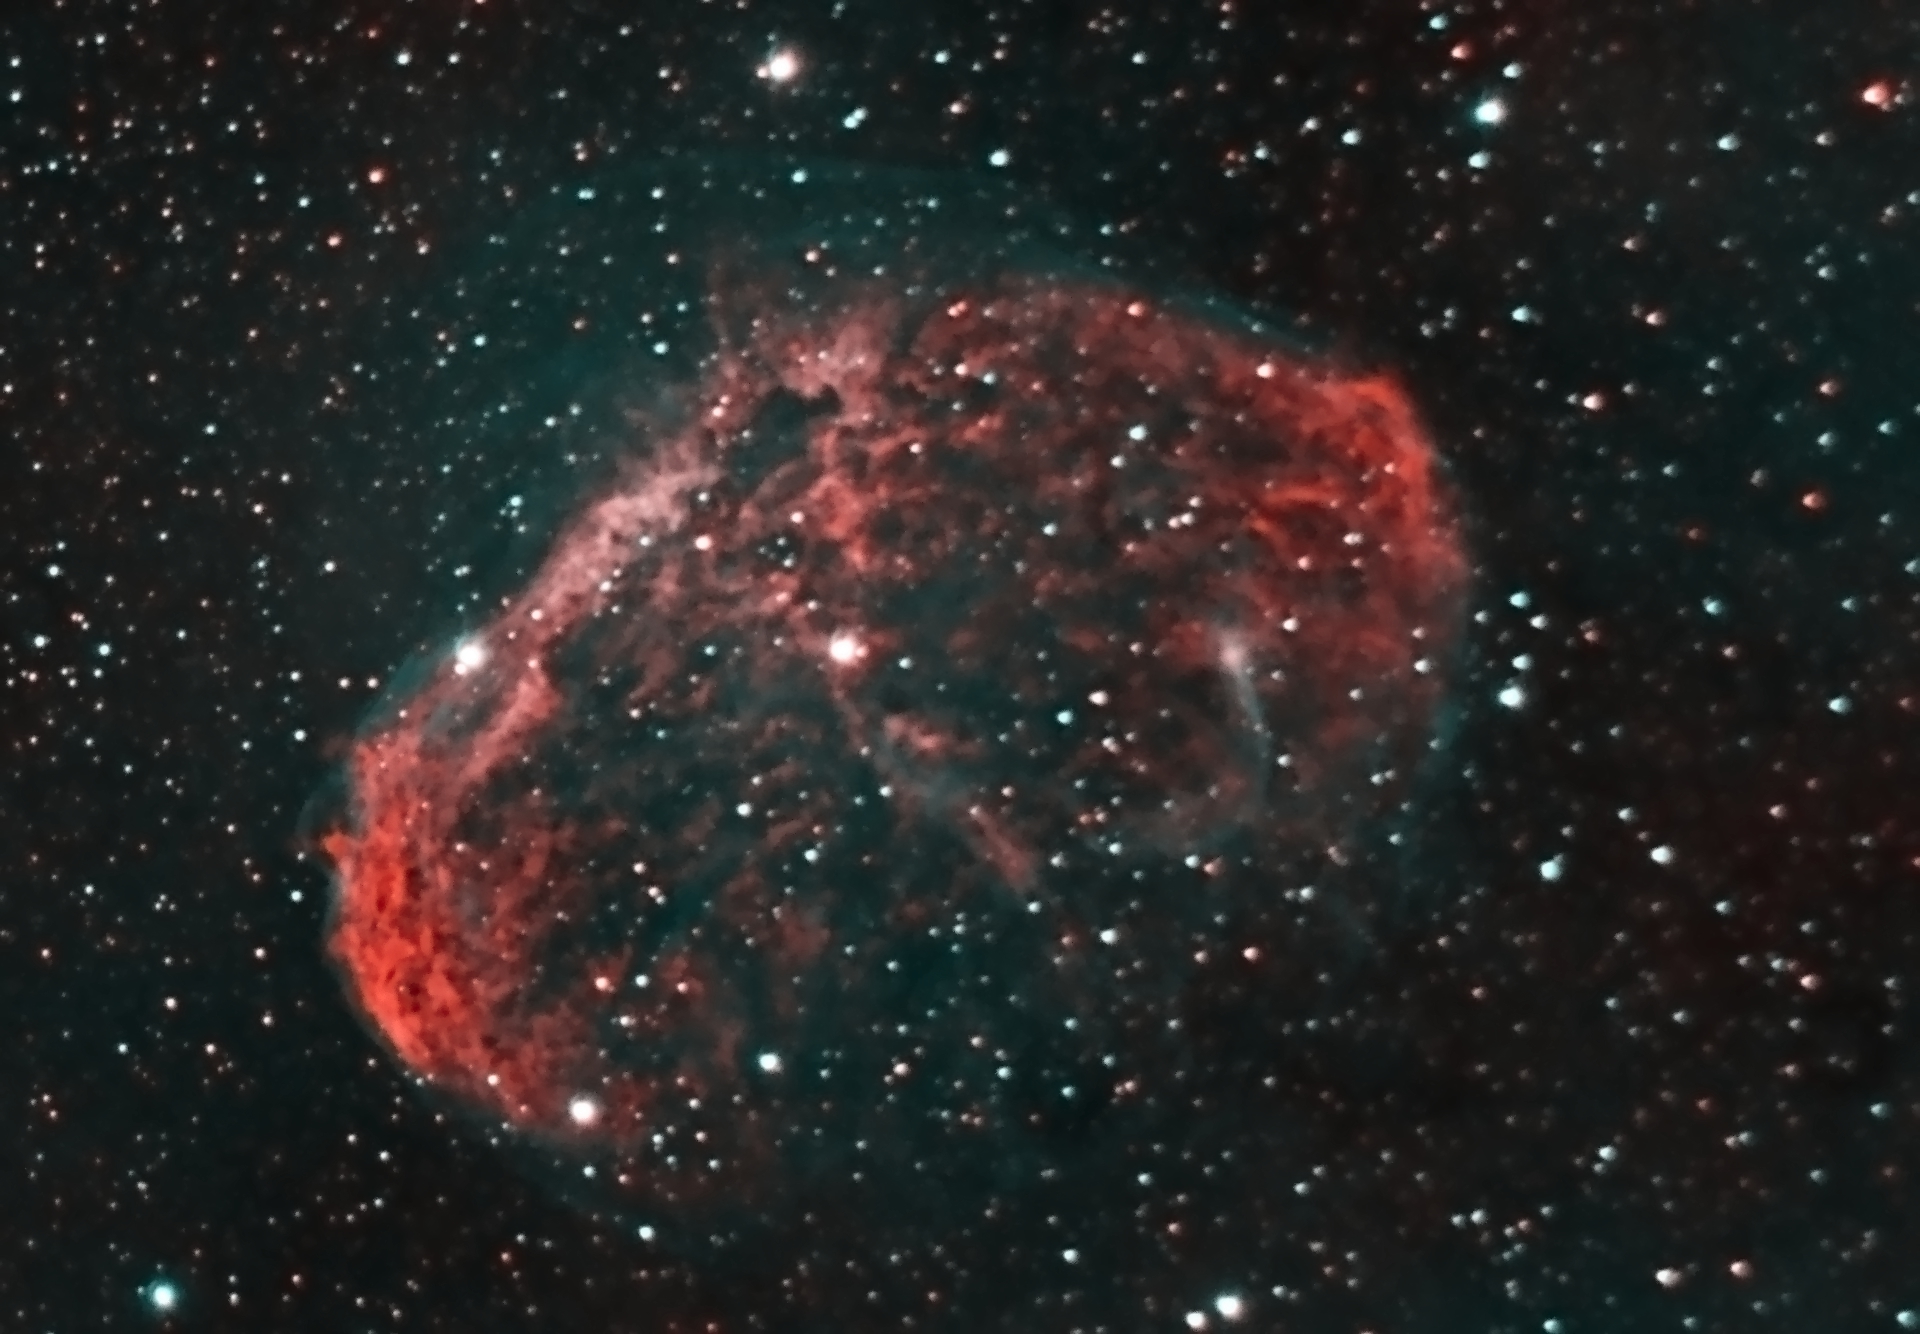
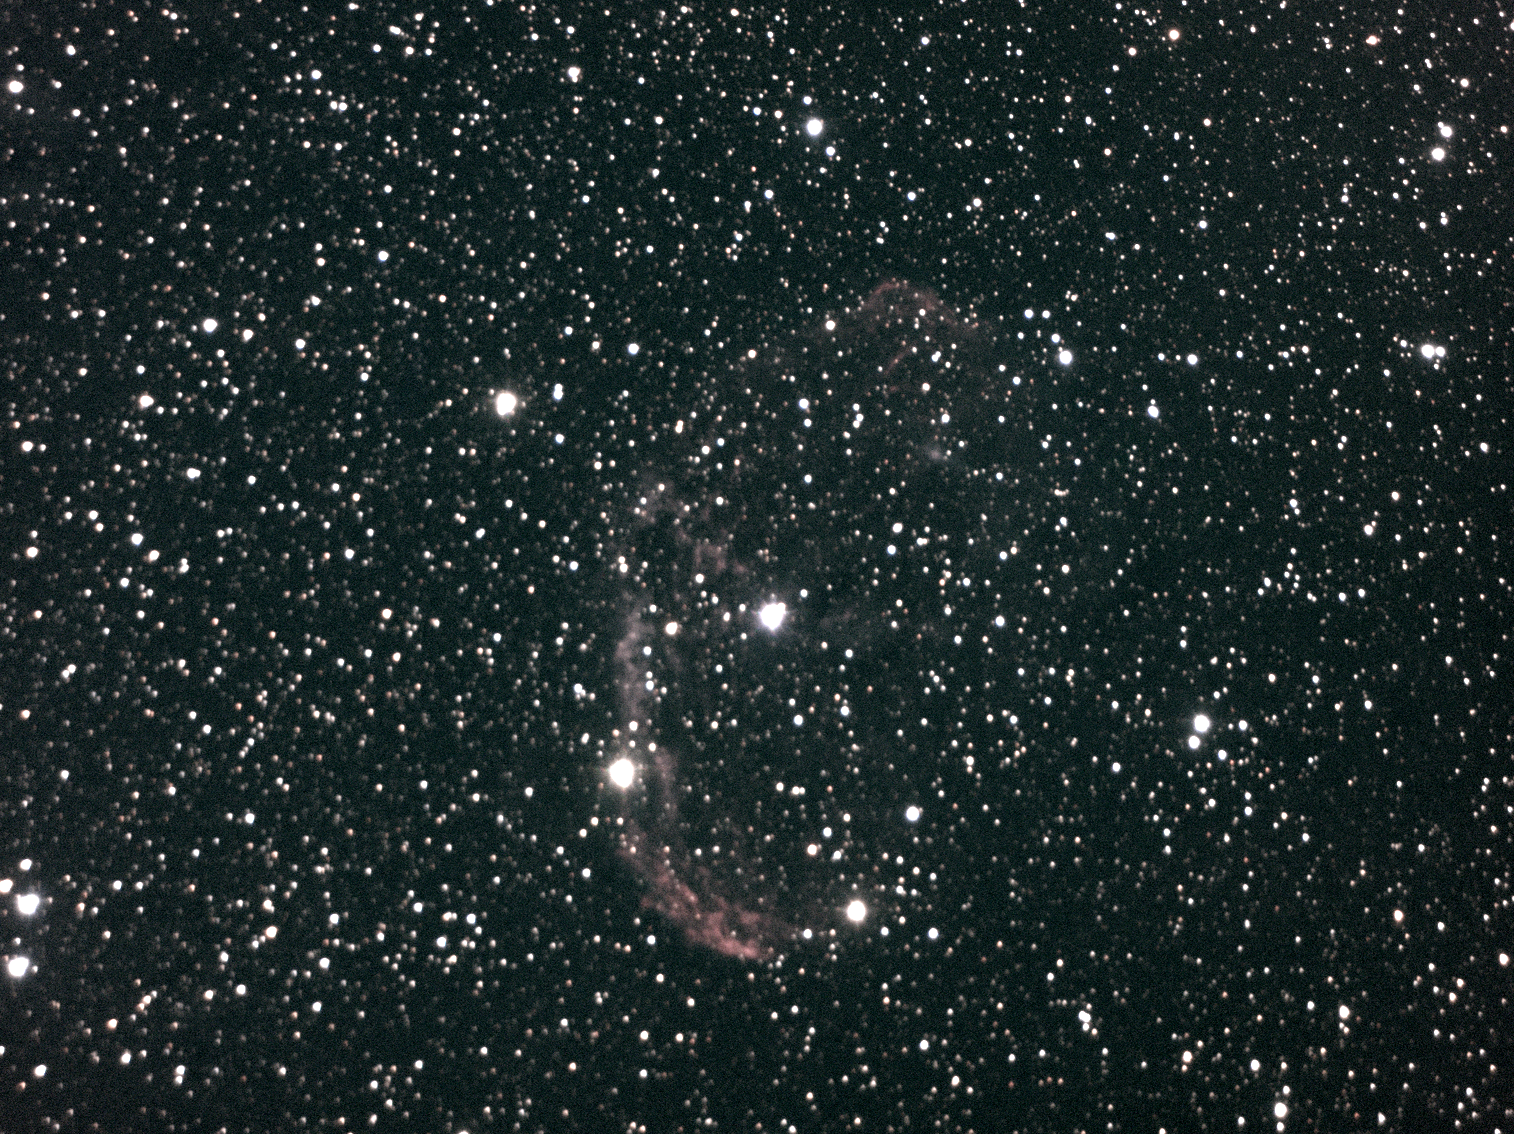
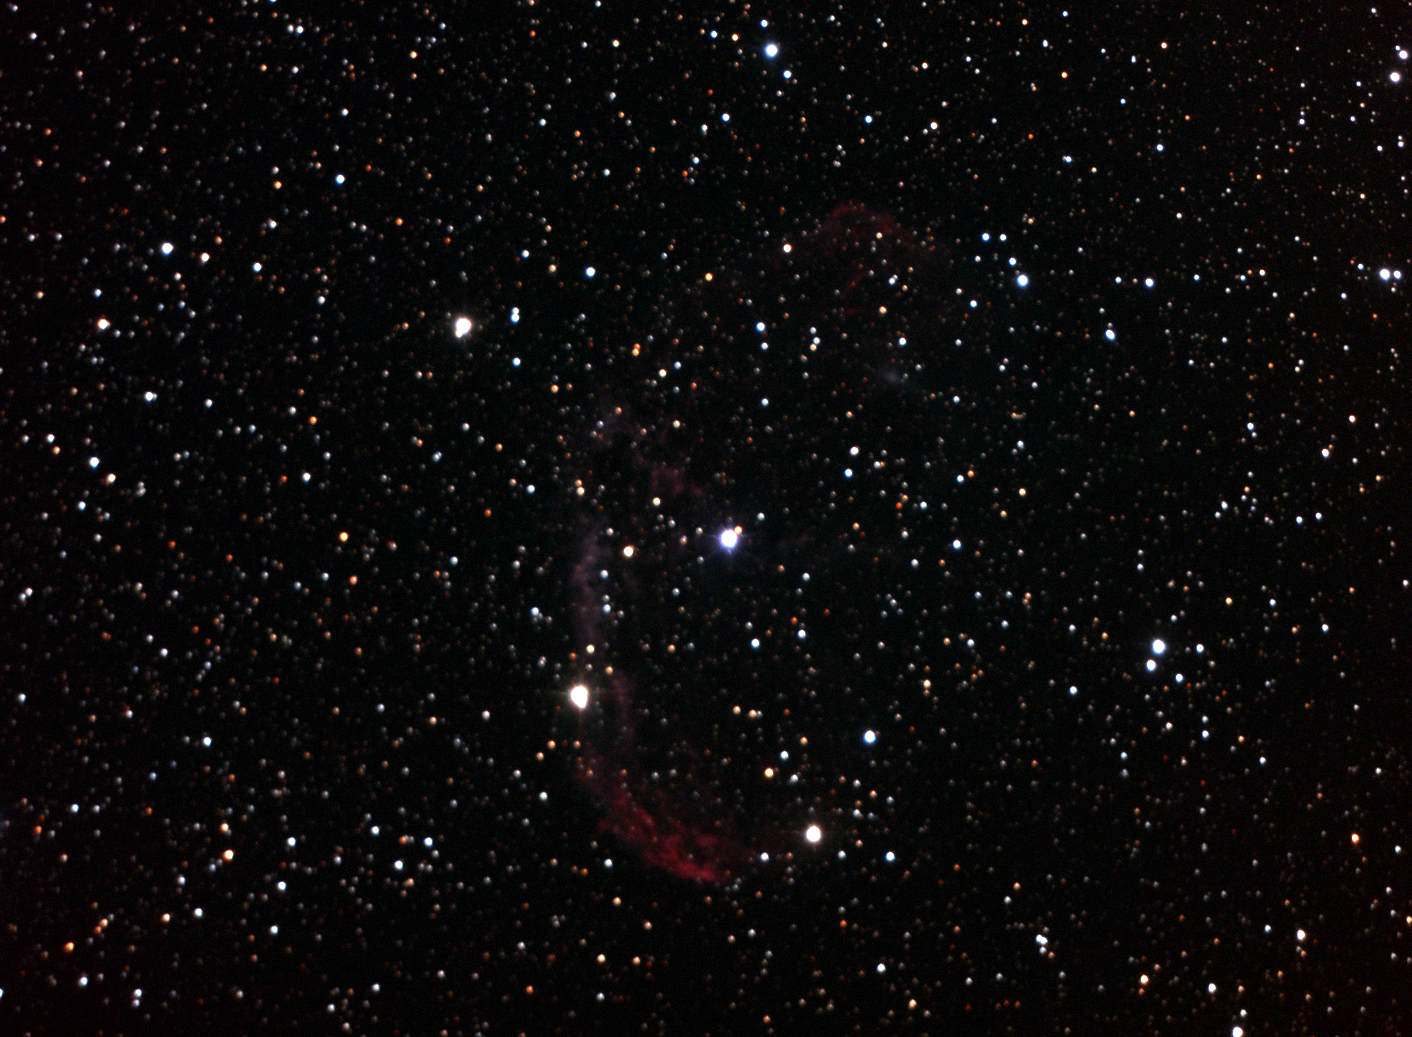
 "Cool Crescent" Work in progress |
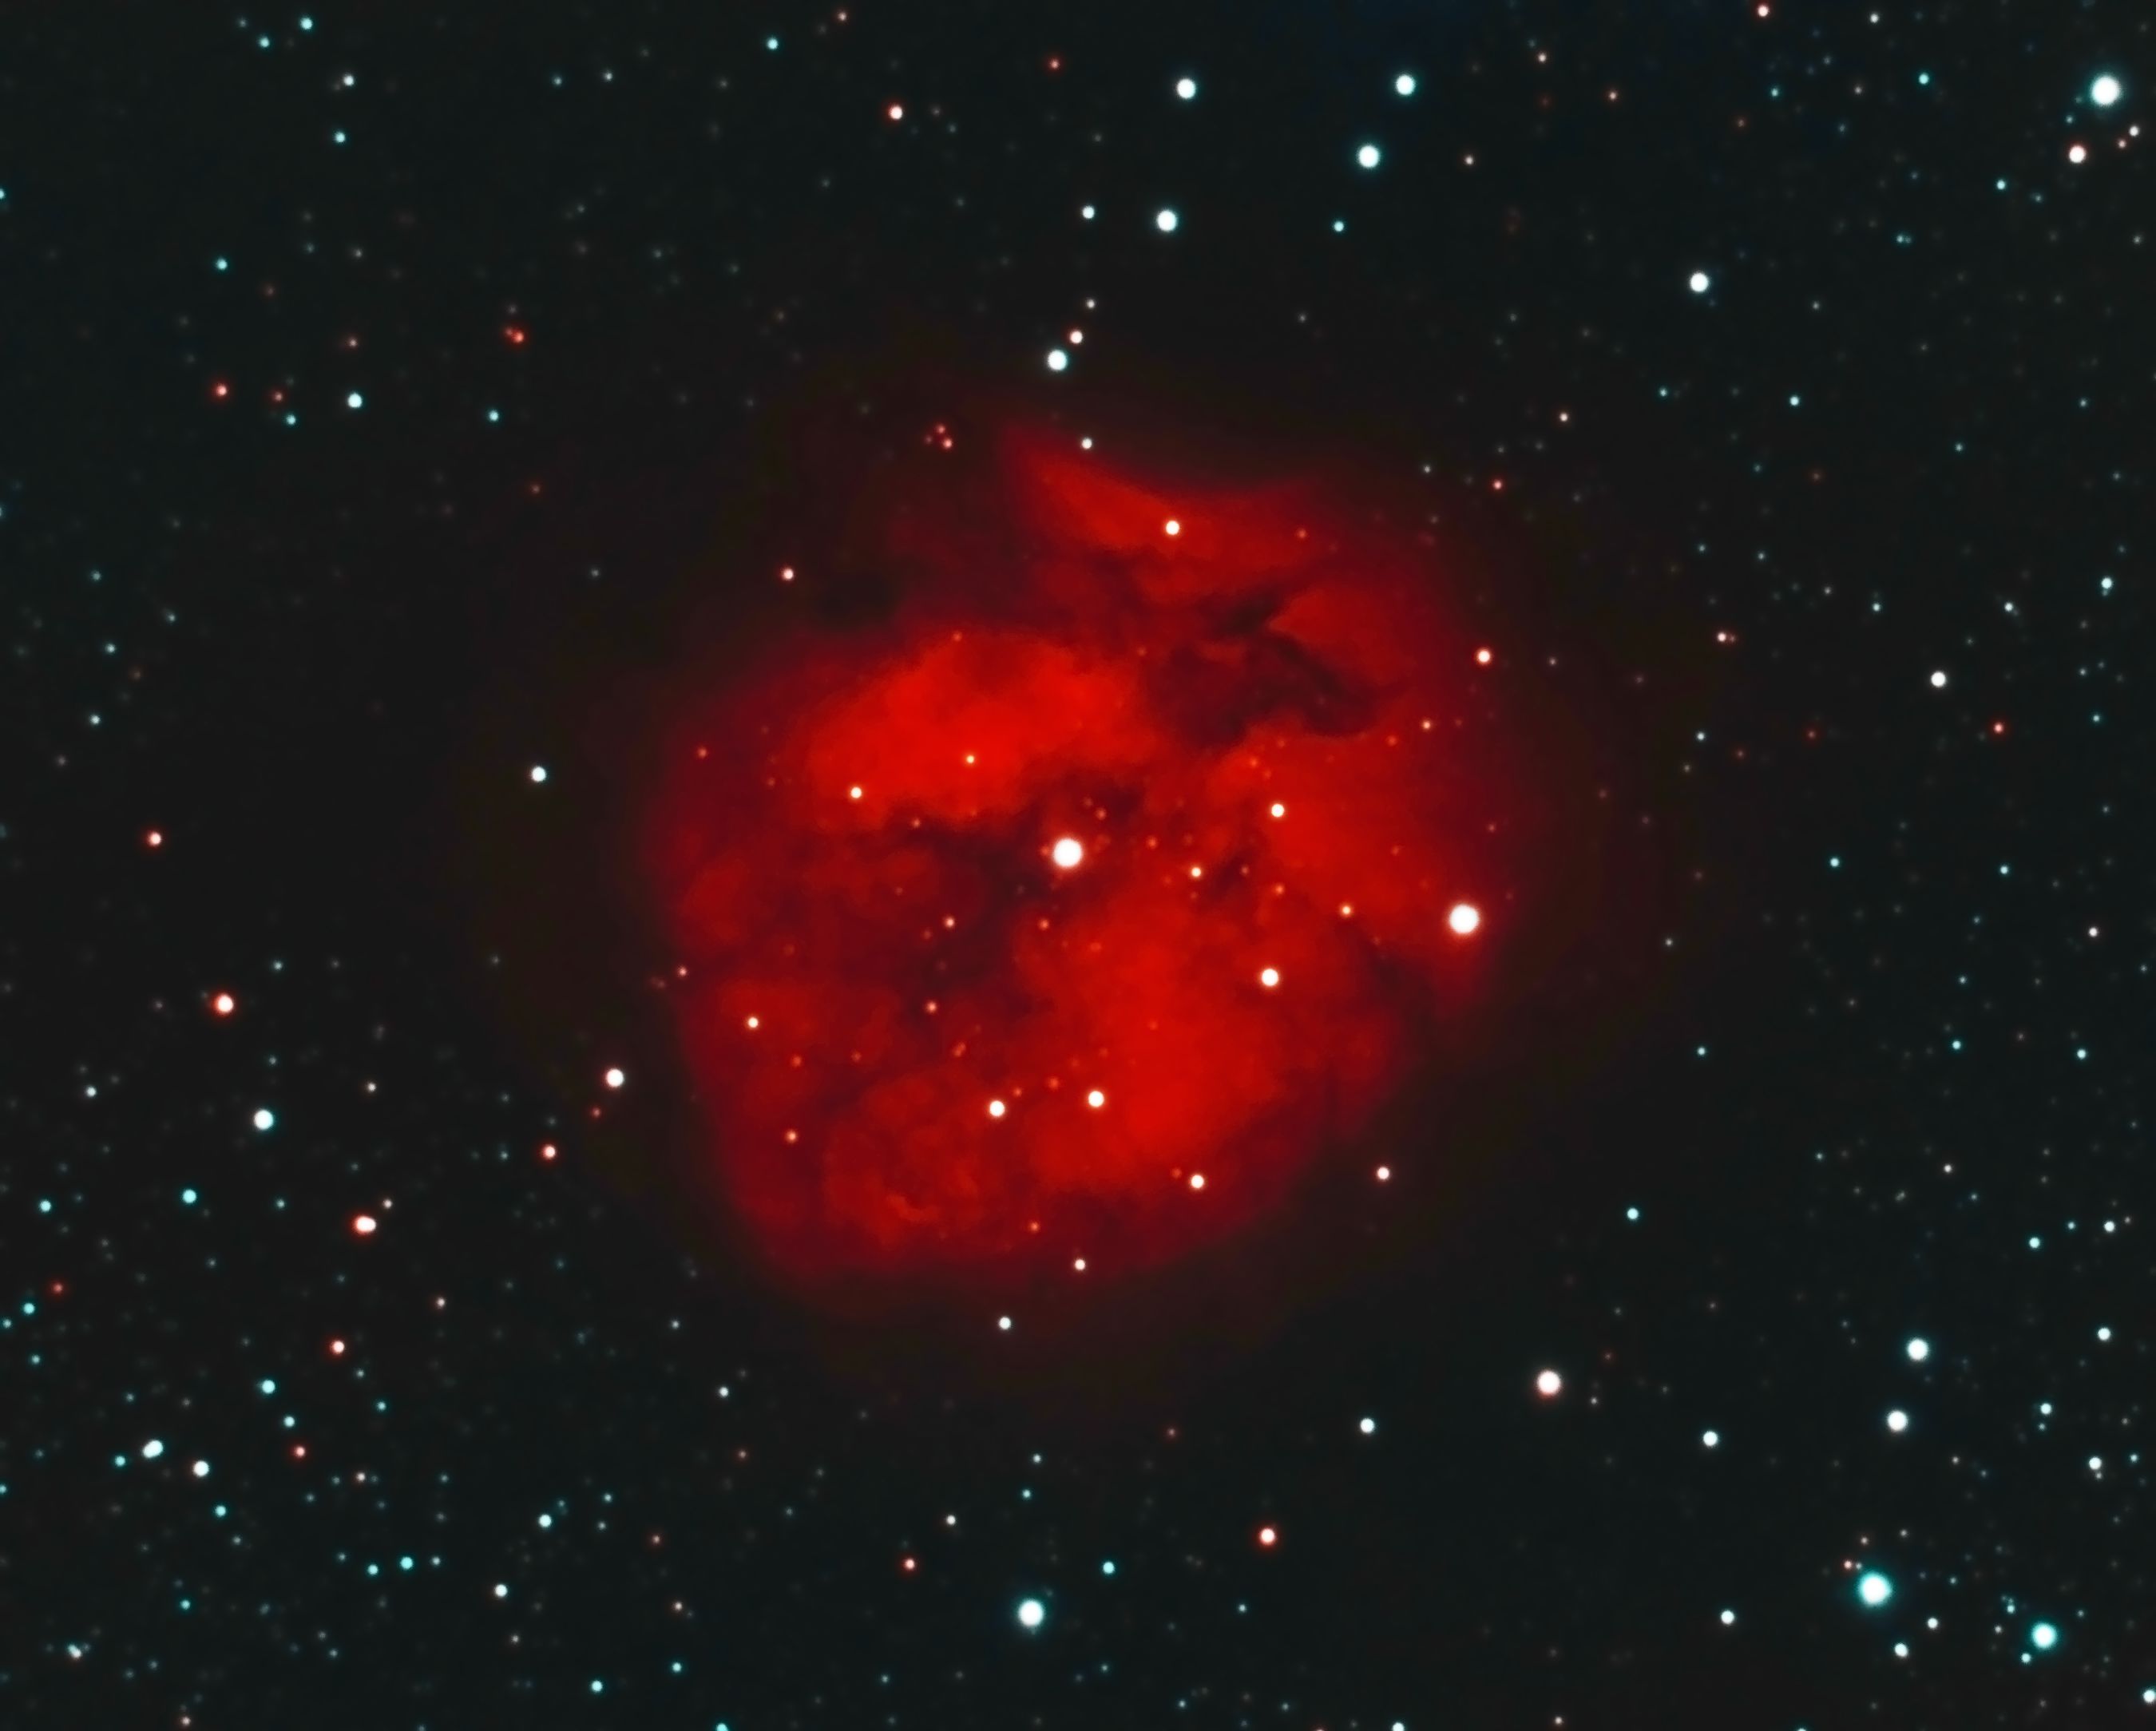
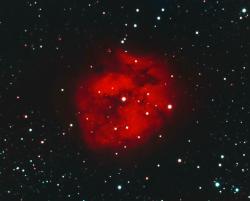 IC5146 - Cocoon Nebula |
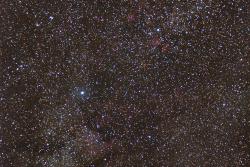 North America Nebula and Pelican Nebula Region |
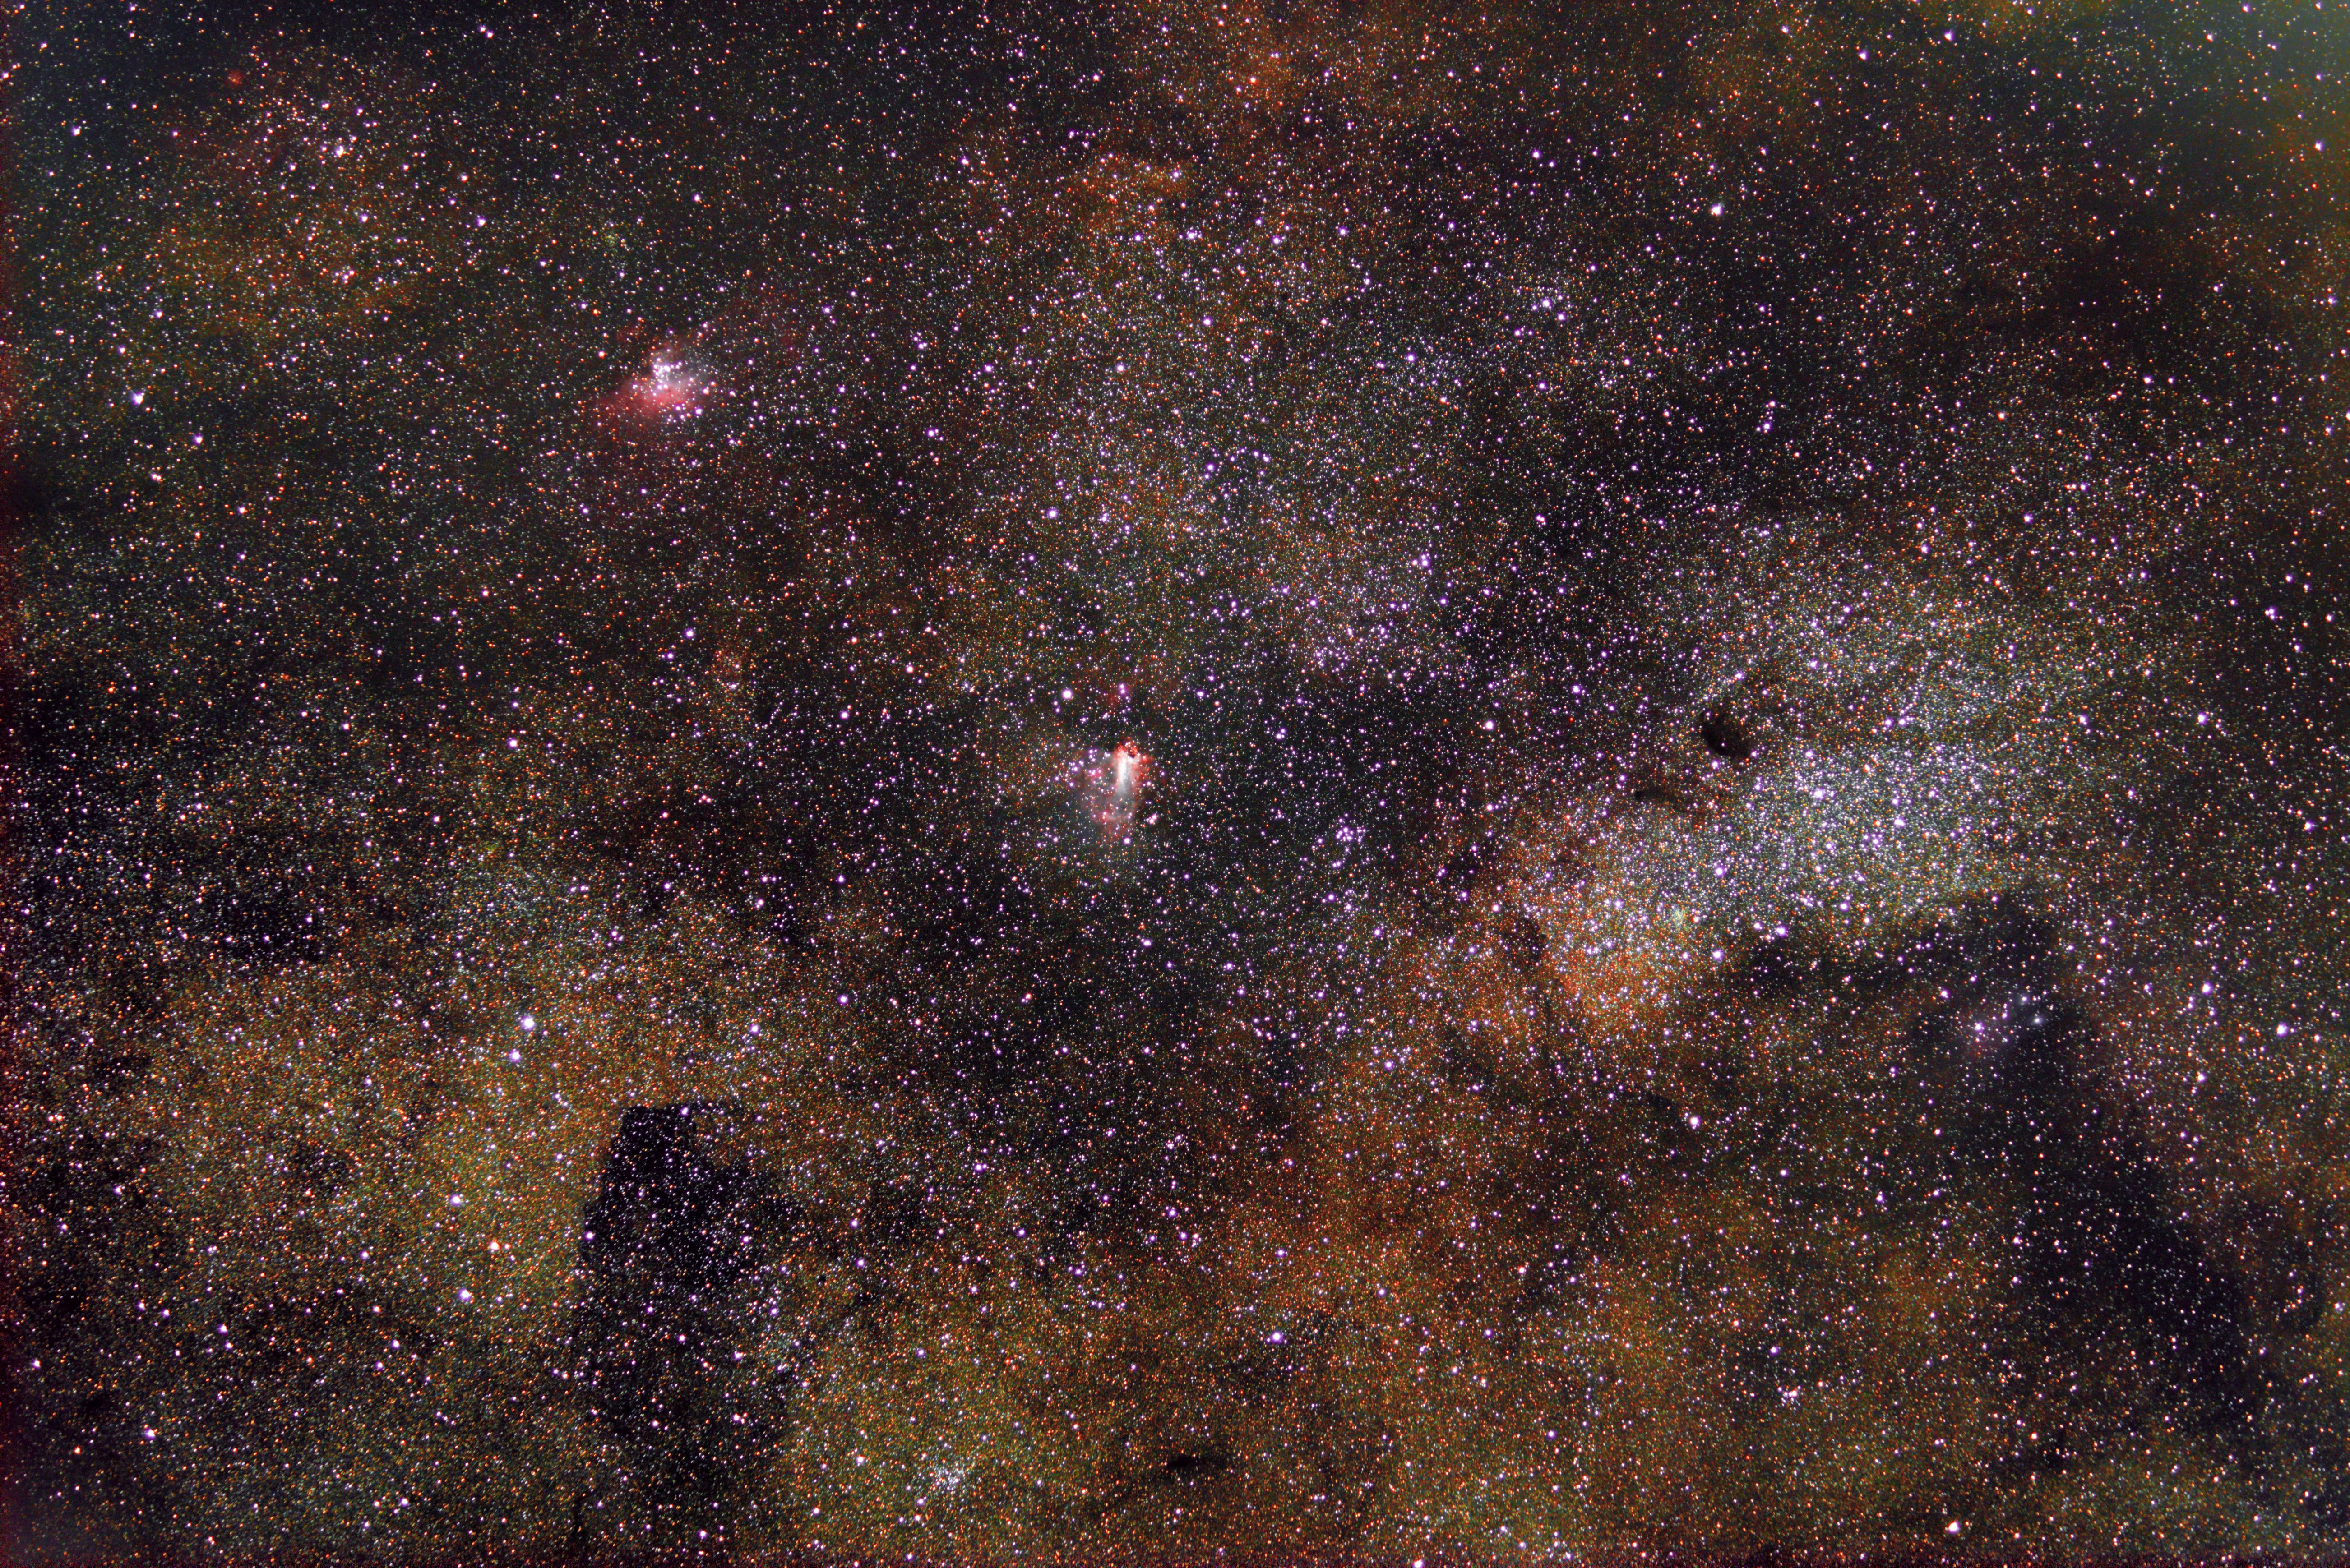
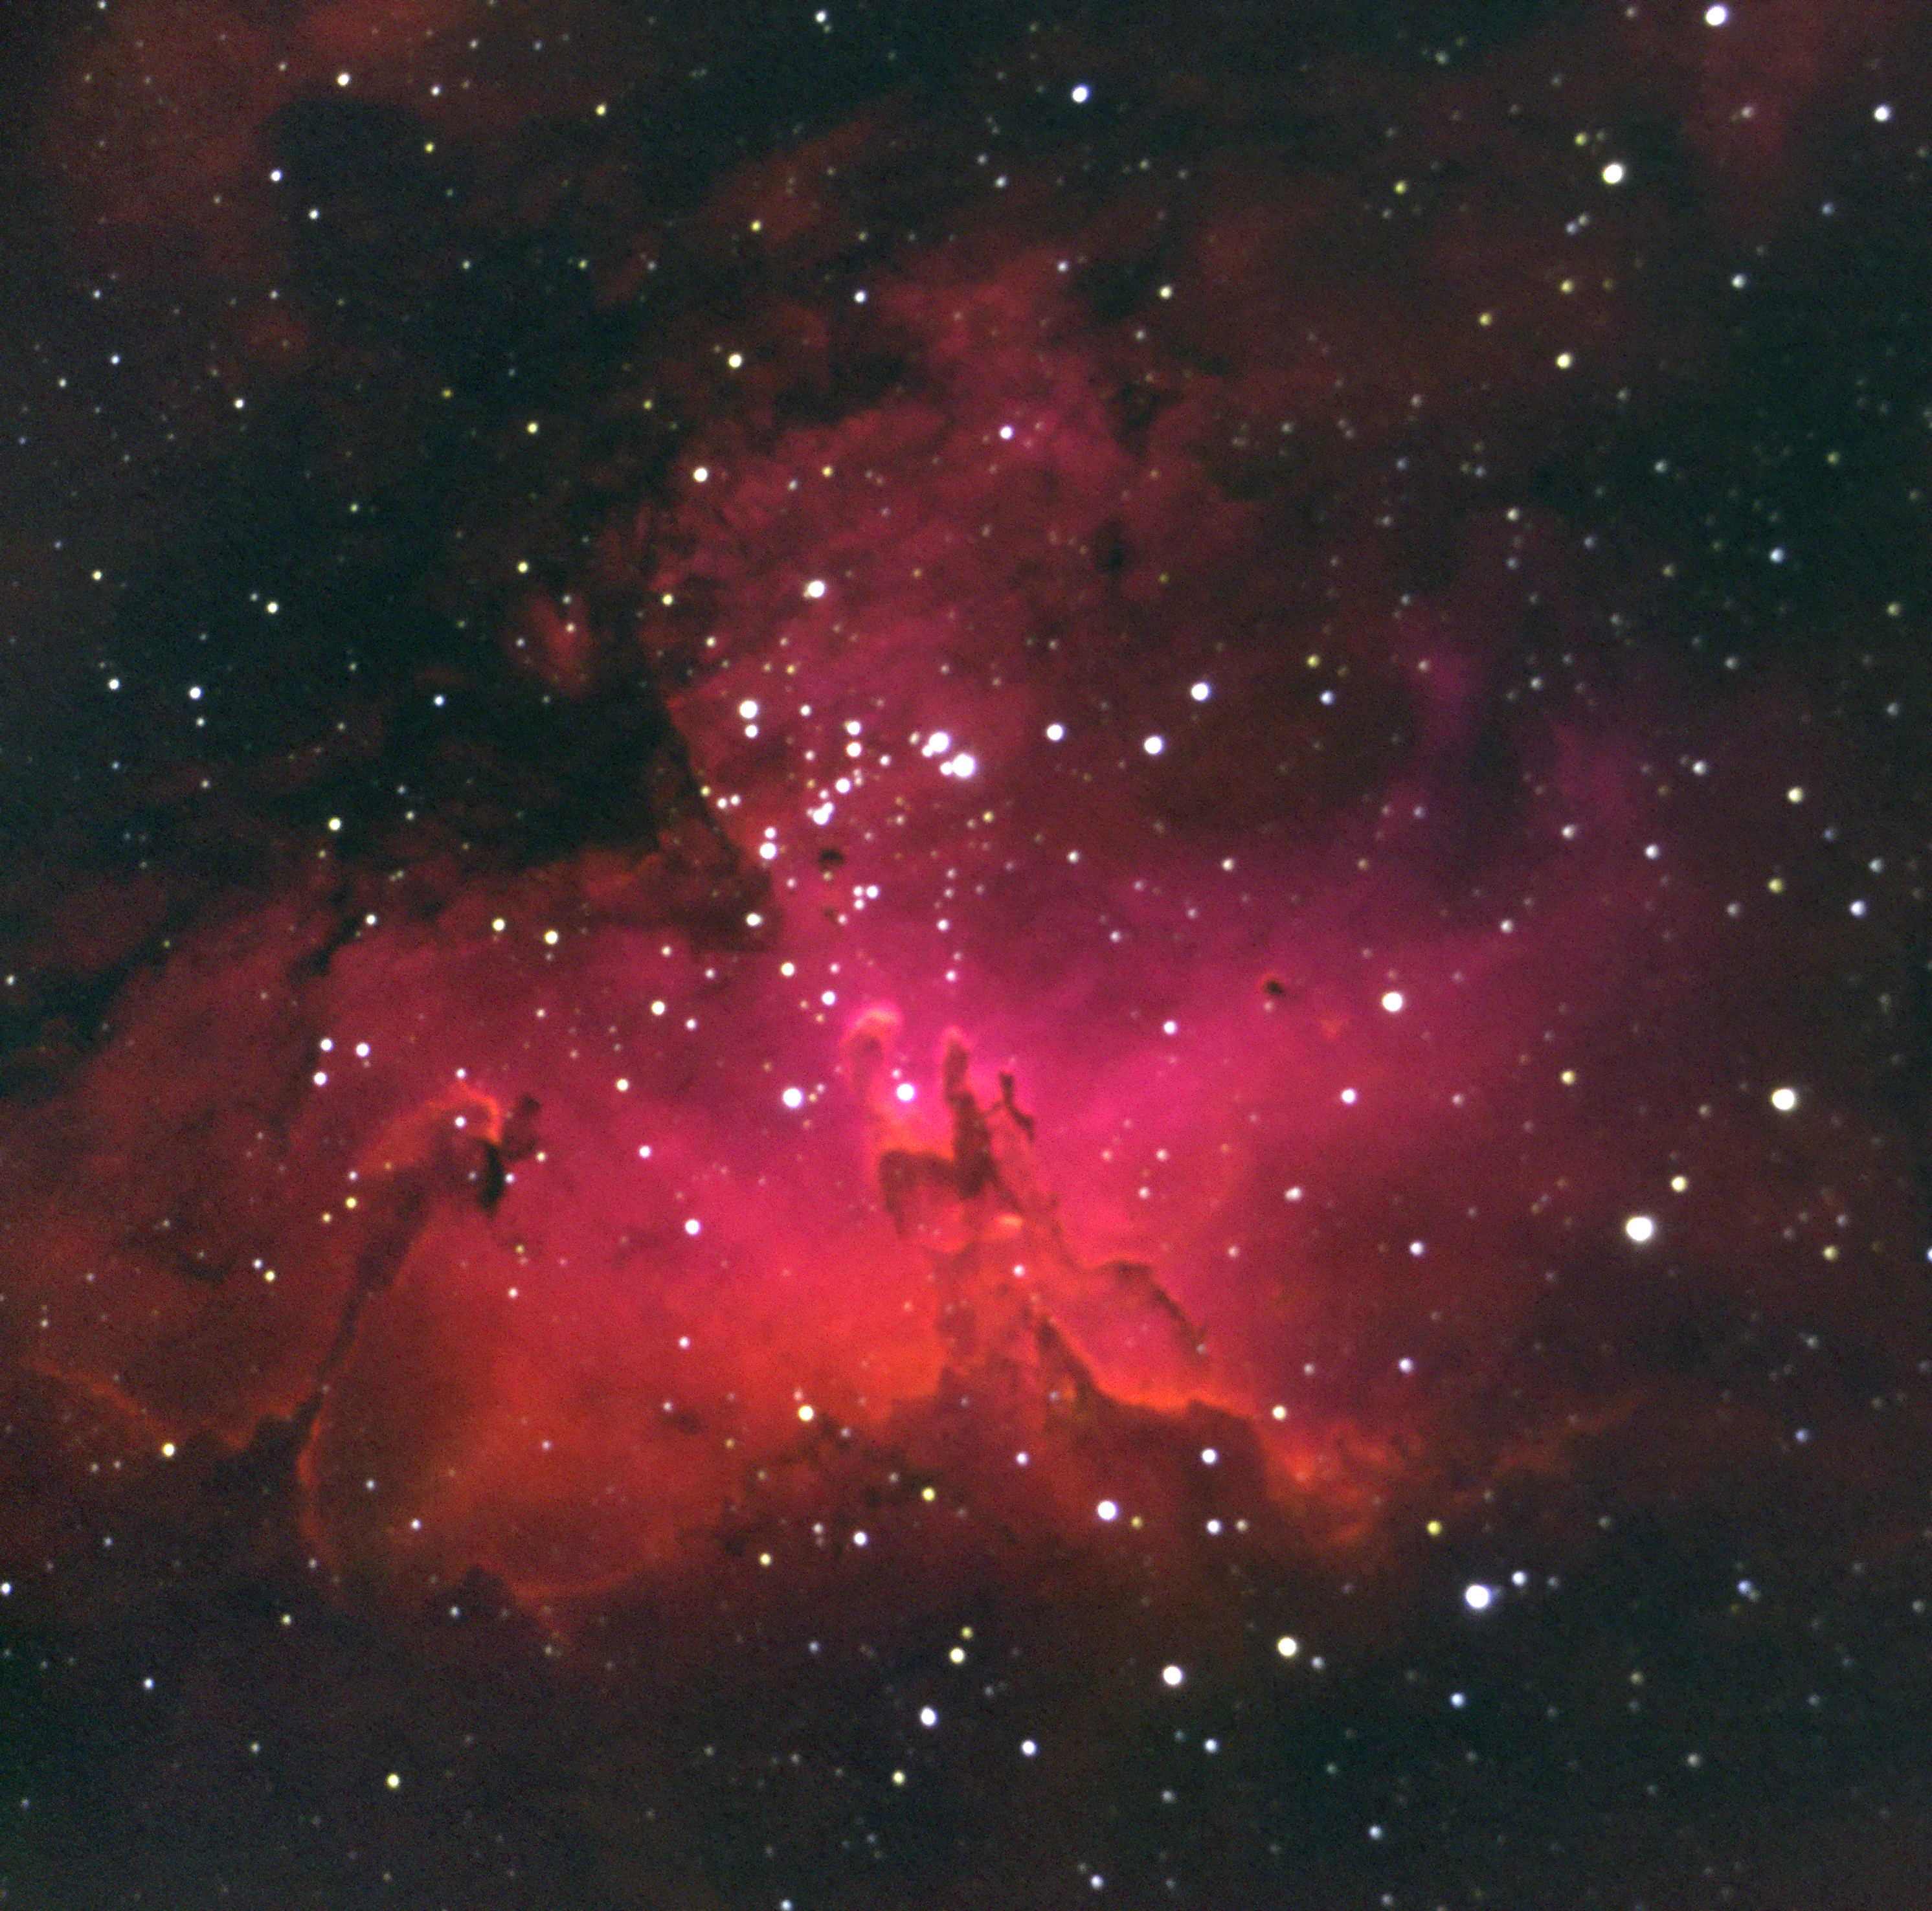
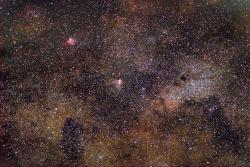 M17 Region Eagle and Omega Nebulas, Small Sagittarius Star Cloud |
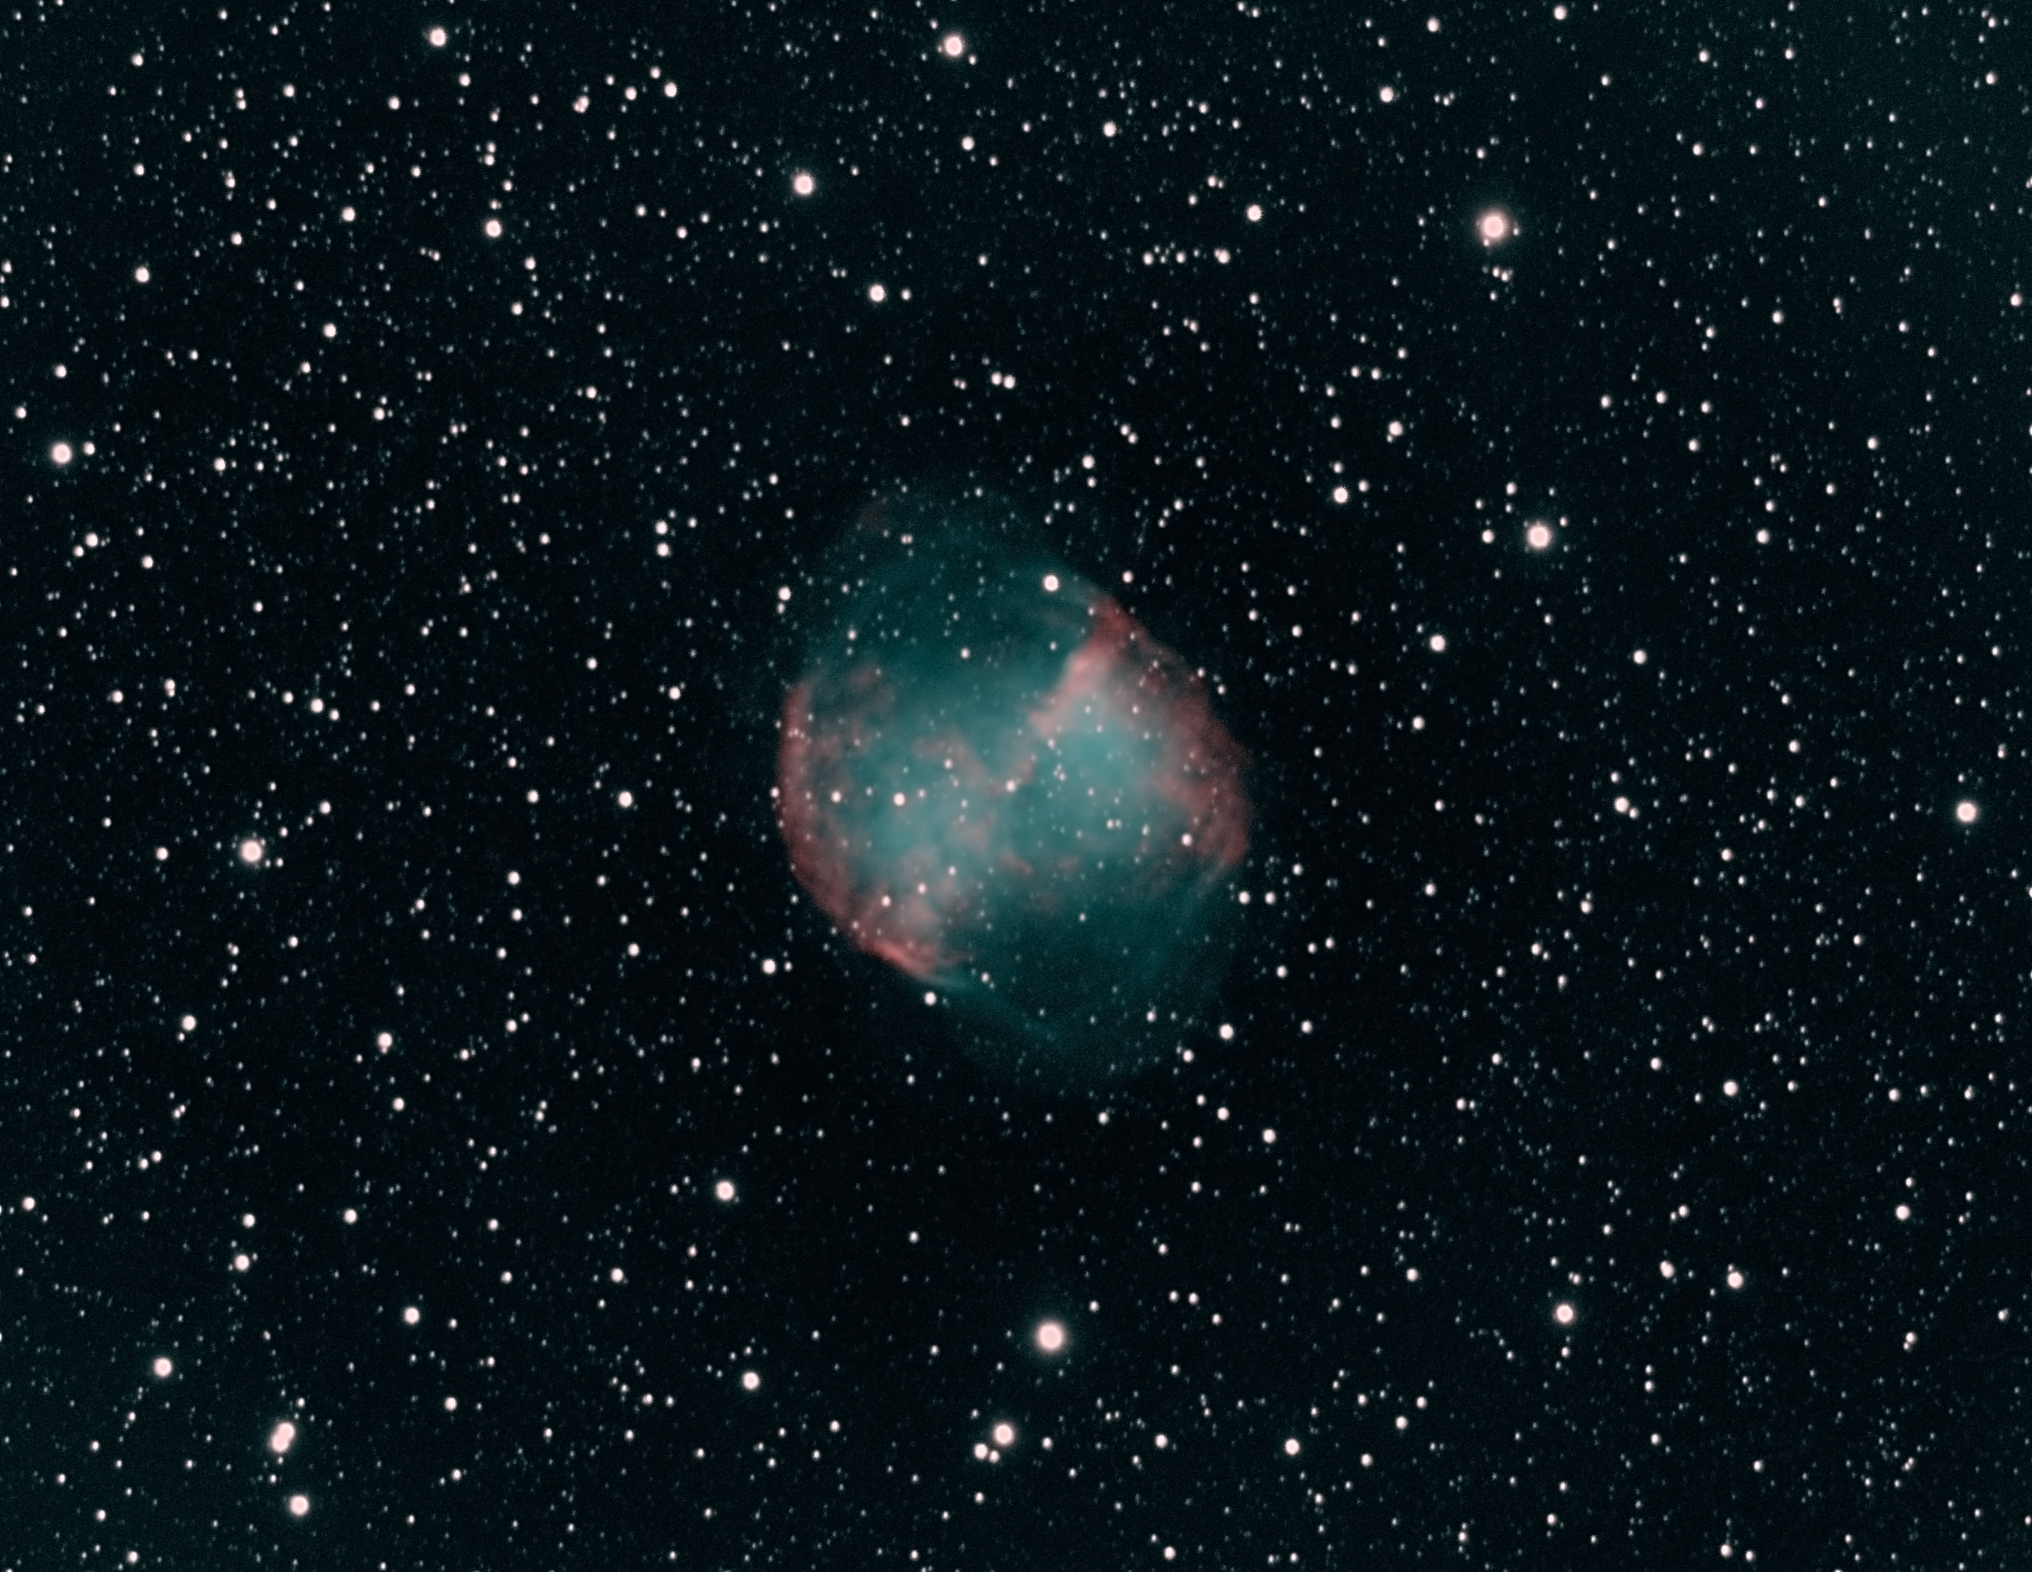
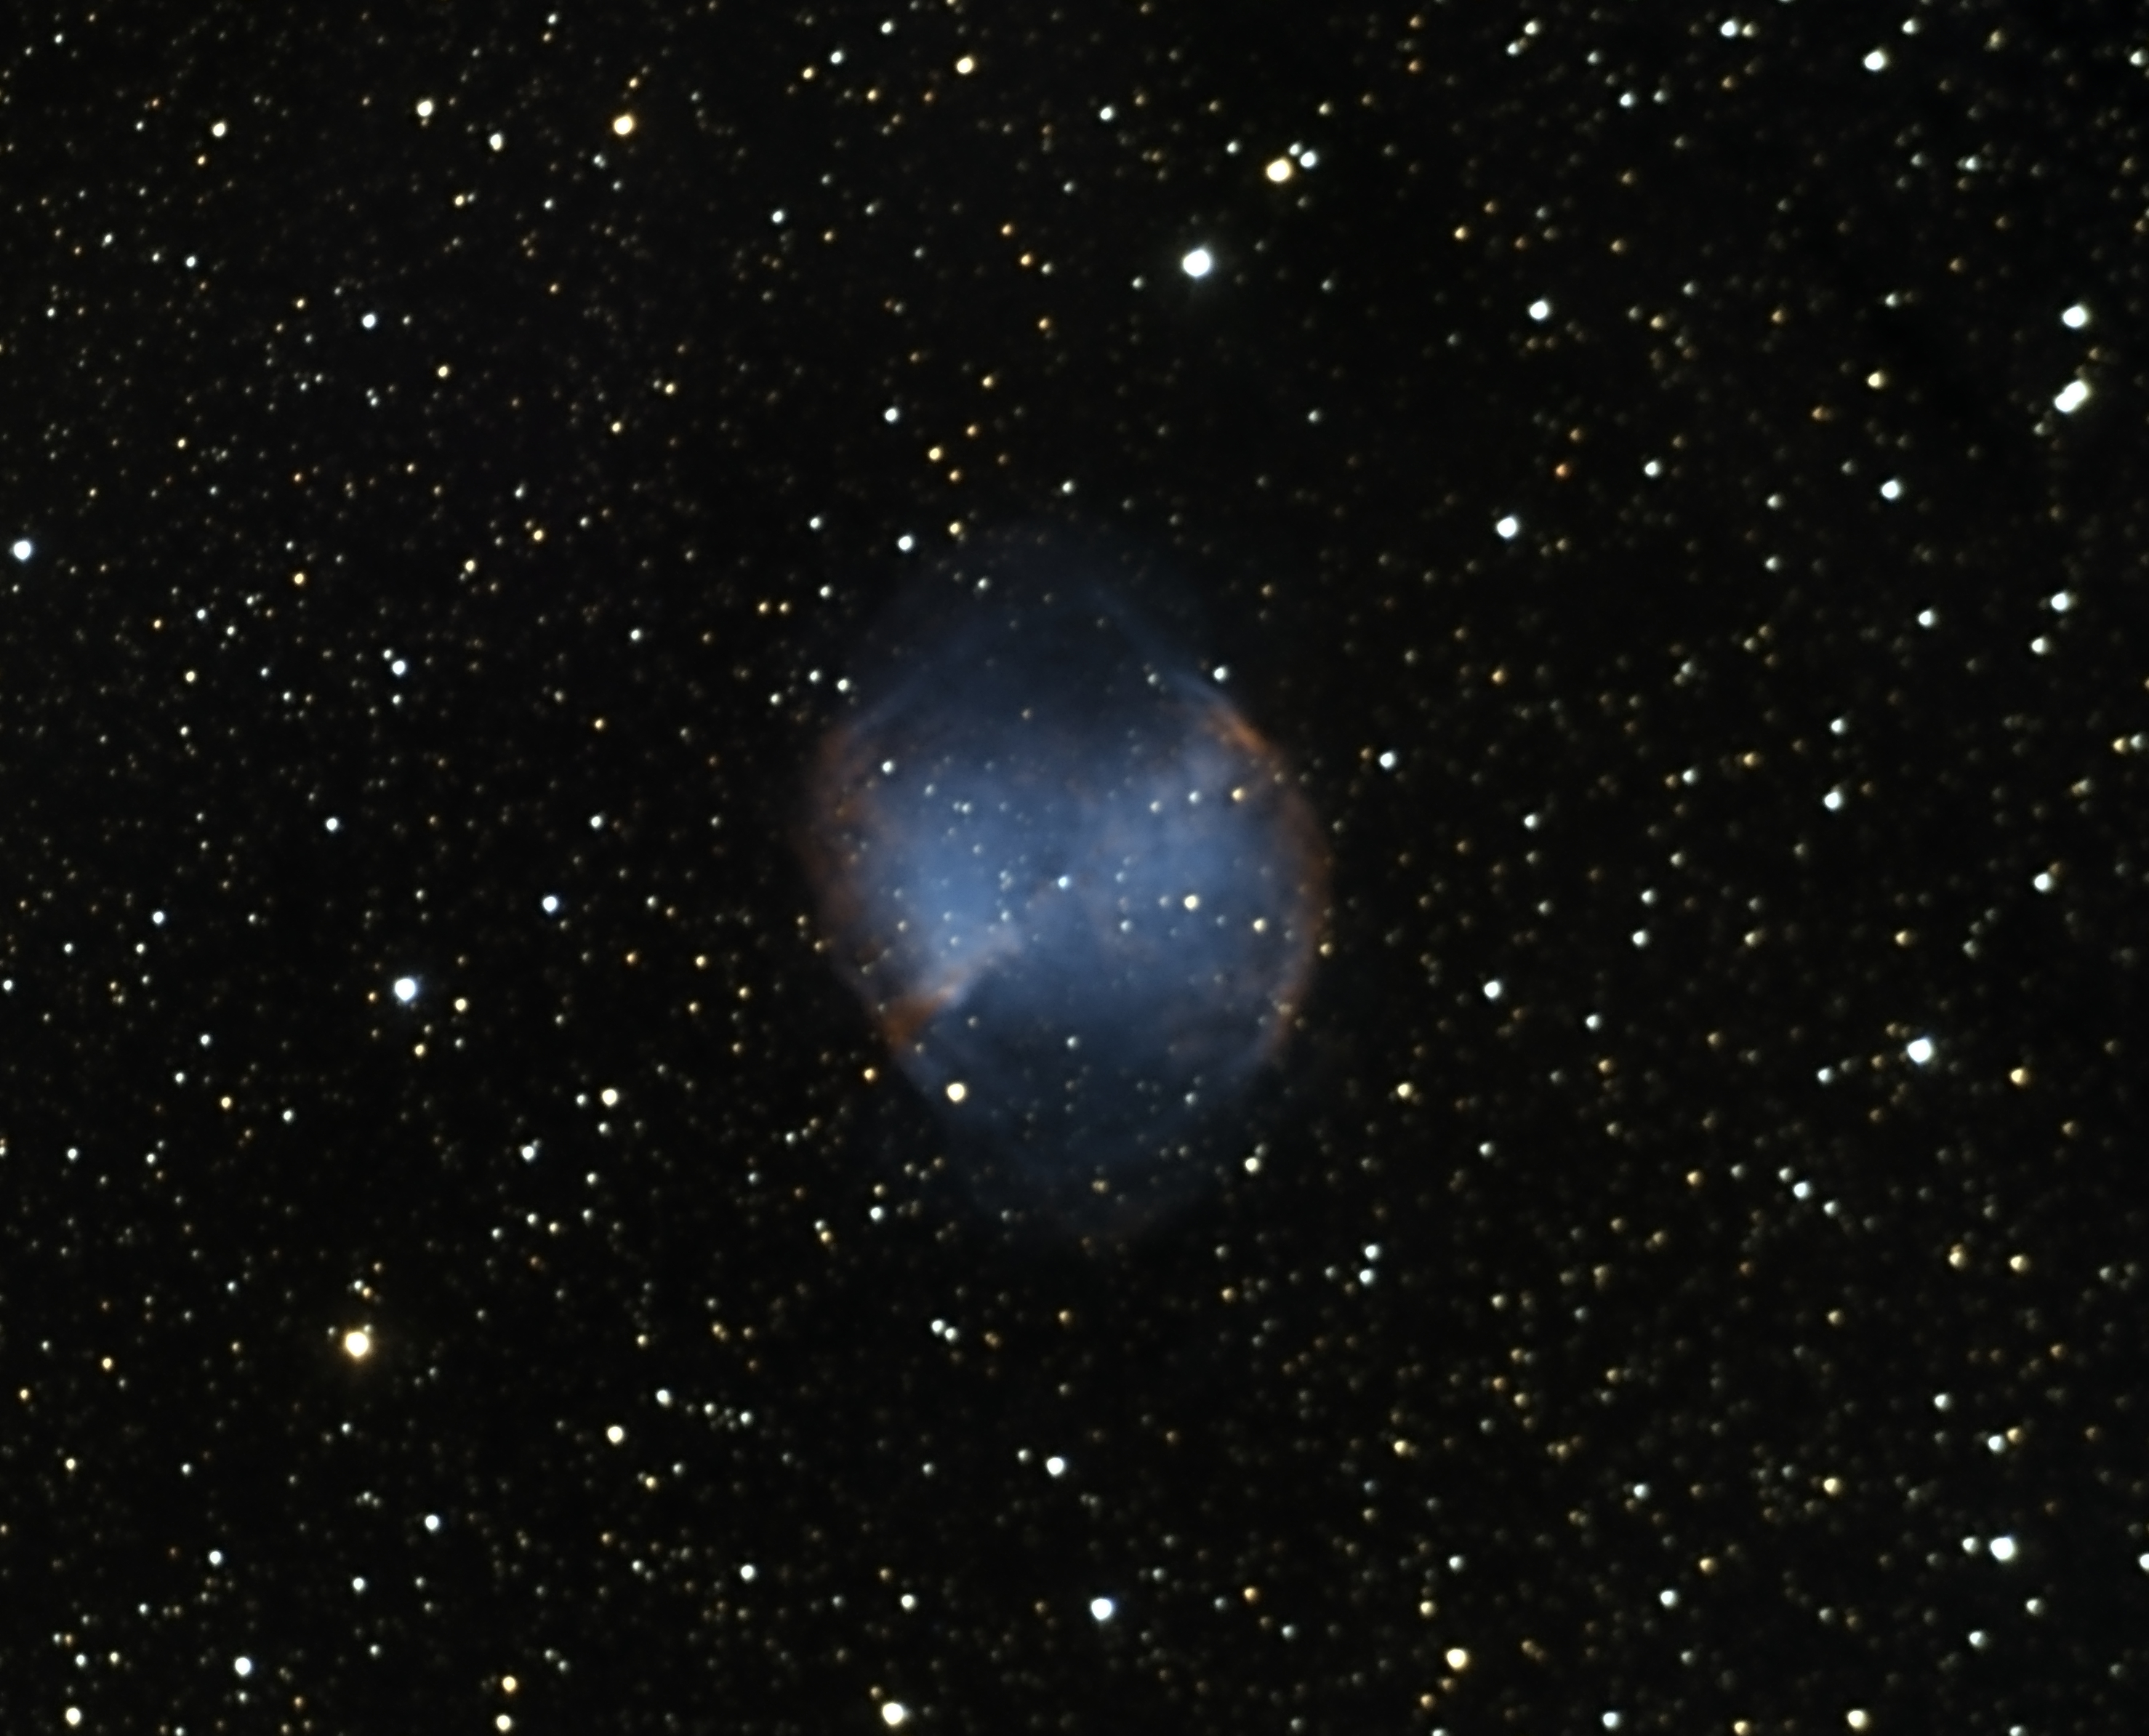
 M27 - Dumbbell Nebula LHOO version |
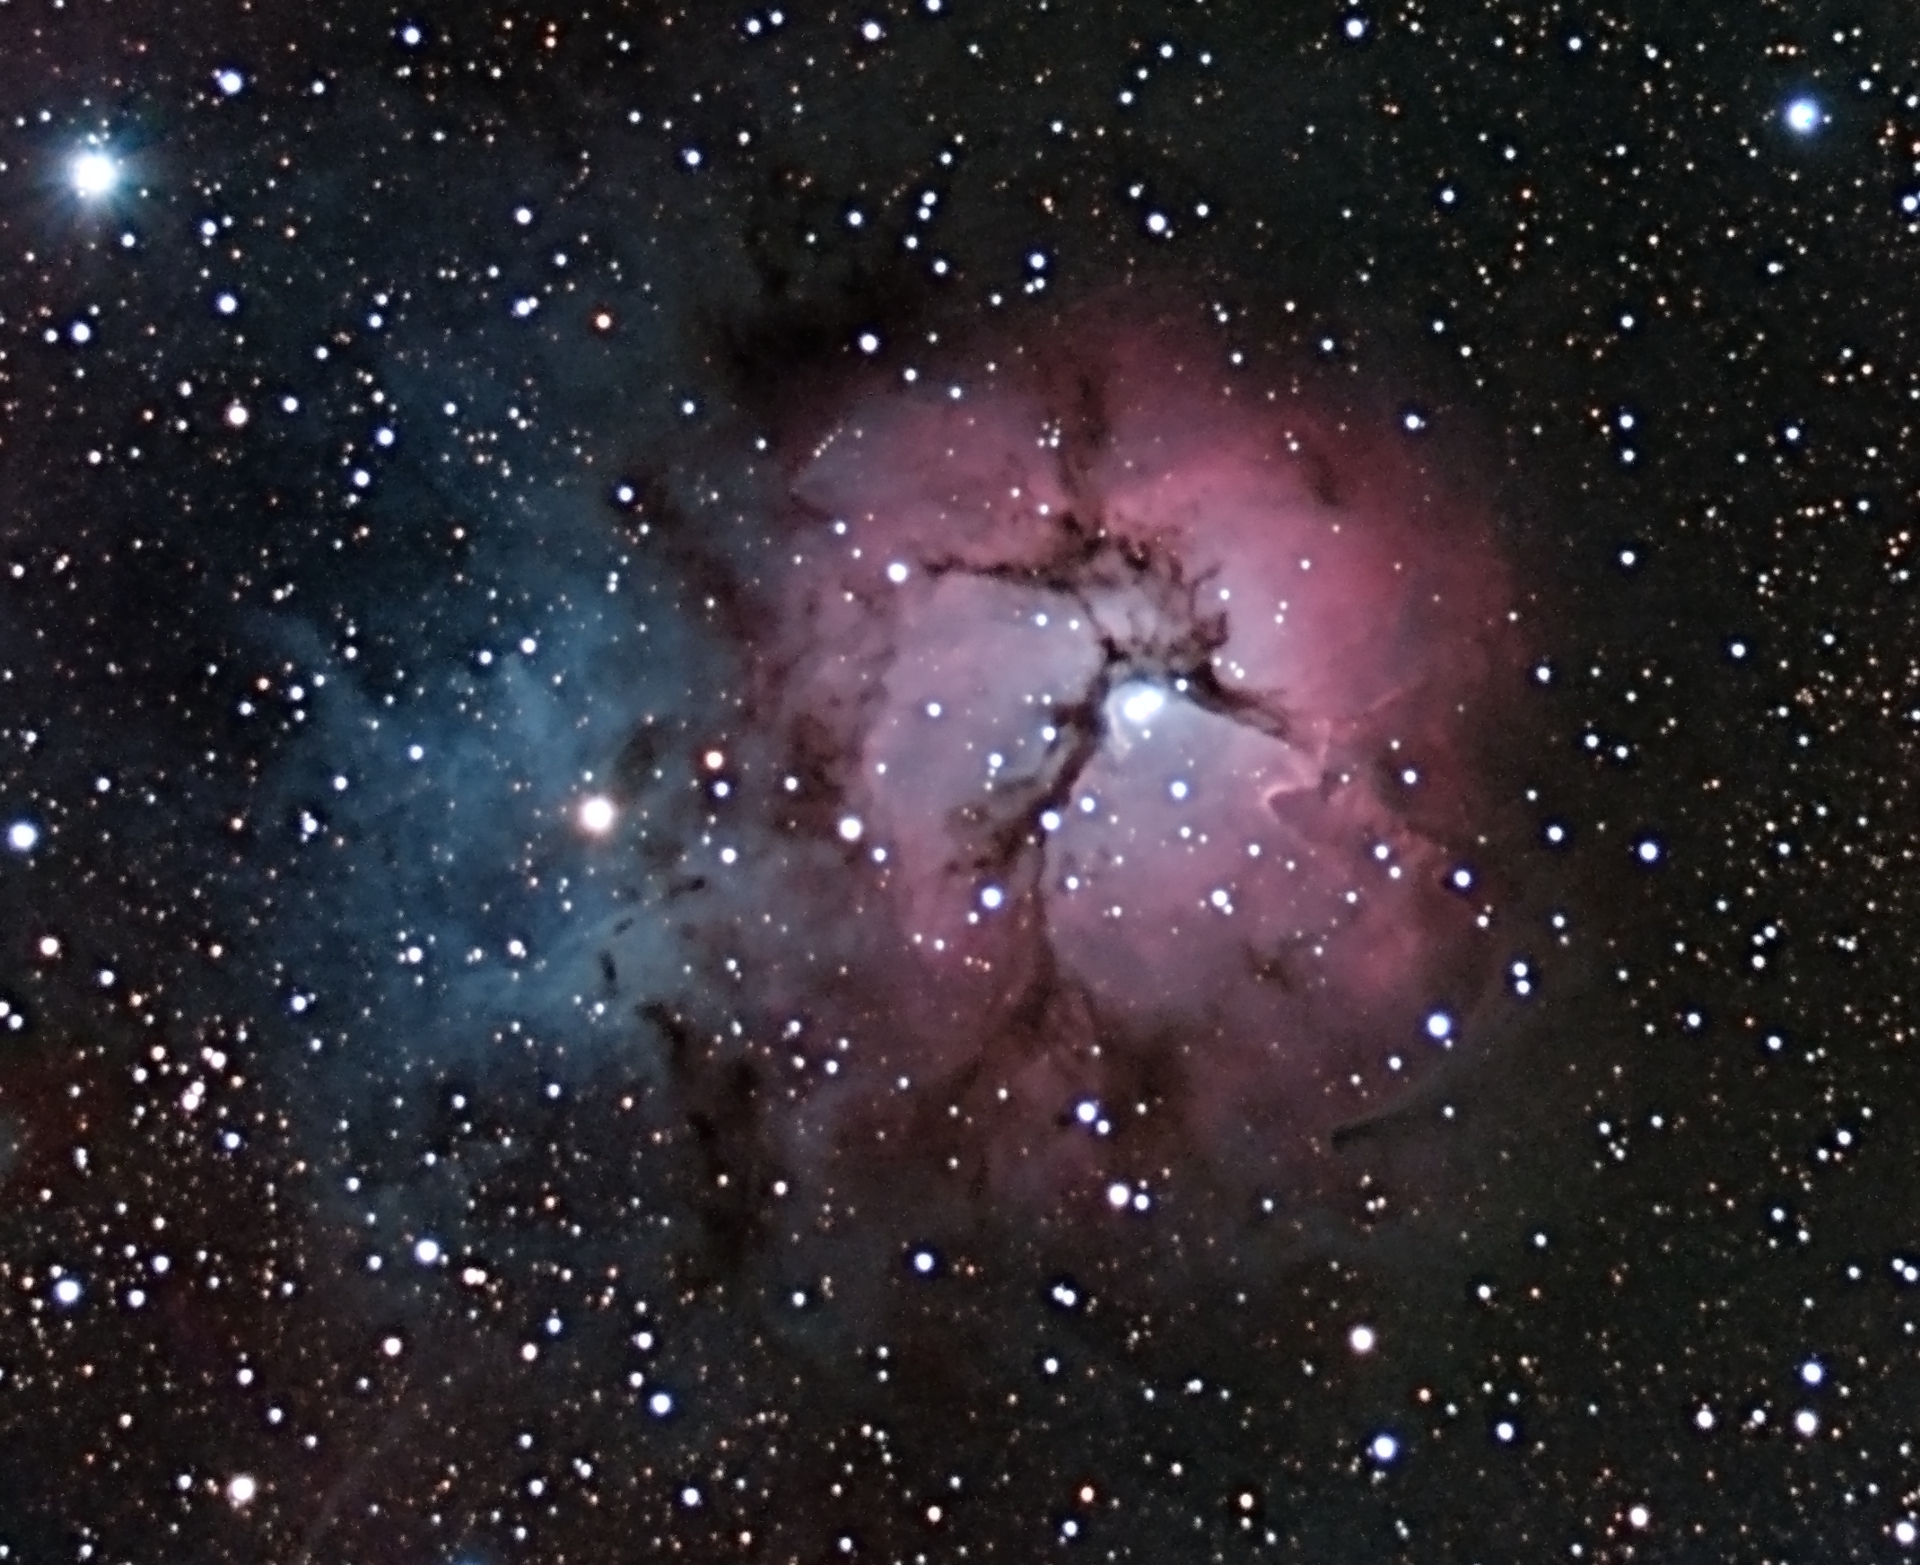
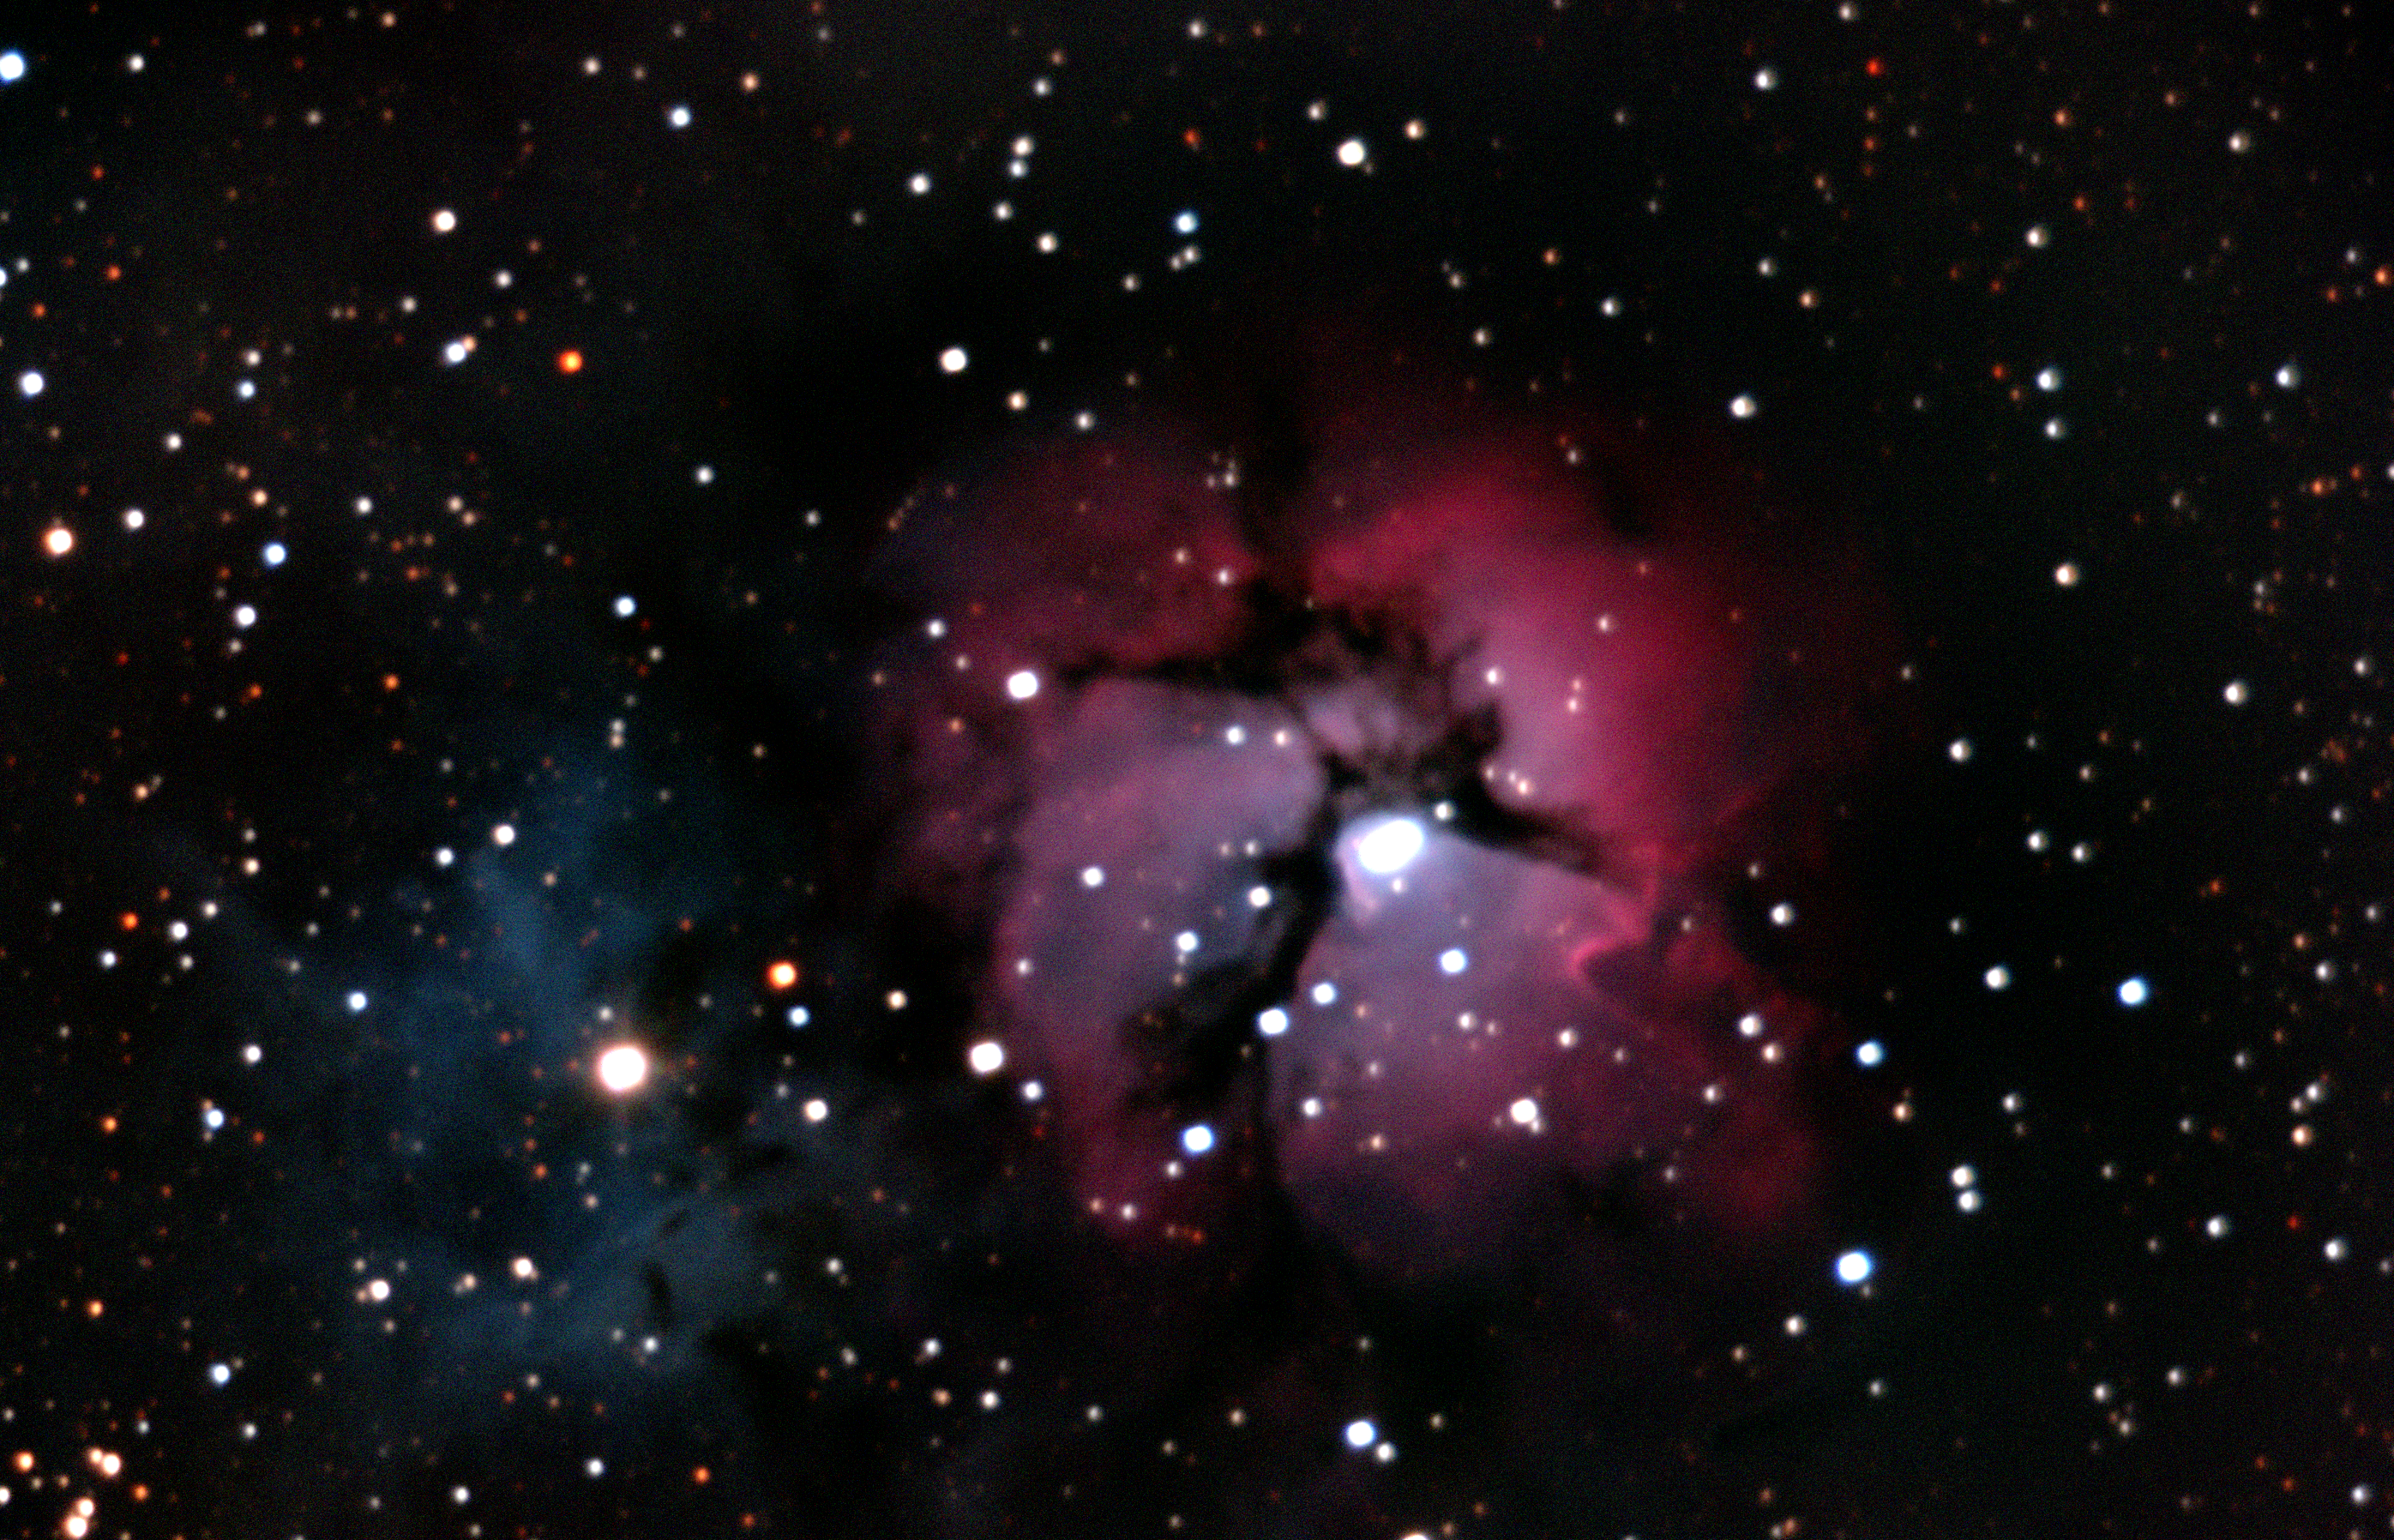
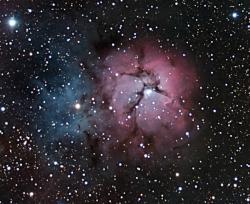 M20 - Trifid Nebula |
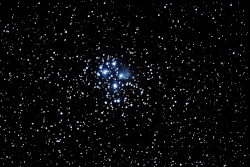
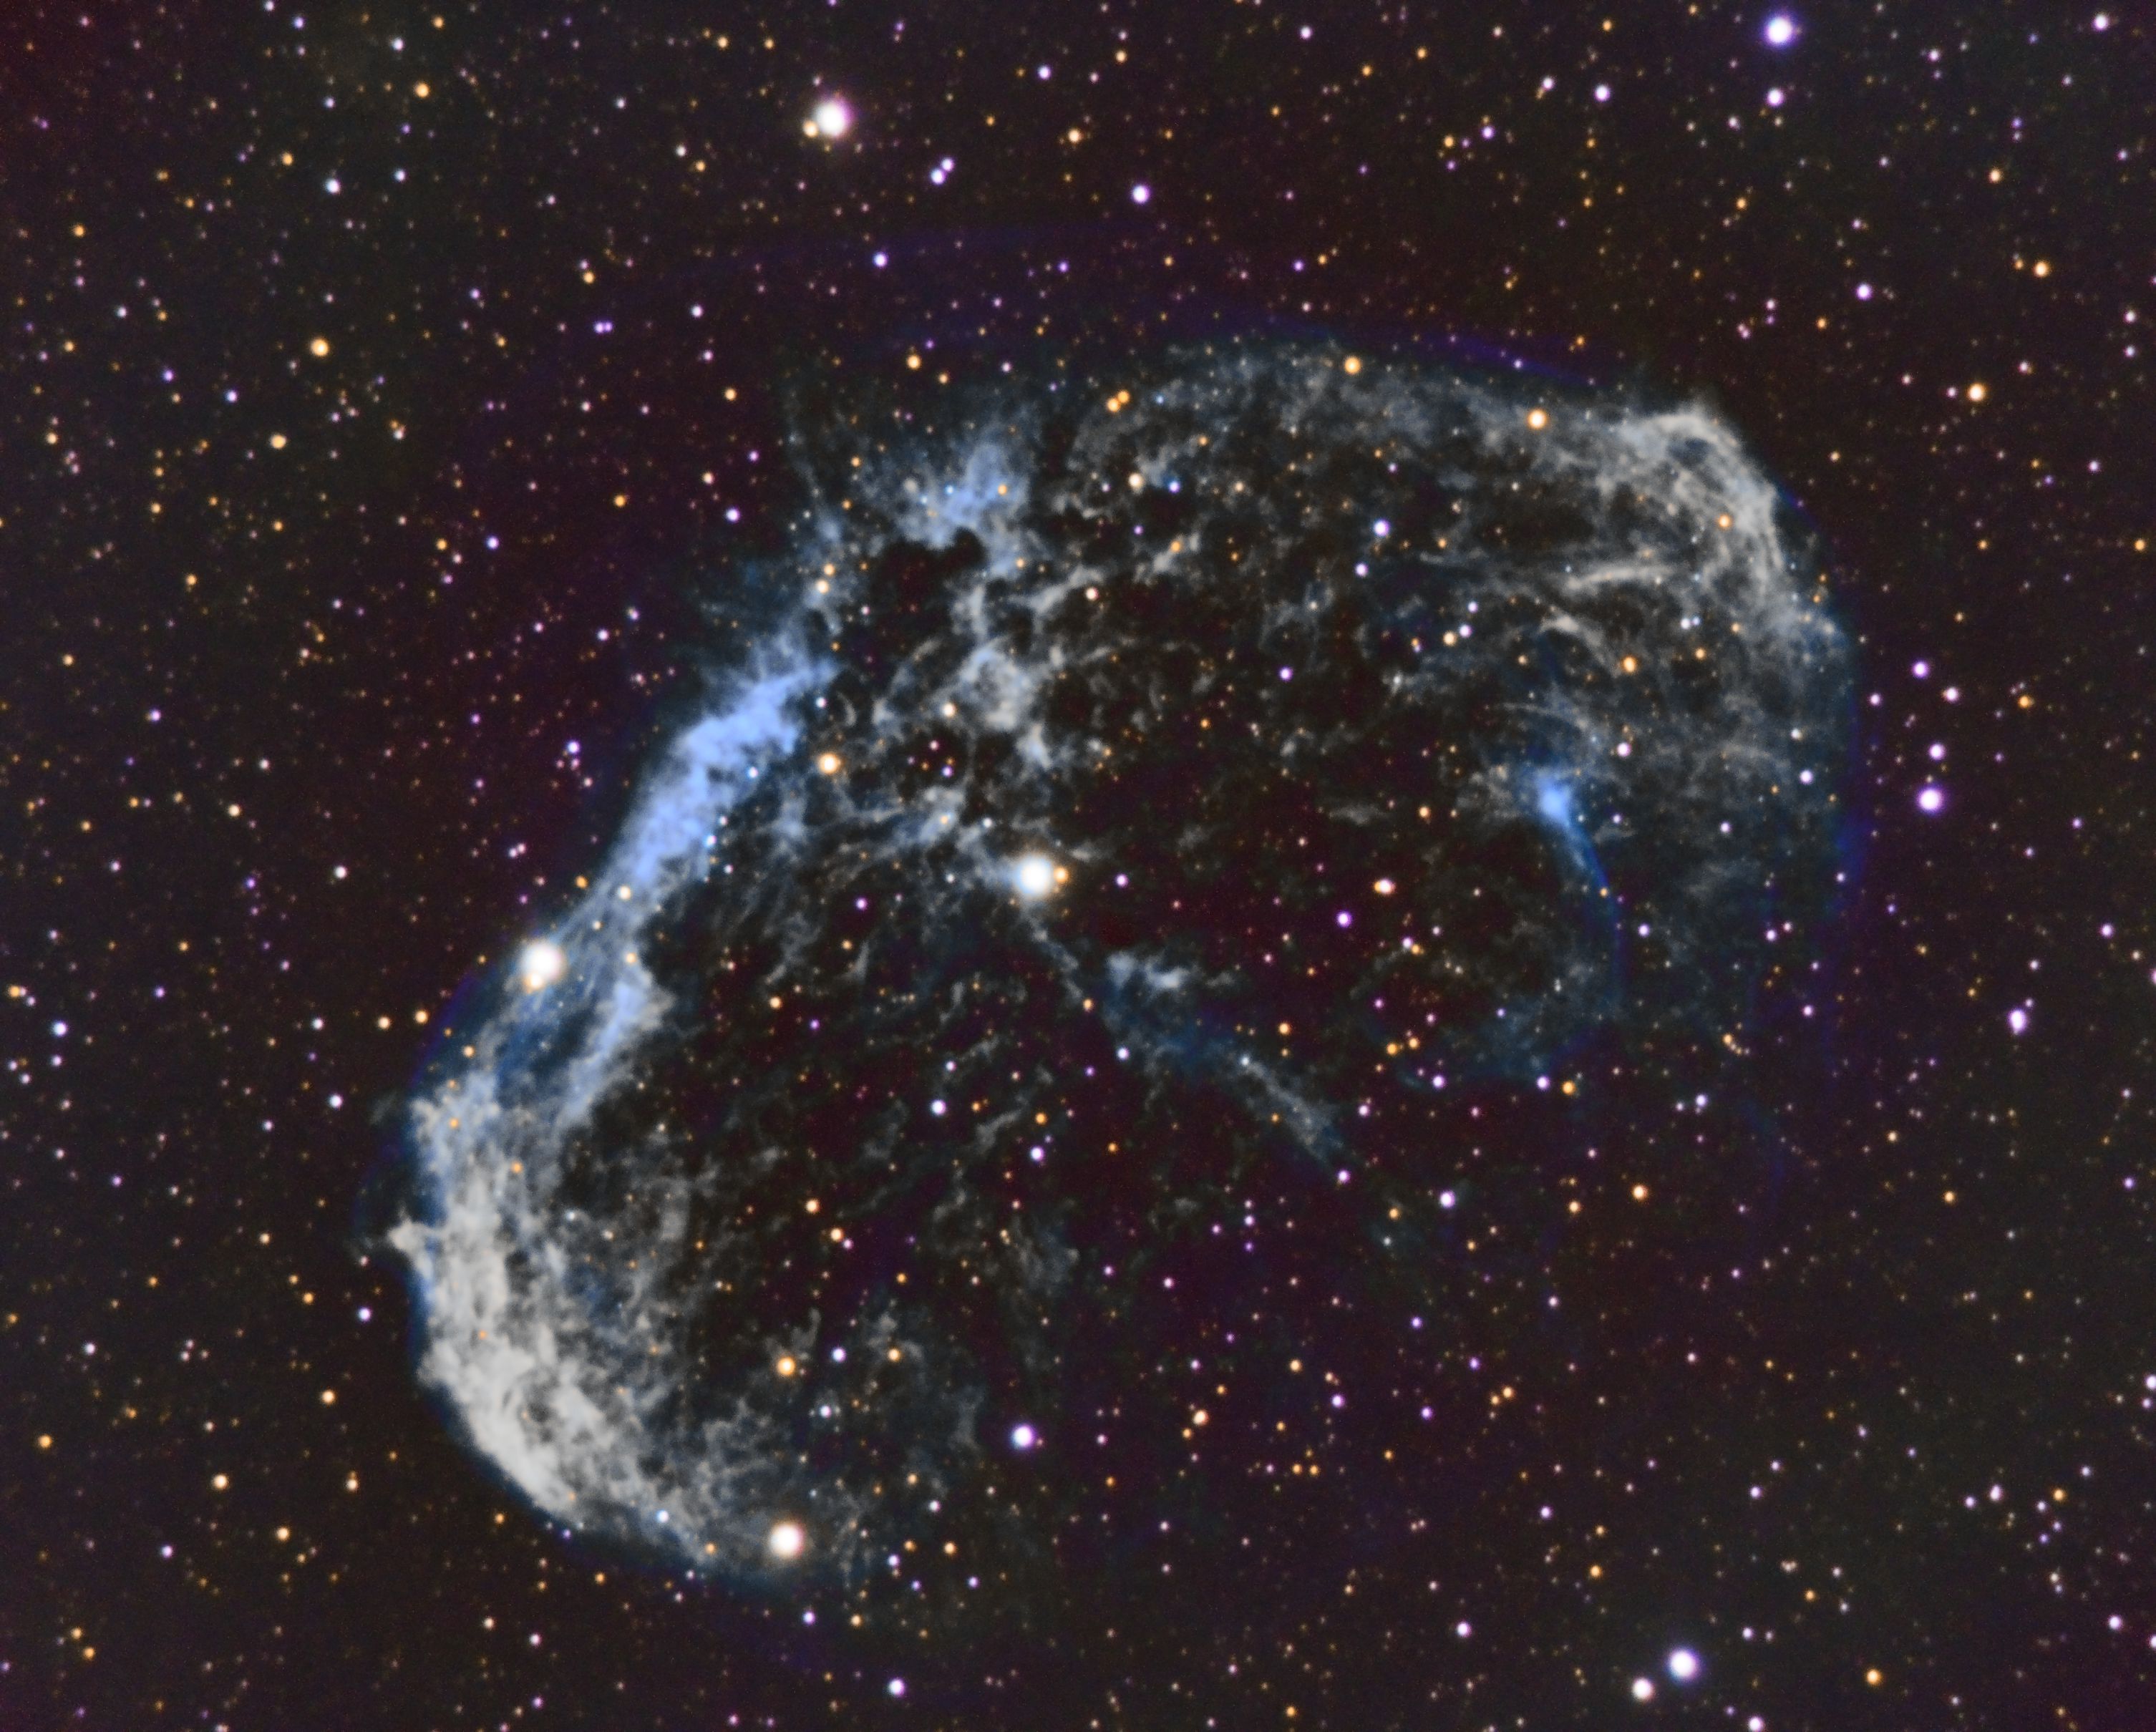
 NGC6888 - Crescent Nebula Bane of my existence |
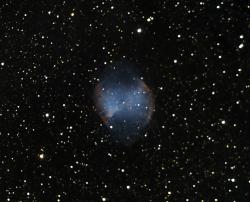 M27 - Dumbbell Nebula 2020 Edition |
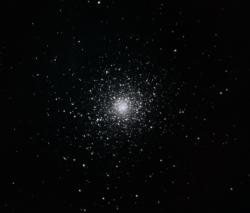
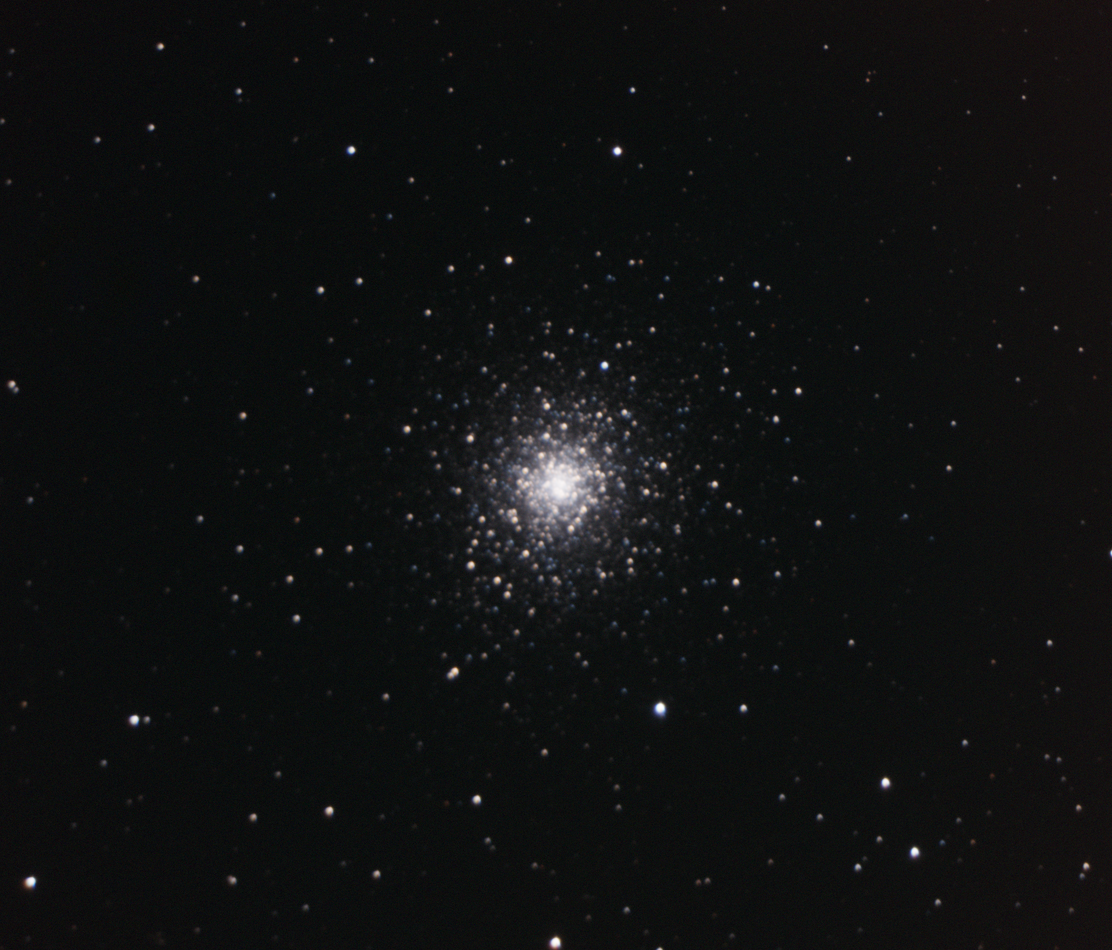
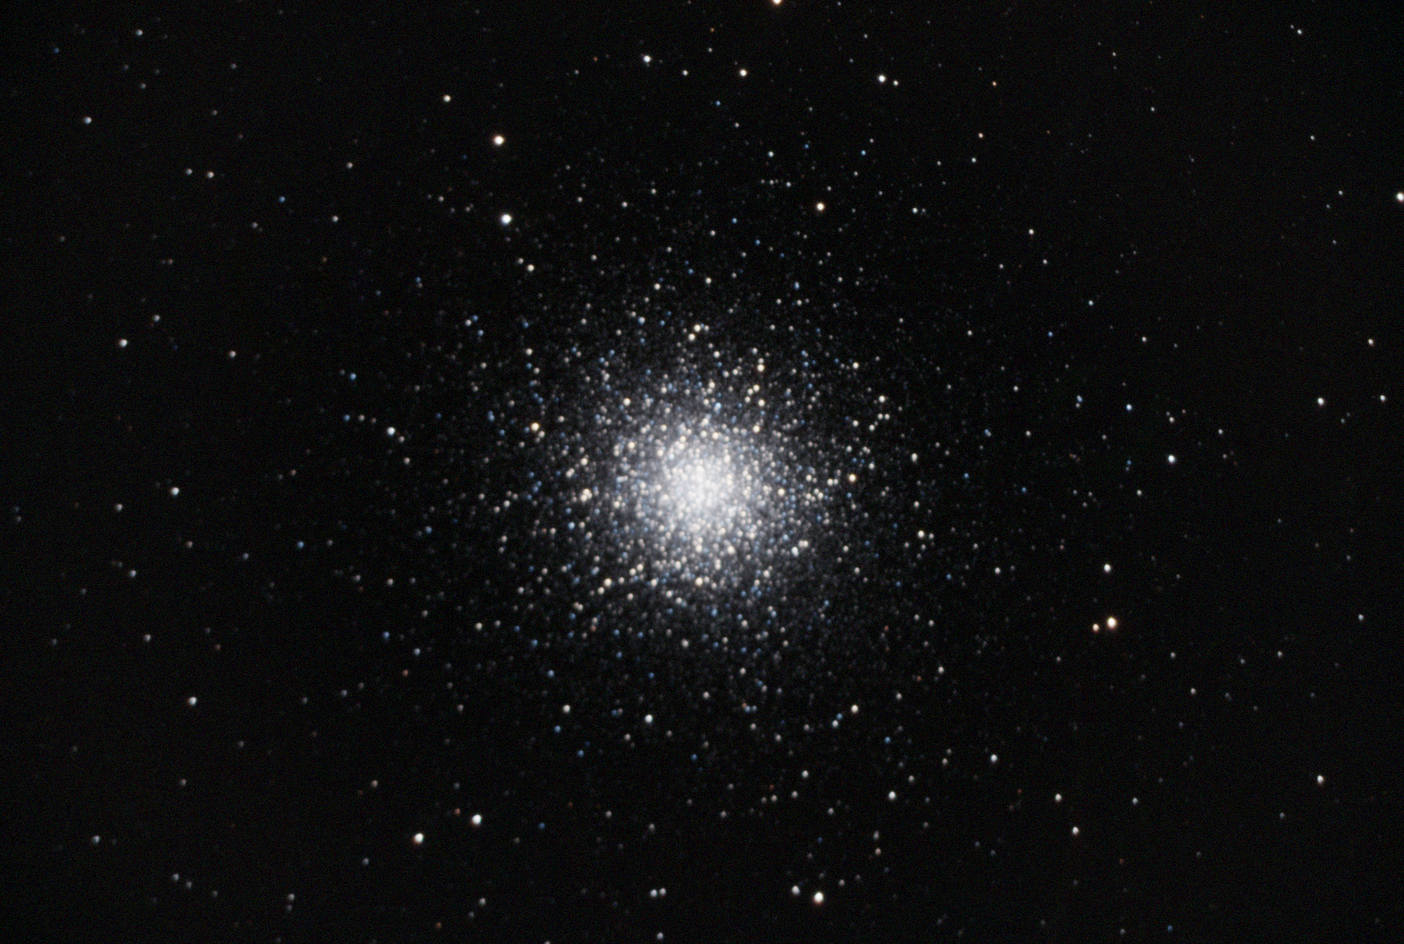
 M13 2020 Edition |
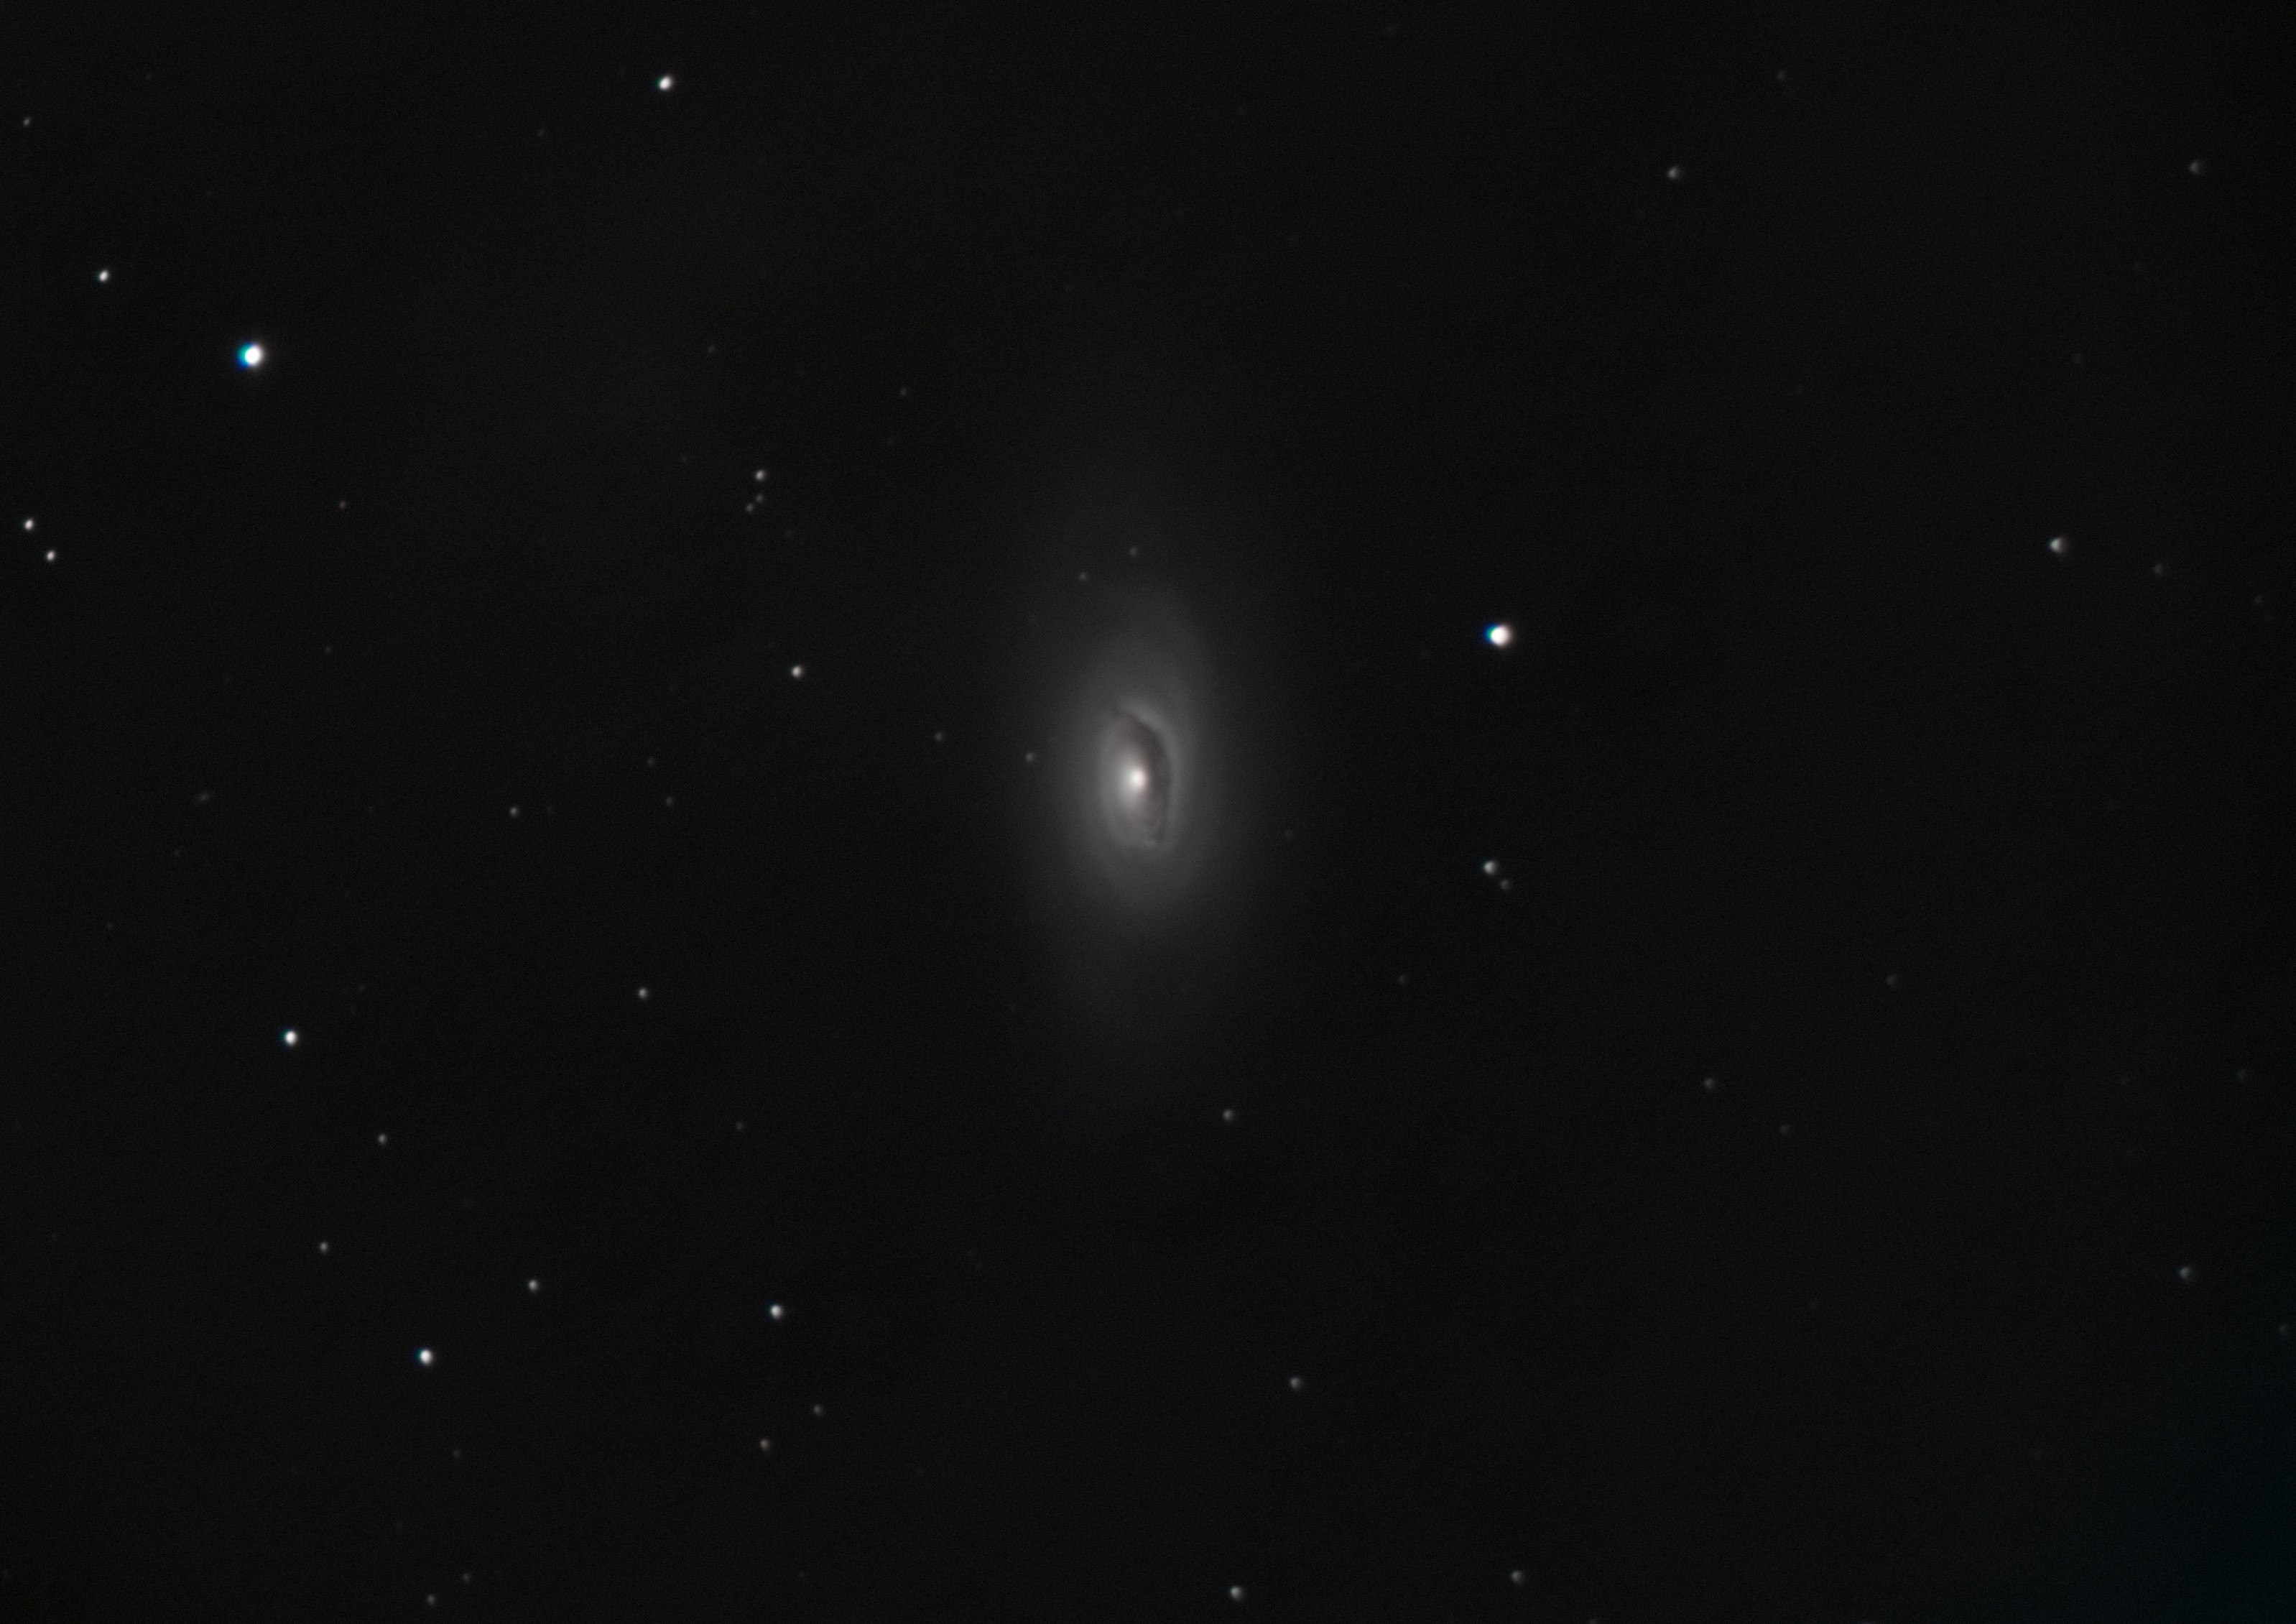
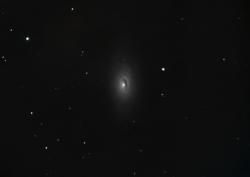 M64 - Evil Eye Galaxy |
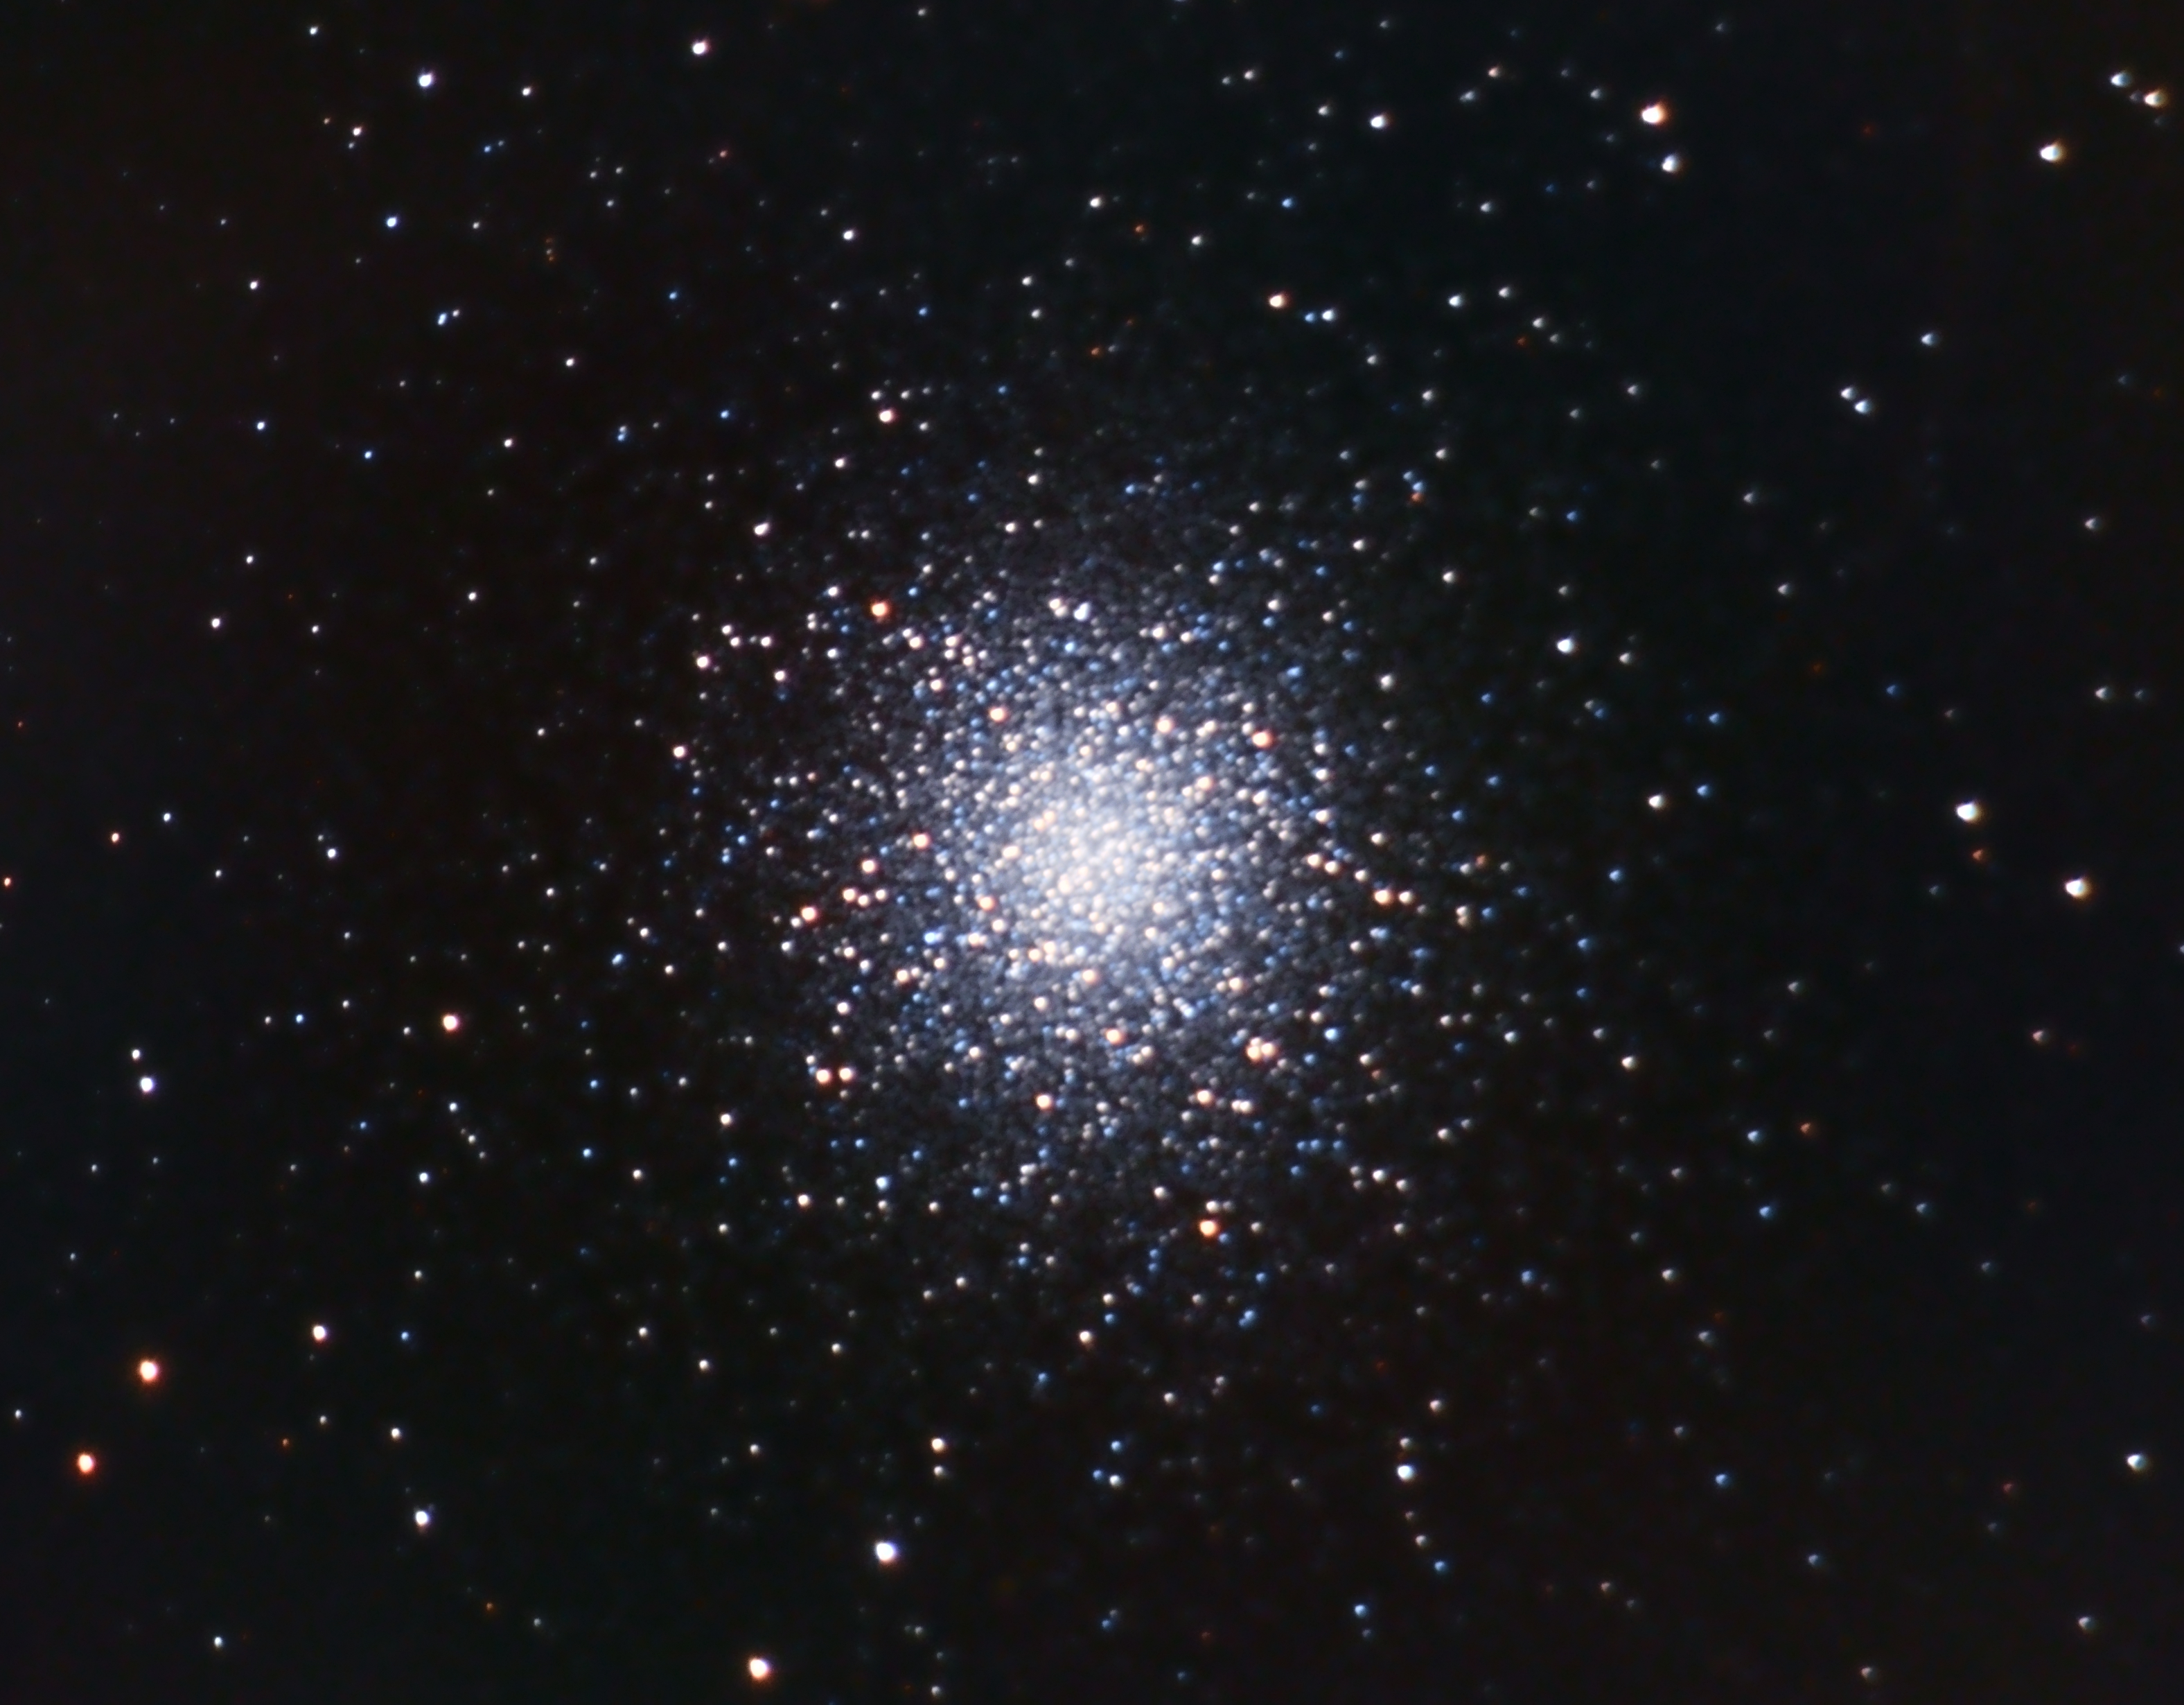
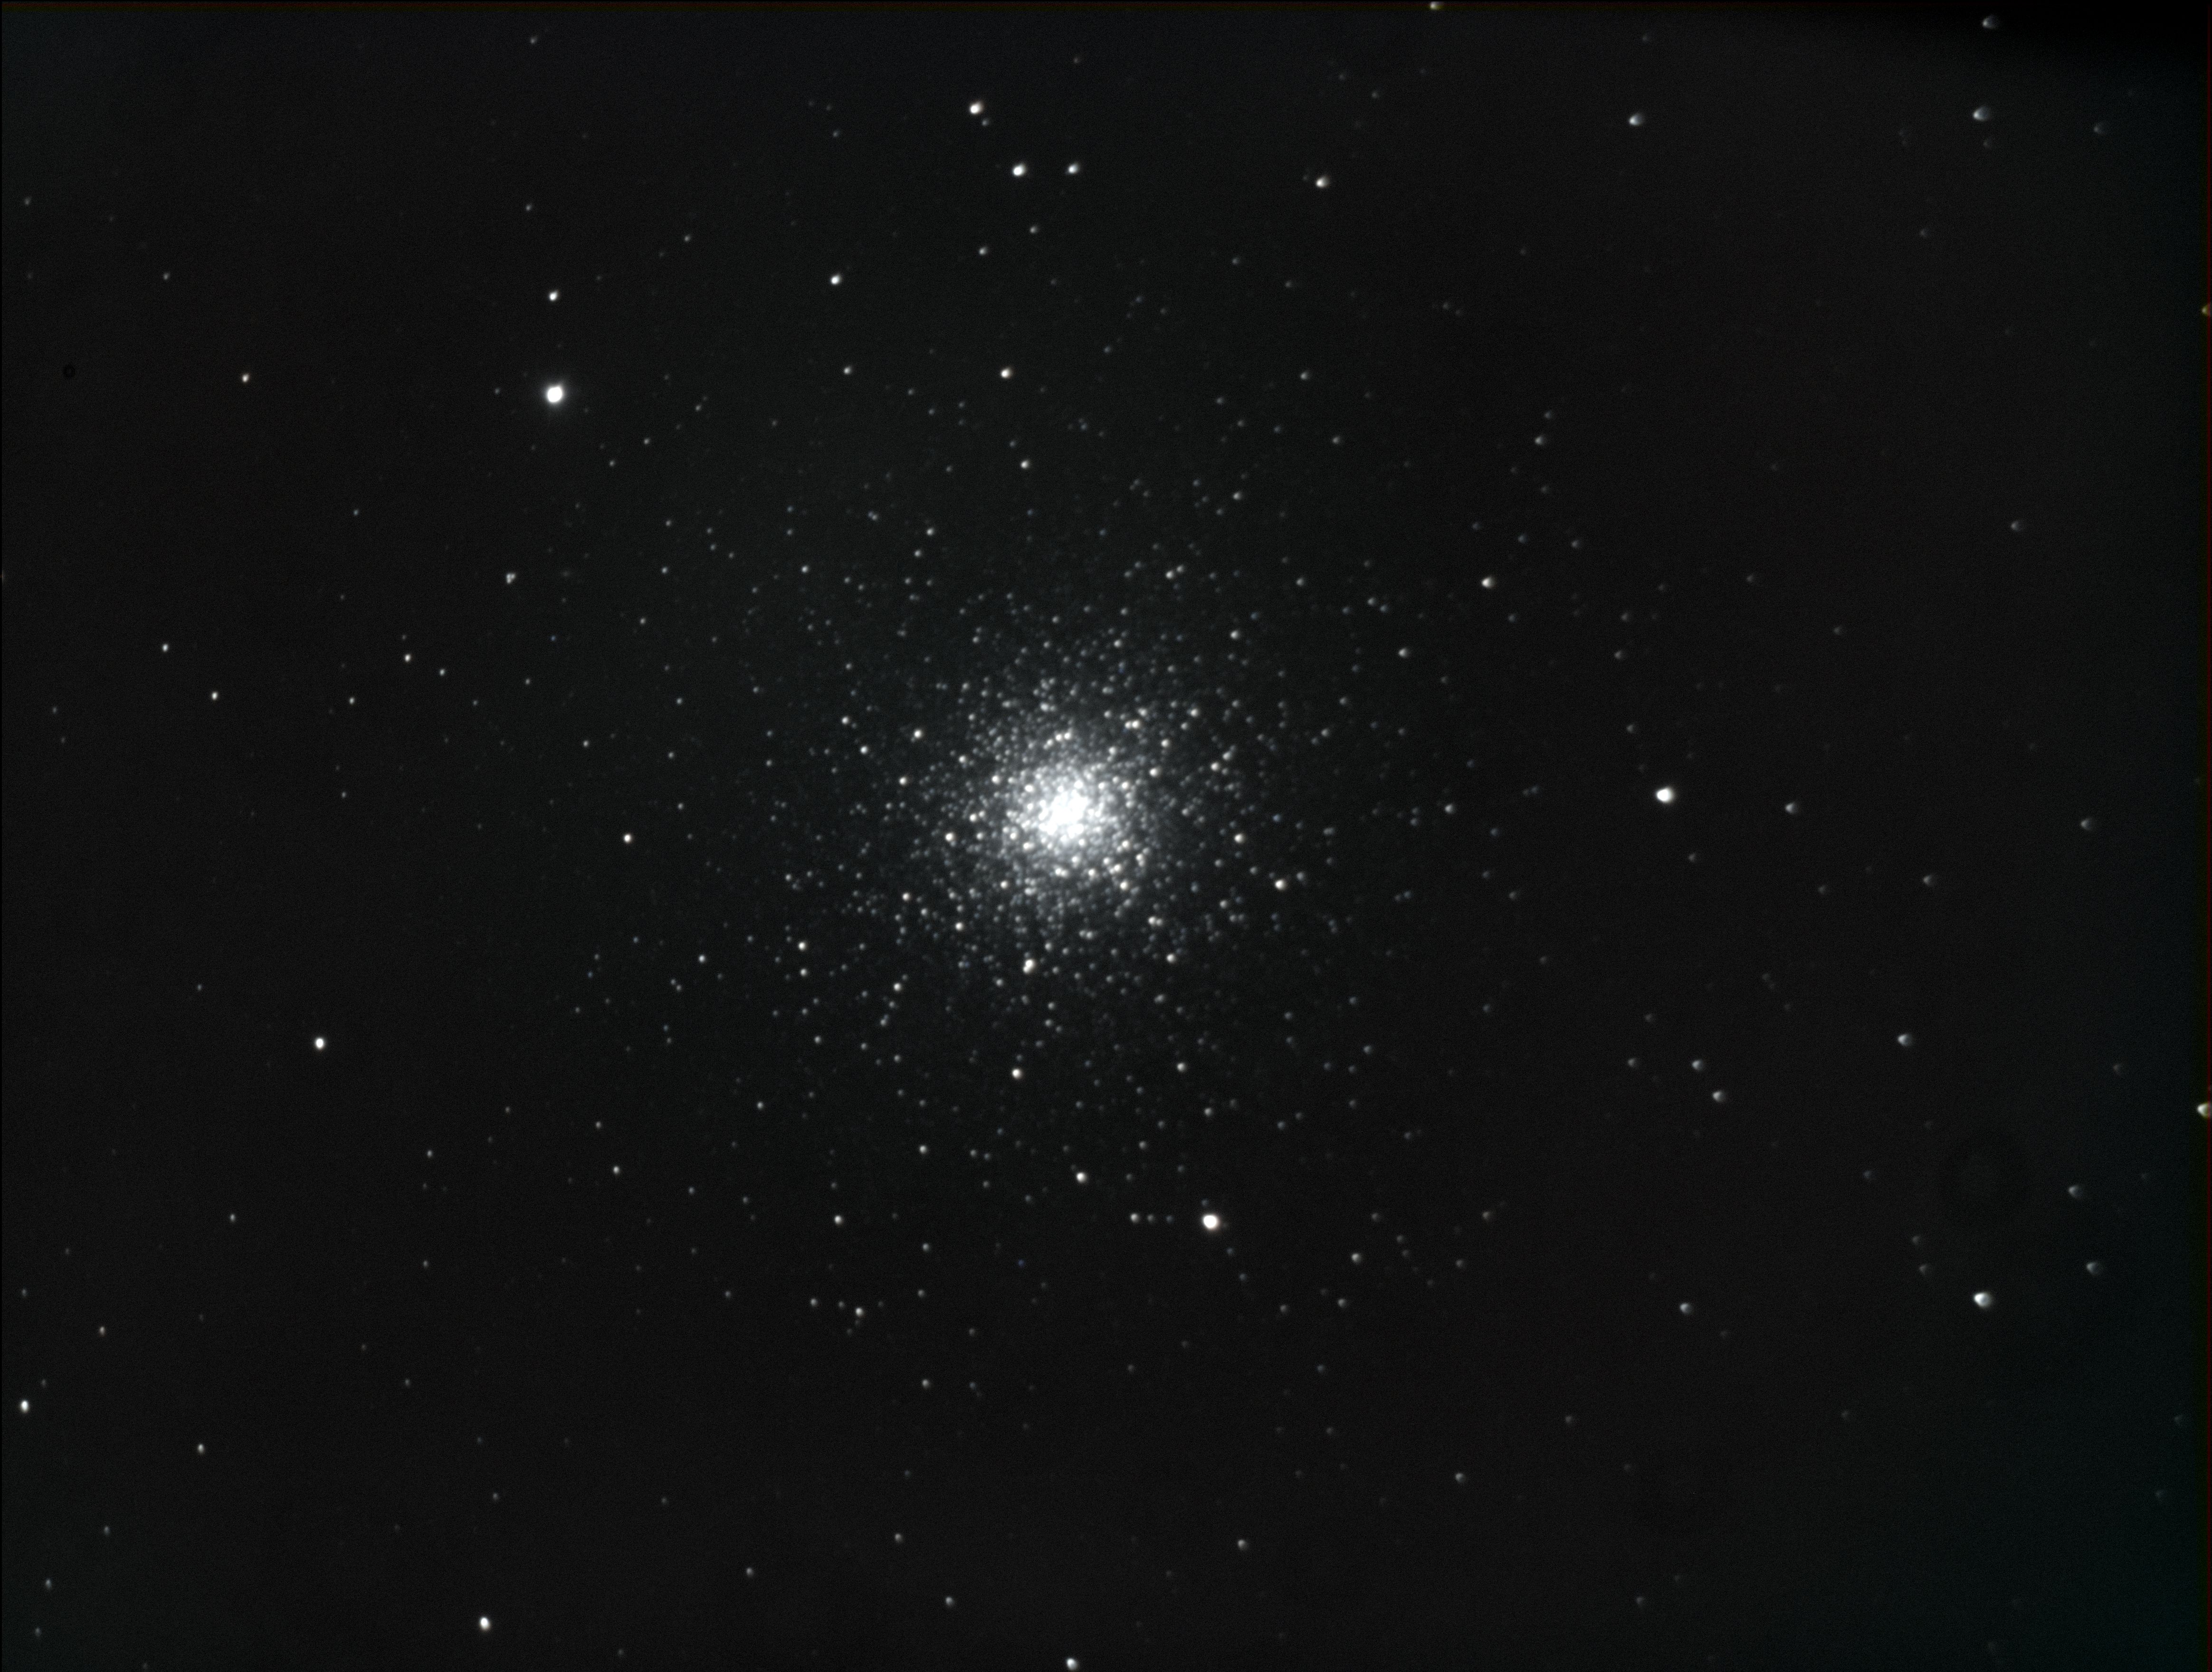
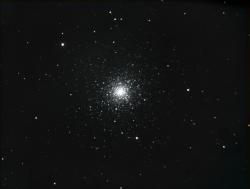 M3 |
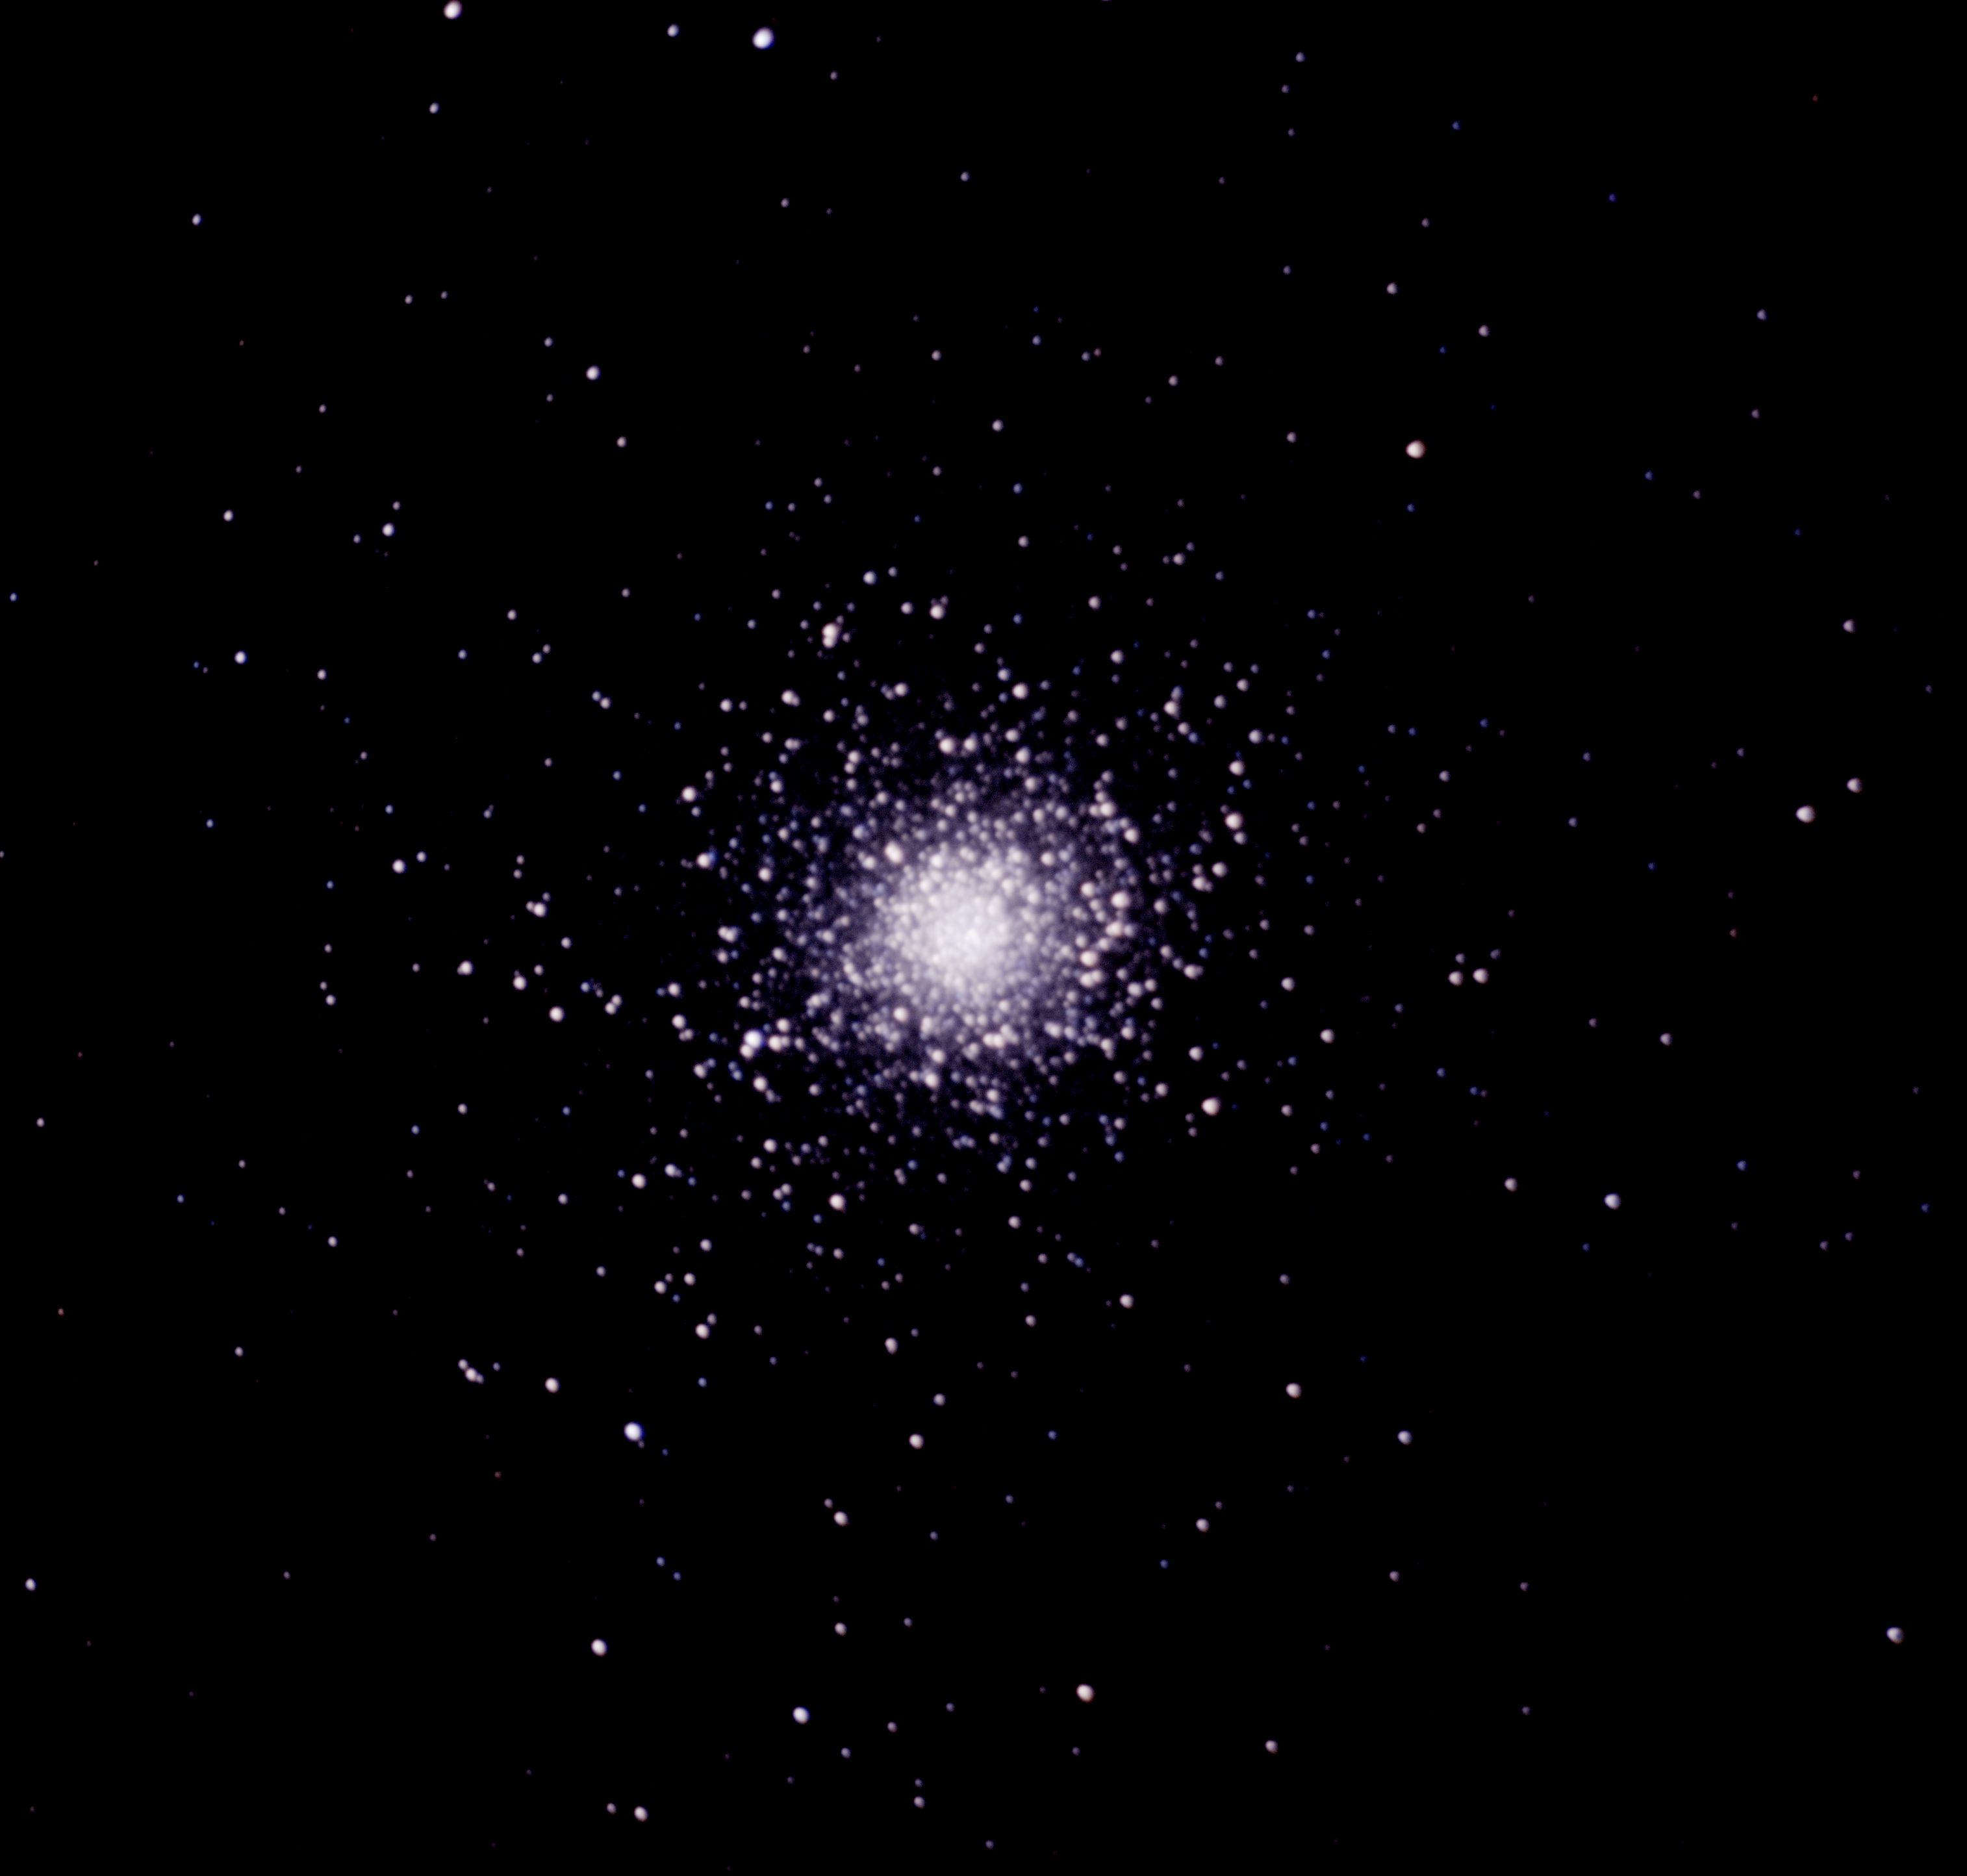
 M5 |
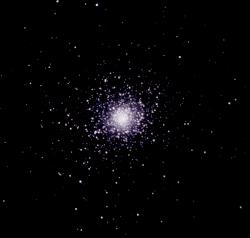 M5 - color enhanced |
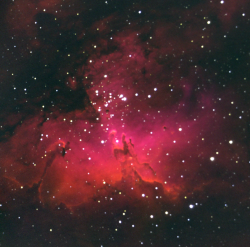 M16 - Eagle Nebula |
 M20 - Trifid Nebula |
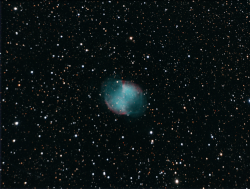 M27 - Dumbbell Nebula Reprocessed 6/1/2019 |
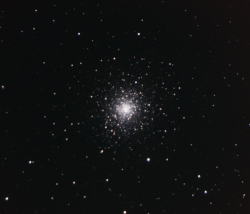 M92 |
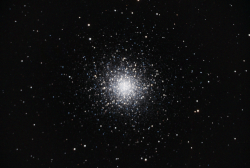 M13 Reprocessed 6/1/2019 |
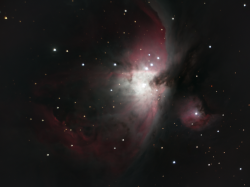 M42 - Orion |
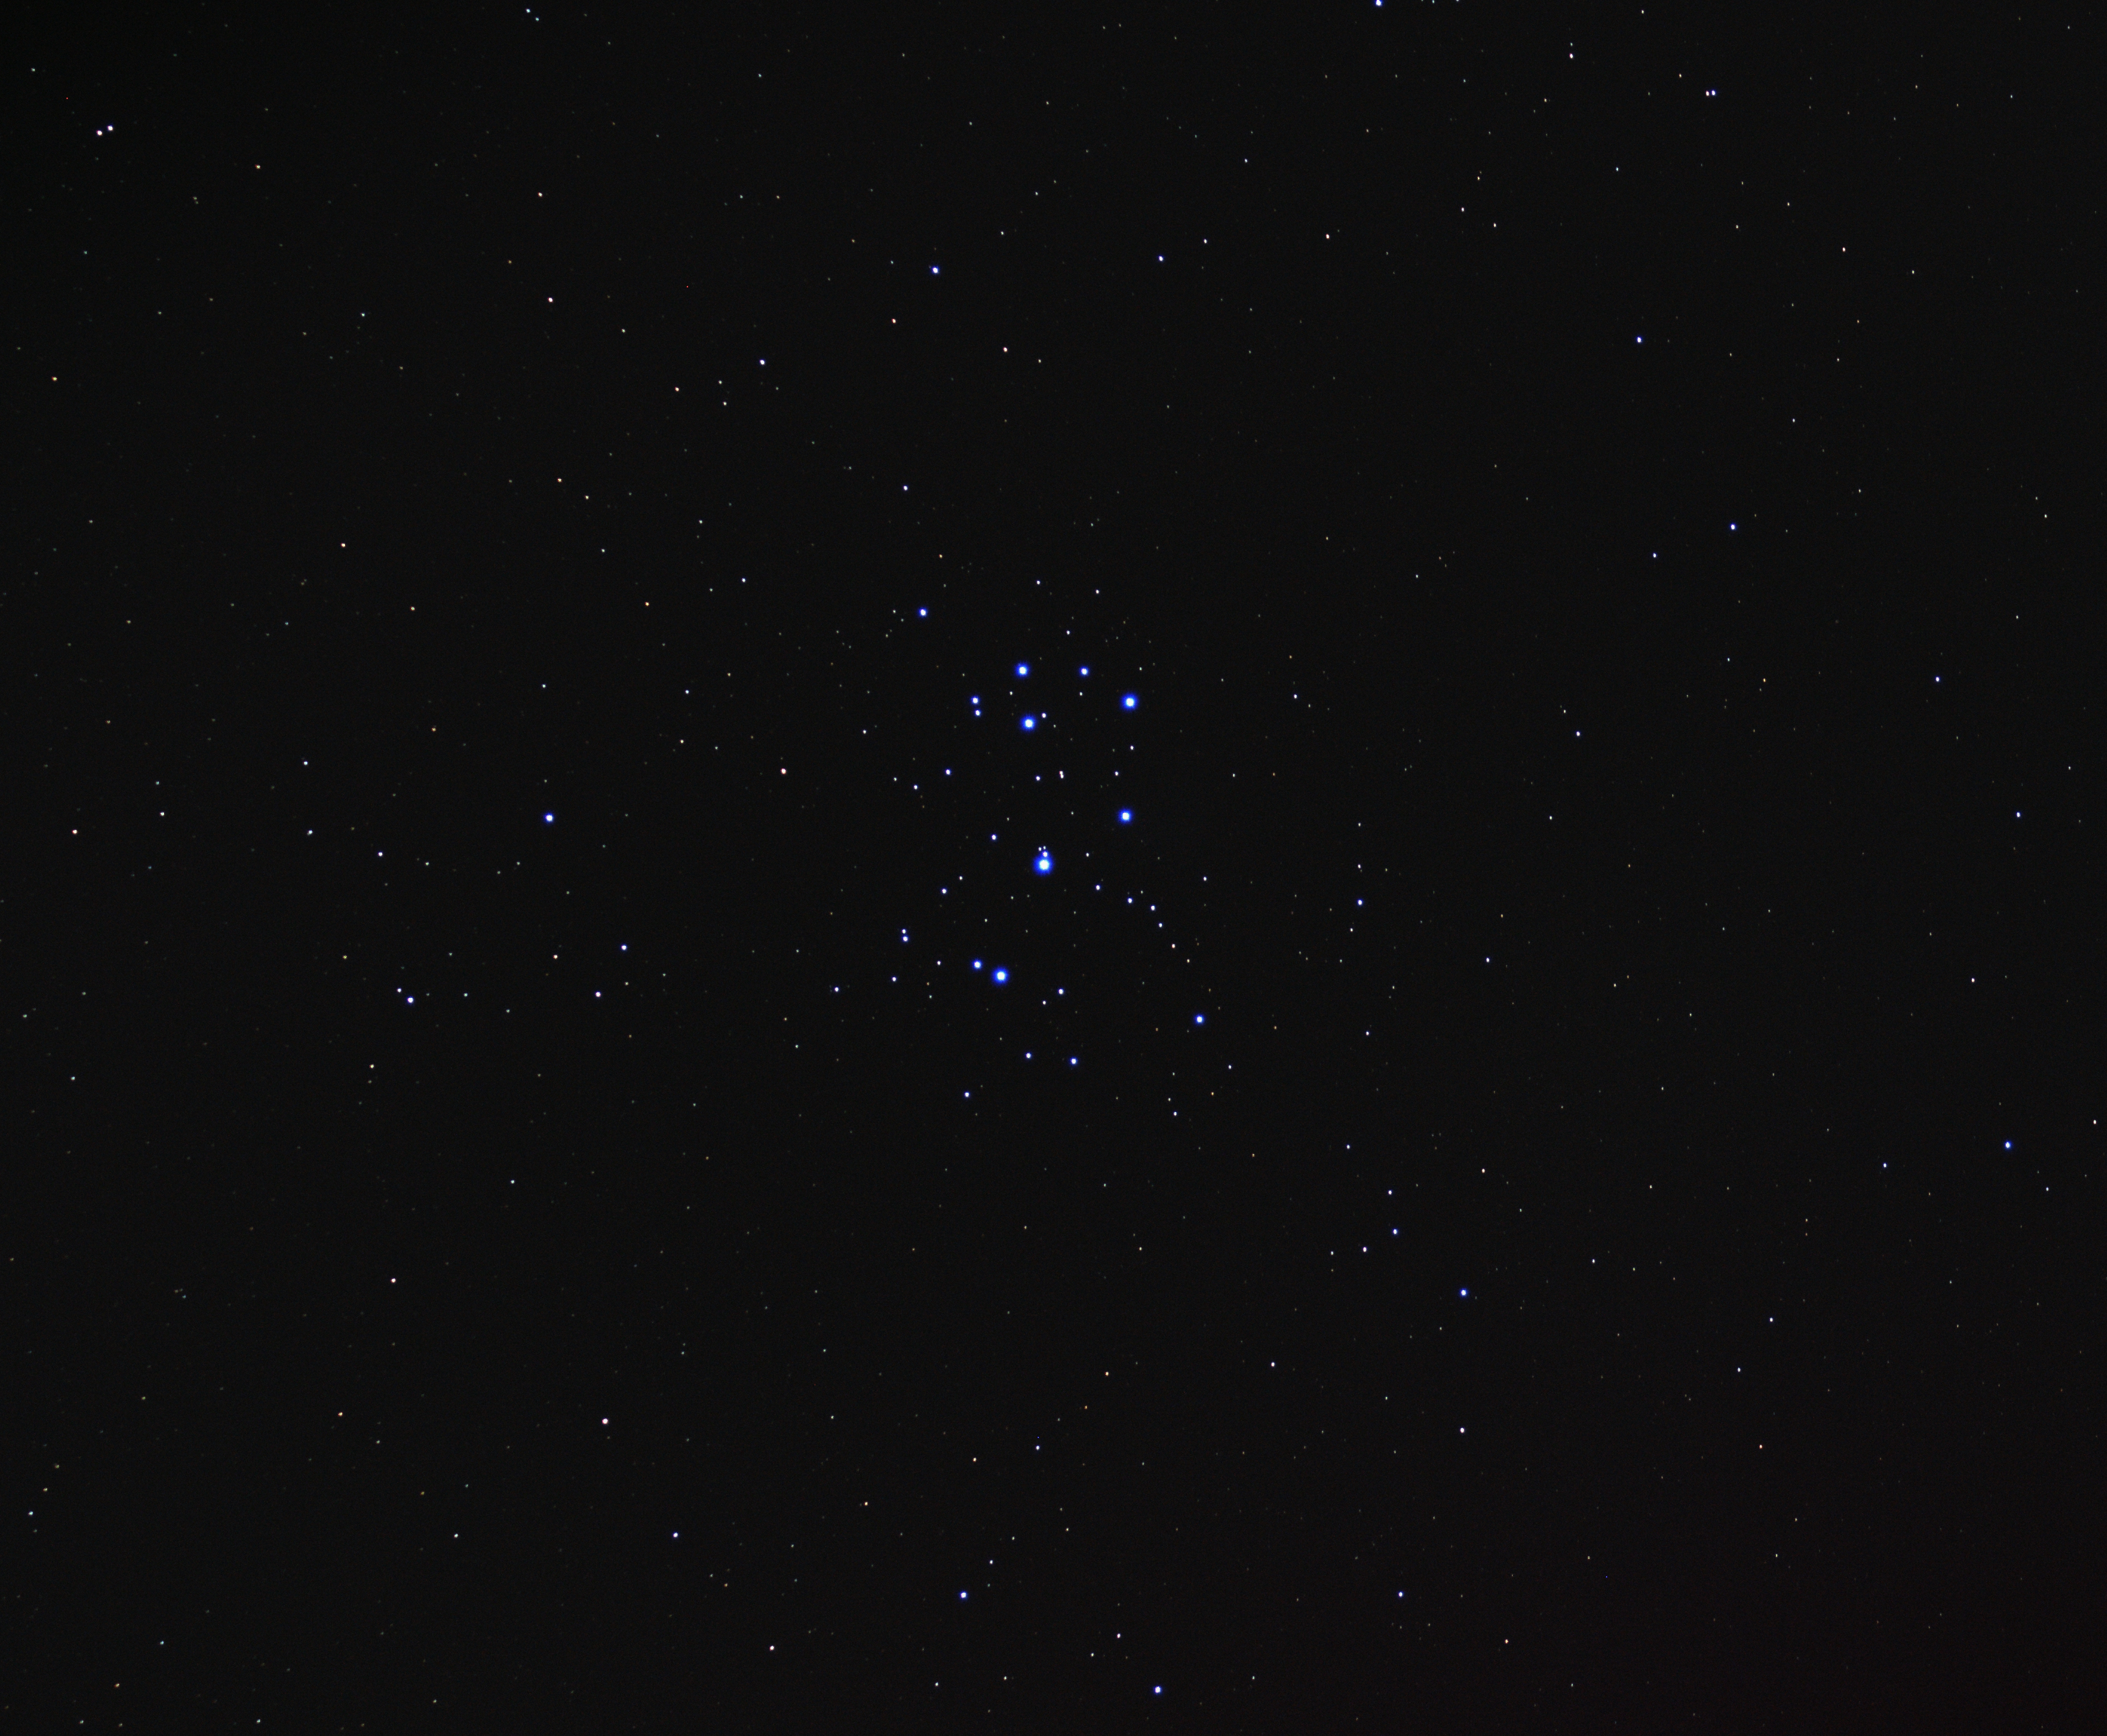
 Pleiades |
Now, my rantings:
Ha Filter Troubles
After installing the Celestron f/6.3 reducer/corrctor and collimating my scope the other night, I decided to try and capture a new set of data for the Crescent Nebula. Despite having just completed an image, I thought it would be worth it to try with the new, sharper setup.
Of course nothing is that simple in astrophotography!
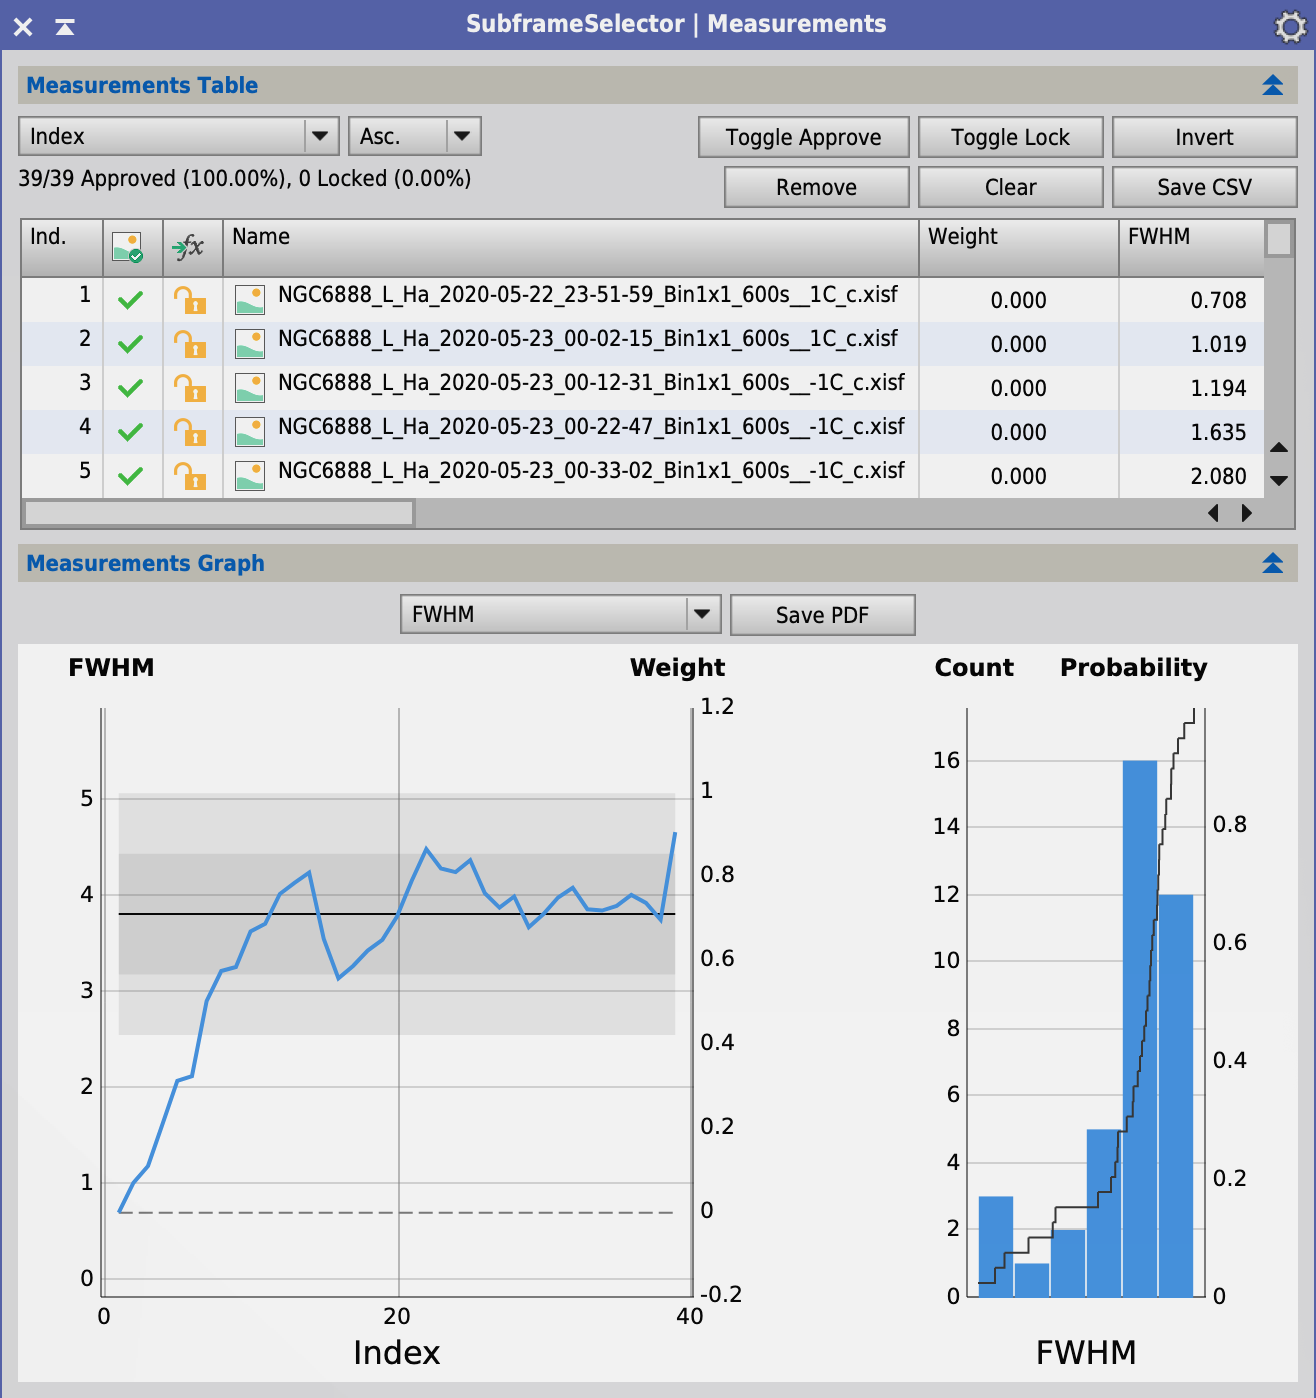
When I try integrating the Ha subs, whether using PixInsight's BatchPreprocessing or manually, the ImageIntegration fails complaining that the calibrated and registered Ha subs have no signal in them! Visually inspecting them reveals they all look like they've been converted into 1 bit B&W images!
So I pull the calibrated Ha subs up in SubFrameSelector and plot the FWHM:
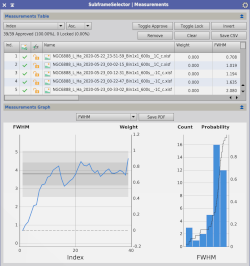
It starts out good but gets progressively worse. And it persists across nights as images 0-19 were taken one night the 20-38 were taken two nights later!
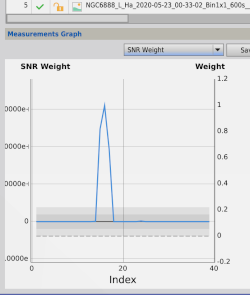
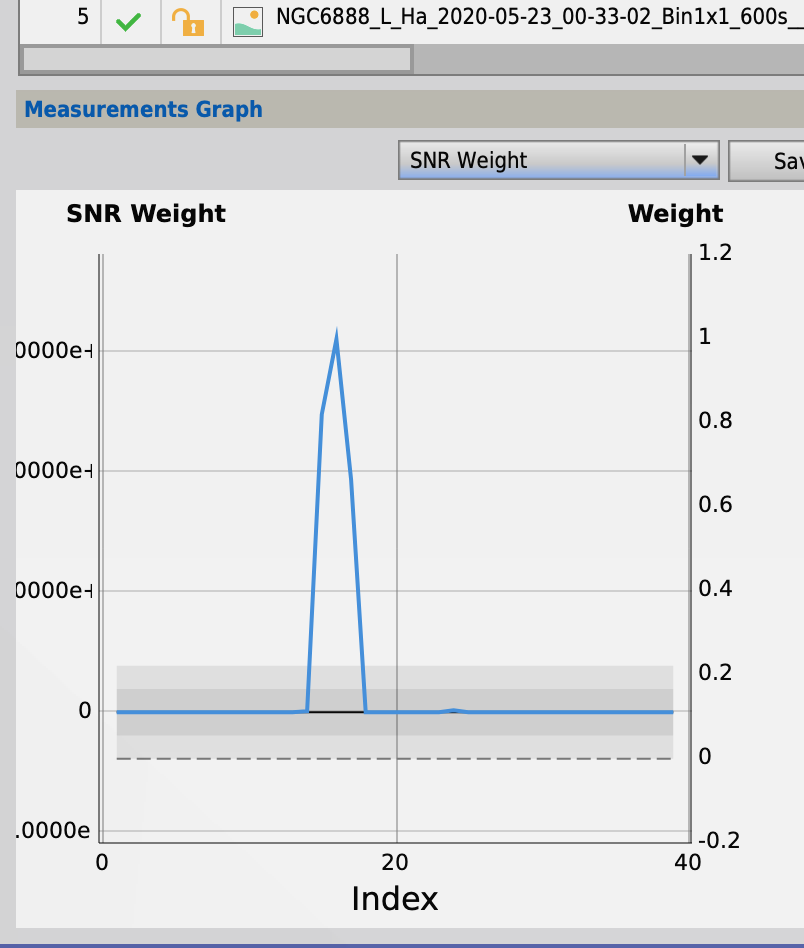
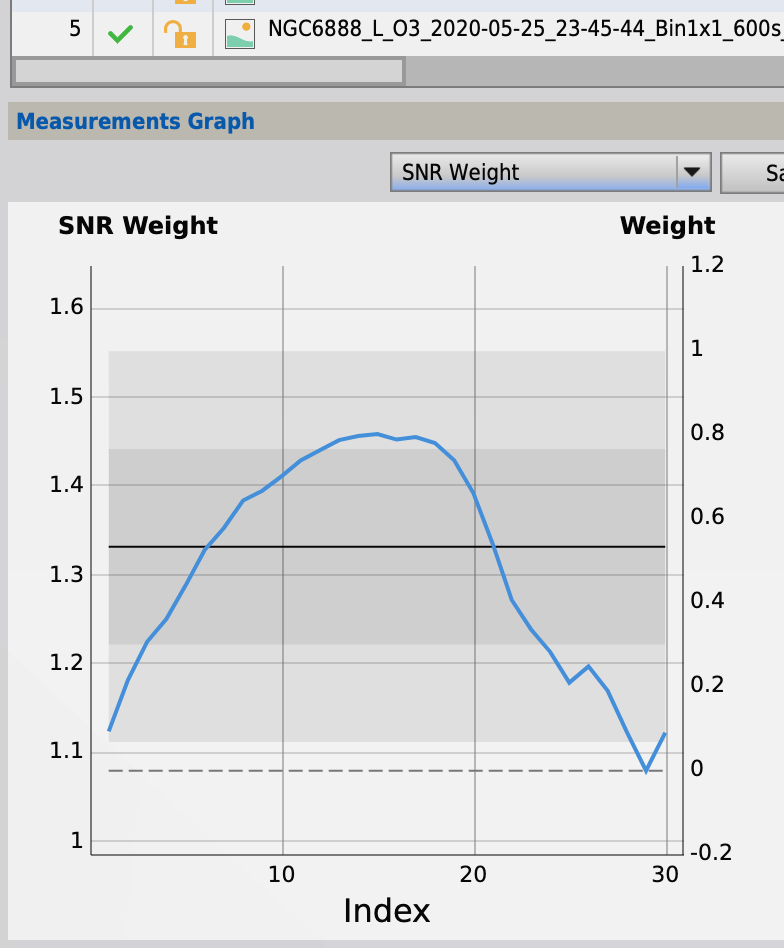
And if we look at the SNR instead, we can see why ImageIntegration was claiming the subs were blank:
If we look at the O3 subs taken the following night, we have a reasonable SNR:
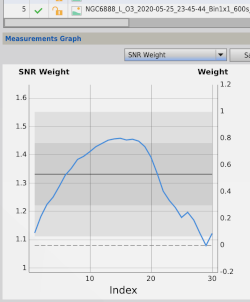
And ImageIntegration produces a decent master O3 image.
I've reached out to Bernard CloudingNights to see if he has any ideas as I'm at a loss as to what could be wrong with my Ha imaging.
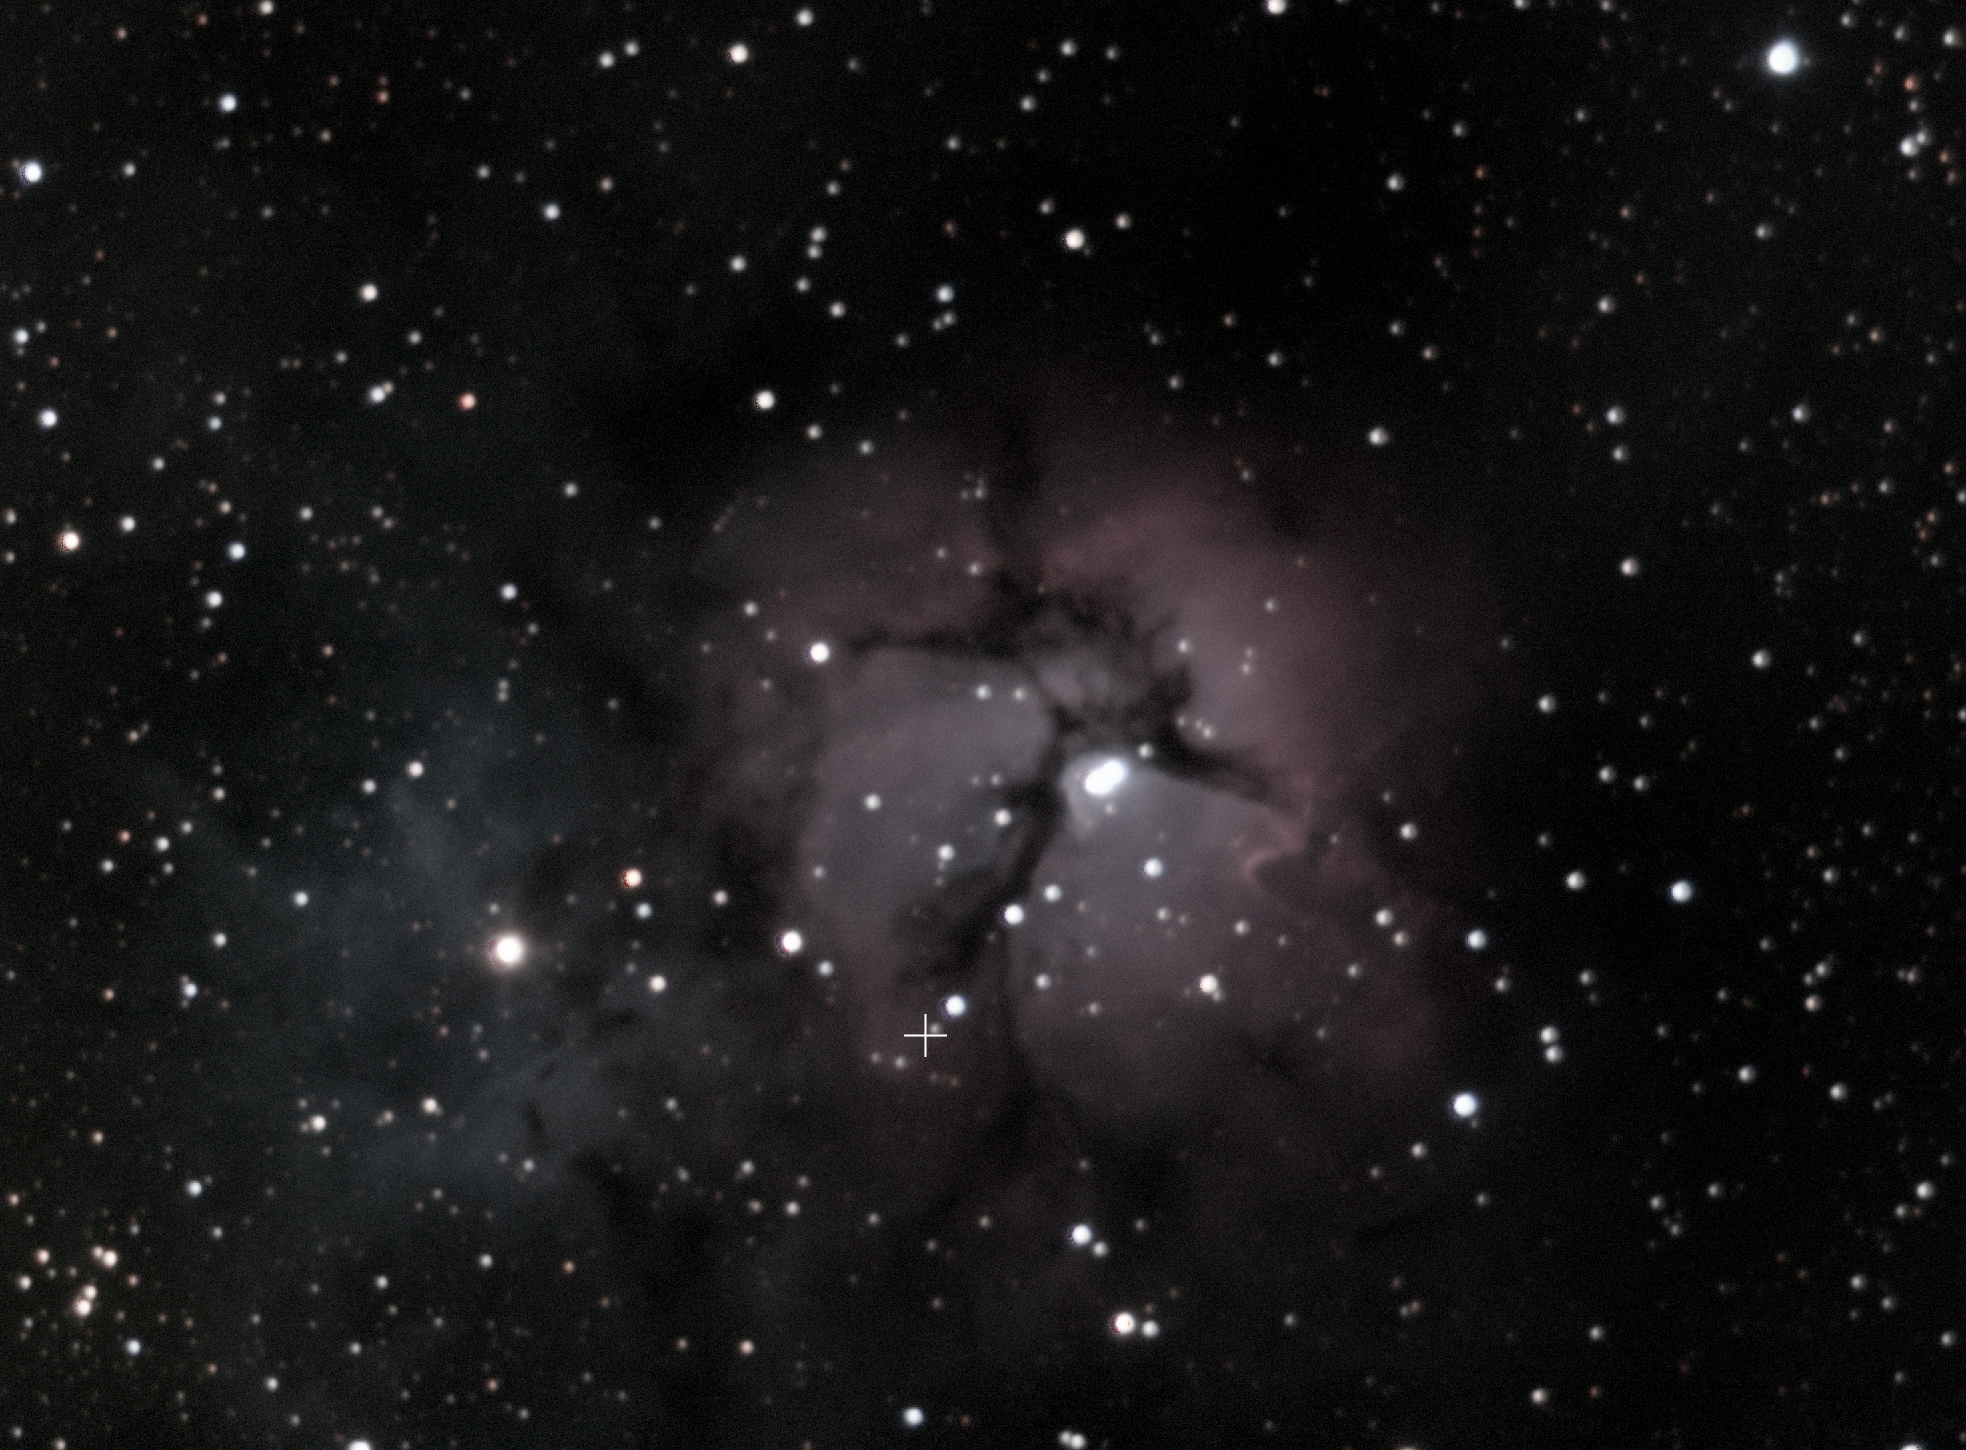
M20 - The Trifid Nebula
Now that I have the reducer/corrector installed and the scope collimated, I went looking for a subject to test the setup on. Looking around in Stellarium and my previous subjects, I decided I wanted to do M20, the Trifid Nebula, over again. The first attempt doesn't have enough data so that the colors turned out overly saturated.
Taking the subs was not without its challenges though. I wanted to start capturing data around 11:30pm. That would give me enough time to get 4 hours of data collected before the sky starts getting light just after 4am. Unfortunately at 11:30pm, it hadn't cleared the swimming pool fence (I placed the scope too close this time!) and the trees completely yet. So I got a late start at just before midnight. I then went to bed while the rig collected the subs.
When I got up at 6am to let the dog out, the scope was parked in the correct psotion which indicates the imaging sequence ran to completion! A good sign!
But when I got to look at the actual subs later that morning, I noticed that the last half of the Blue subs were ruined by either the morning light or were a uniform grey on one half of the frames. Getting a late start was the cause of the former. The latter were caused by M20 sliding along the ridge of the house! Also from getting started too late.
But I though, what the heck! I have some data, just as well process it and see what comes out. And I'm glad I did! I think it came out really nice! Sharp stars, minimal noise. Some glare on the bright stars but I could crop most of that out. So what do you think?
I hope to go back soon and collect some more Blue subs top make up for the ones that got rejected from this run.
Celestron f/6.3 Reducer/Corrector
I had tried the Antares f6.3 reducer that came with my Celestron C6 SCT but it would not cover my ZWO ASI1600mm Pro camera's sensor. It also had really bad glare.
I saw a used Celestron f/6.3 Reducer/Corrector on CloudyNights and decidedd to try it to see if it would fix some of my coma issues. I could not find any definitive info on whether it would cover my camera sensor or not. But it was relatively cheap so I ordered it.
Once it came, I had to wait a day to try it so that I could finish capturing all of the OIII data for my Crescent Nebula image. I installed it and waited until nightfall, knowing I'd have to refocus since the focal length changed so much (1030mm vs 1630mm).
At first light, it was "Oh no!", de ja vue all over again! Terrible glare and soft stars. Argh!! After calming down, I got to work to see if I could make things better. First, I noticed that the out of focus stars showed I had a collimation problem. I could swear I had checked that before when I didn't have the reducer on and I couldn't think of my the reducer would cause a collimation problem. Oh well! It is what it is!
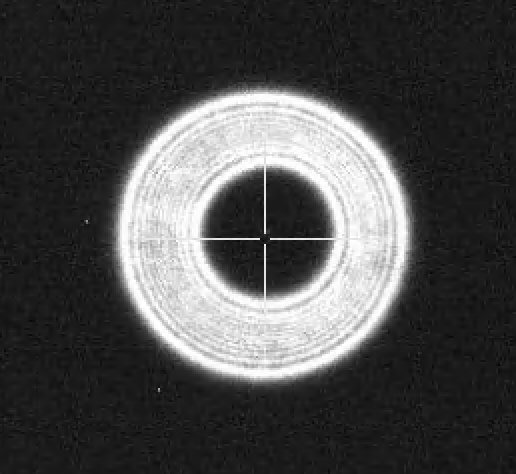
So I set about to collimate the scope for the first time! (Because it was "good" when I checked it!) Inorder to collimate the scope, you have to have a bright star centered in the field of view of the scope. So you recenter. Then you adjust the focuser so that the star forms a ring like:
 .
.
You then adjust the bolts holding the secondary in place in an attempt to make all of the rings concentric. Every time you adjust the bolts ("Bob's Knobs" on my scope), the star's image will move off center. So you have to recenter to see what effect you made with your last adjustment. Repeat until you're satisfied with how concentric the rings are.
That has go to be the closest thing to "herding cats" that exists in the real world! What a PITA!
Anyway, once I was satisfied that it "was good enough", I proceeded to look into the glare issue. Not coming up with a solution, I posted to the local AZ-Observing mailing list and then headed over to the Crescent Nebula for some test exposures. Lo and behold, all of the glare disappeared. It seems that only the brighter stars cause noticable glare. Luckily there are no really bright stars in the FoV around the Crescent Nebula.
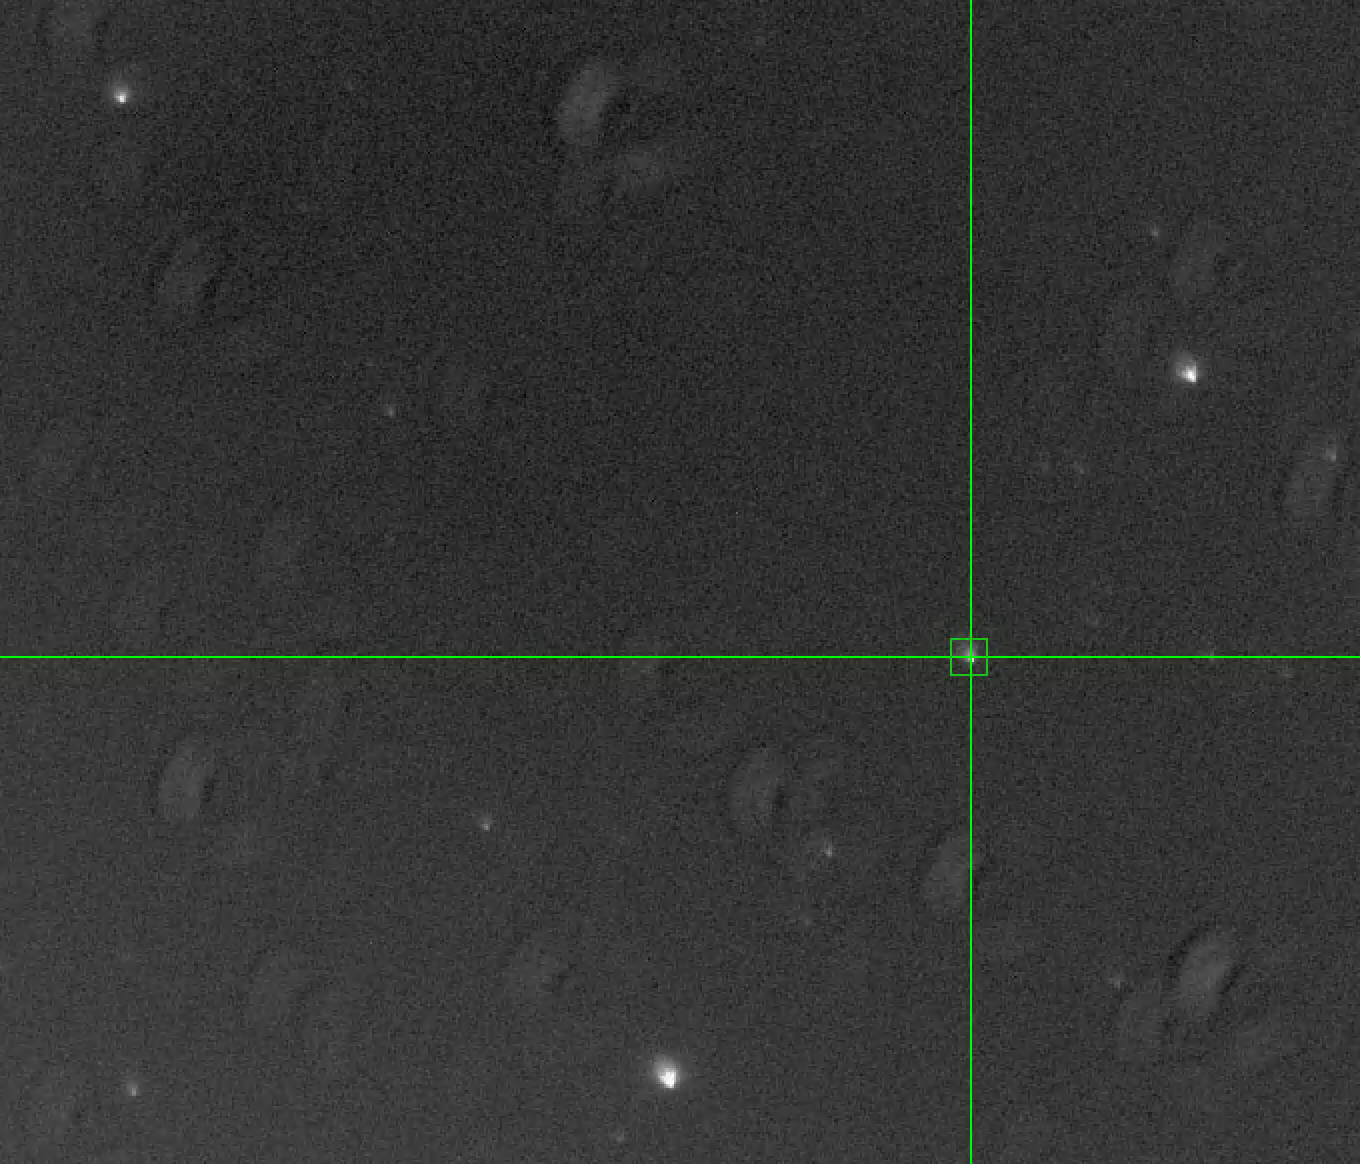
So I took a test exposure. As I've mentioned once or twice, my C6 has been suffering from coma, leaving the star away from the center looking like crescent moons or sometimes, seagulls. Like this:
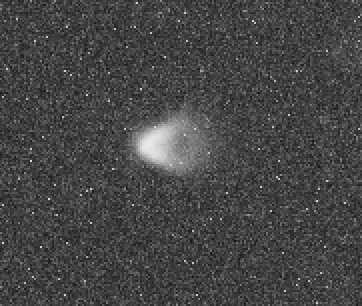 .
.
With the new reducer/corrector installed and the scope collimated, my stars now look like:
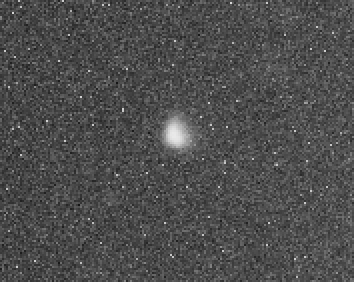
That gives me hope that I will be able to produce decent images with my little C6 SCT afterall!!
Guide Camera "Dust"!
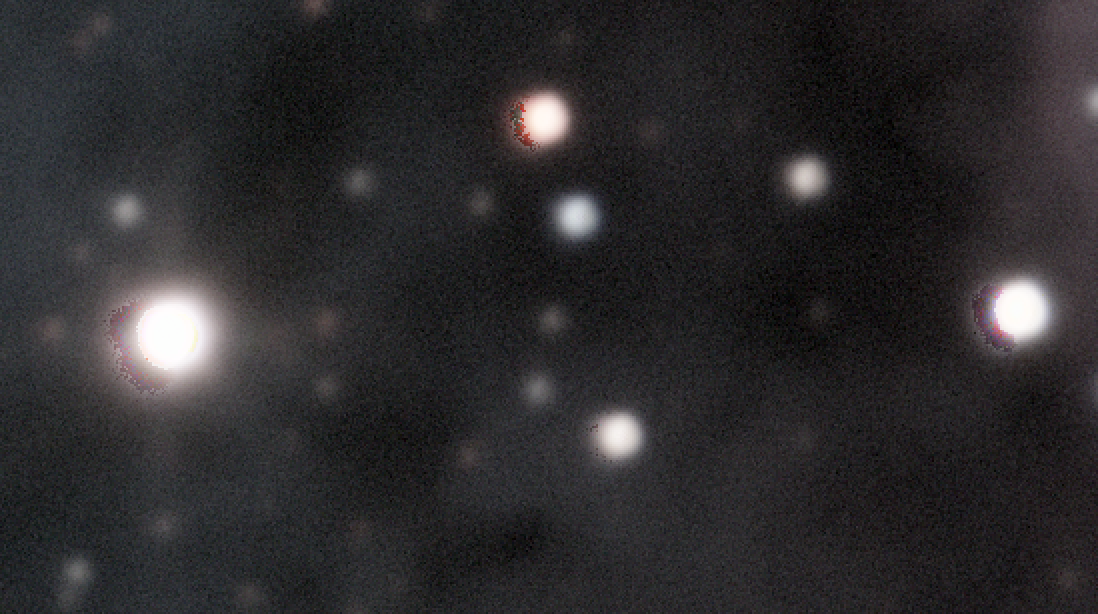
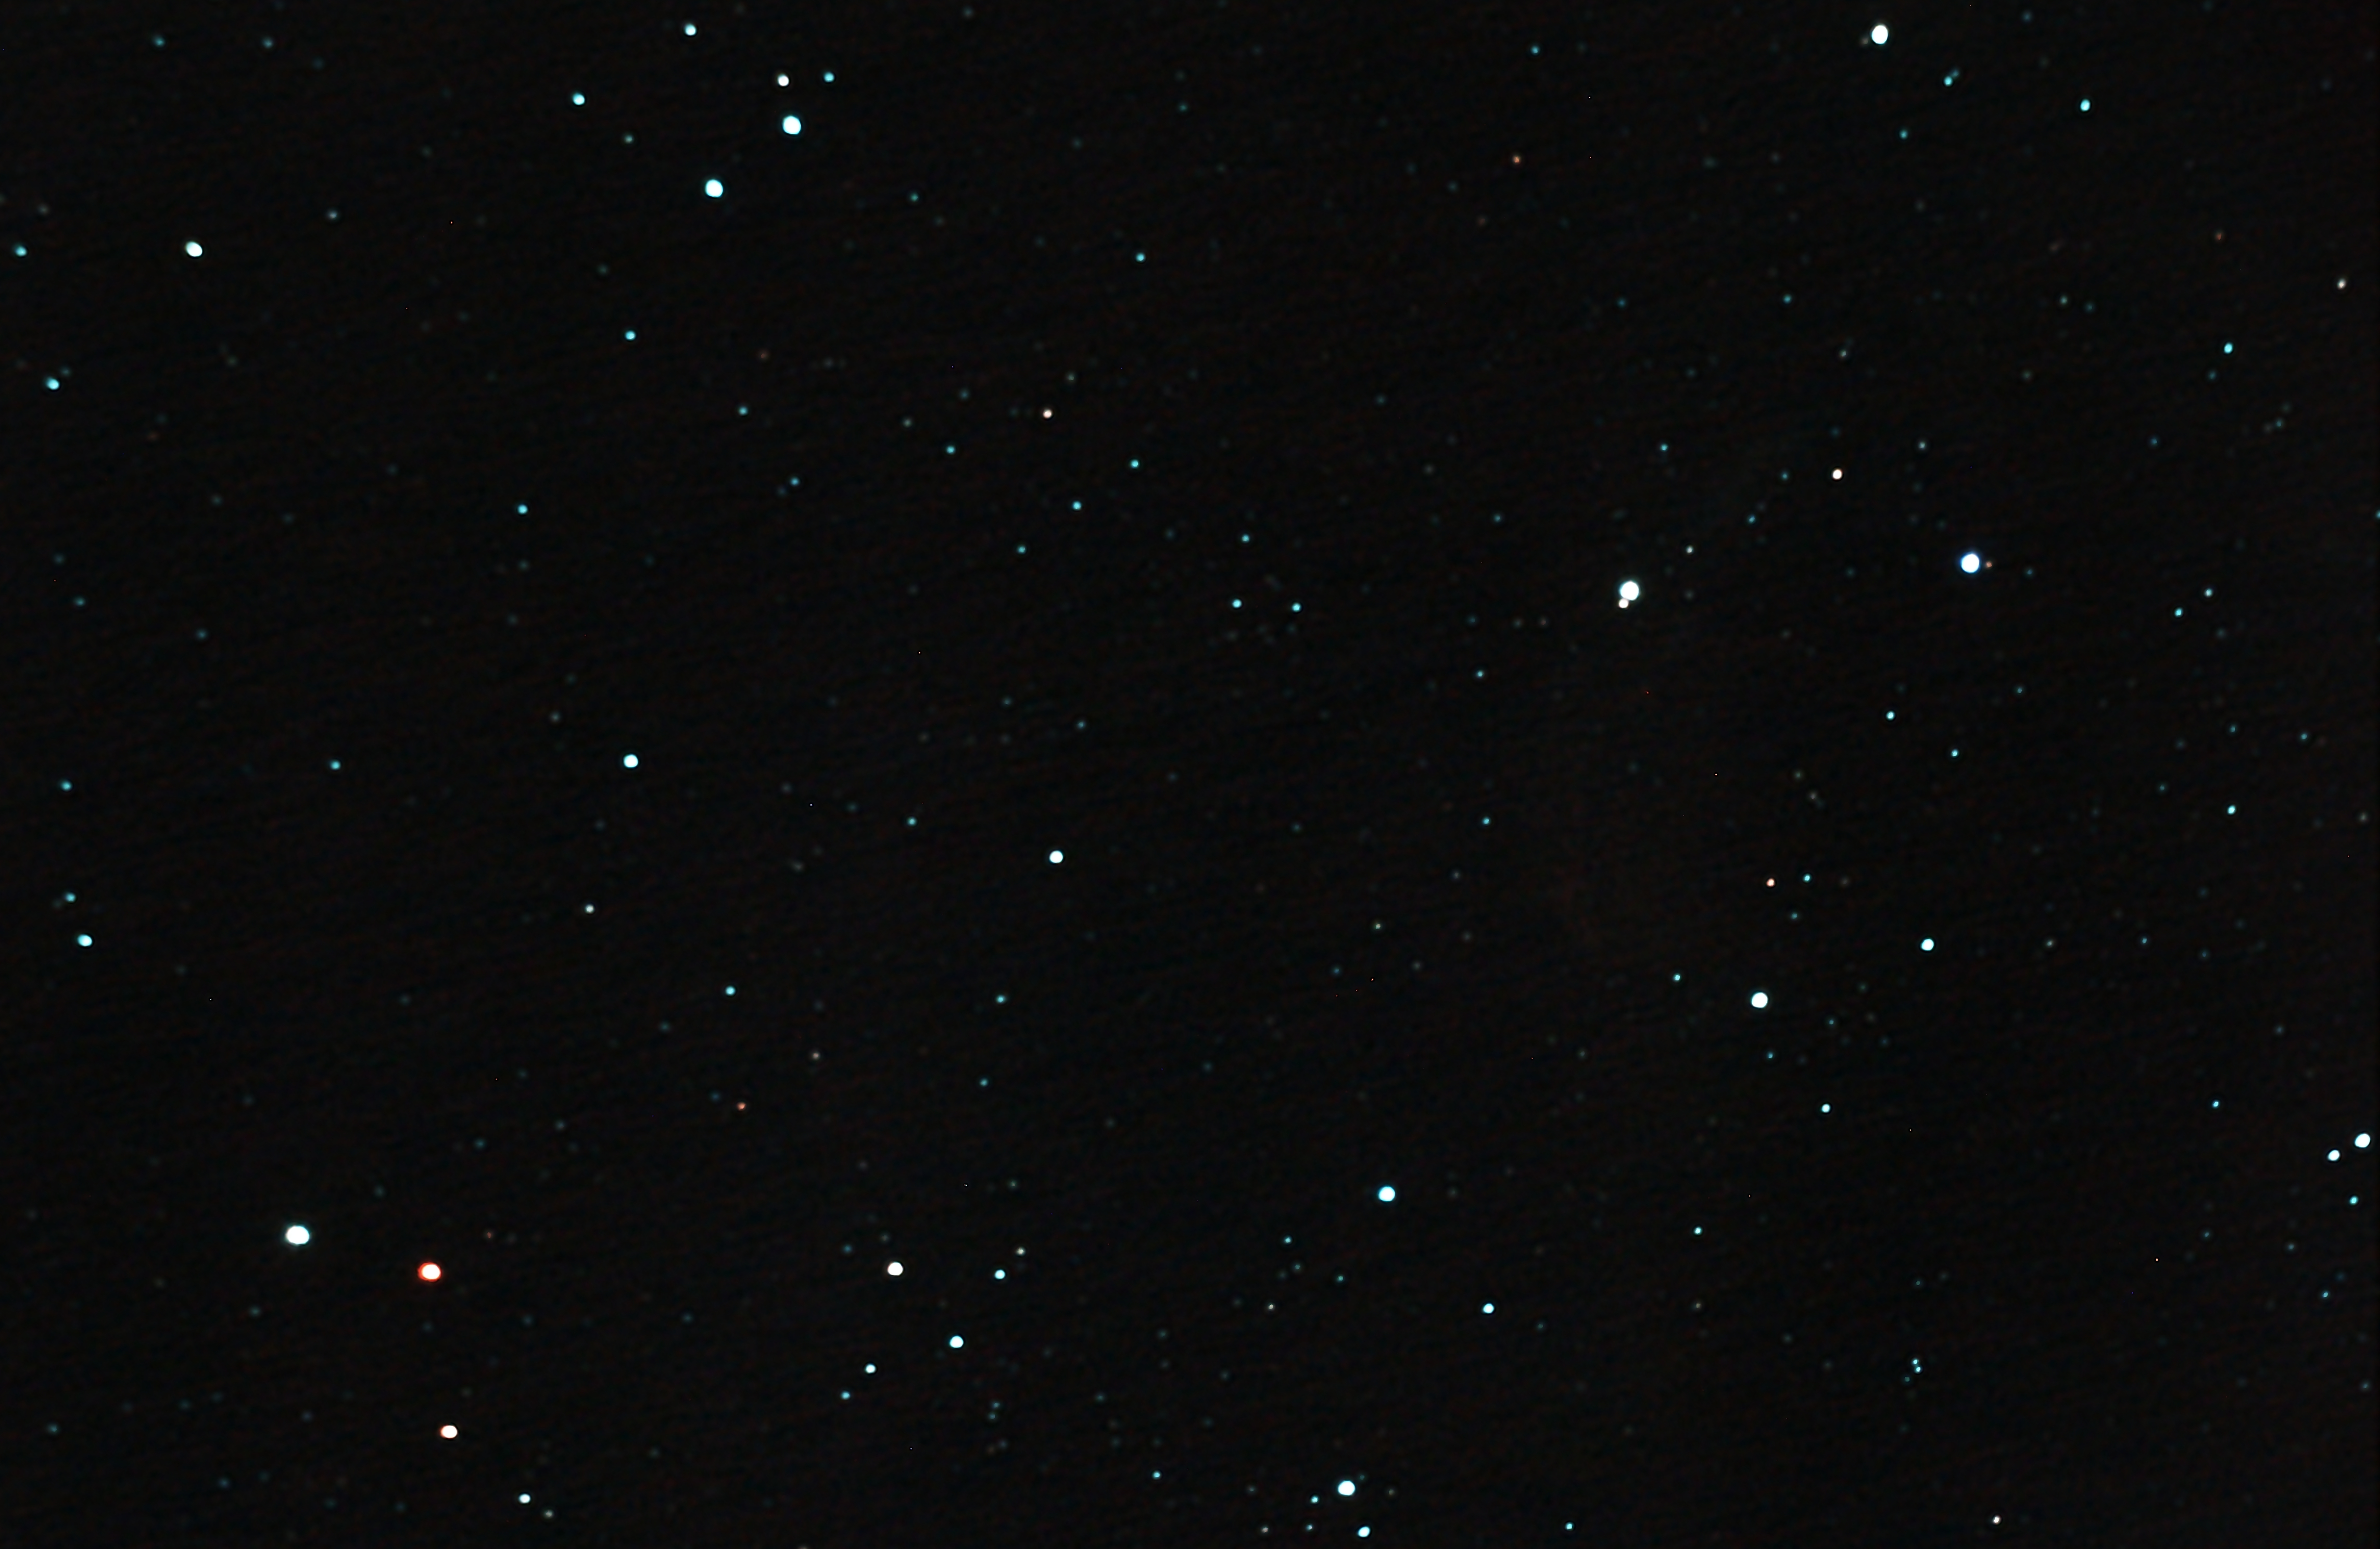
I went out last night to do some more imaging. When I went to start guiding, I noticed my guide camera images looked like:
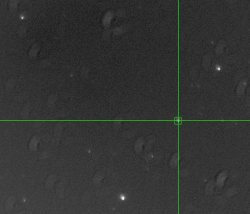
What the heck? Argh!
So I got the lens cleaner kit out today and cleaned the front element of the CT-80 guide scope and the surface of the ZWO ASI290mm guide camera. I reassmebled everything and waited until dark to see if I got the dust removed.
No changed! Bleep!! What the heck?
So if cleaning the front element and the imaging sensor didn't get rid of the dust, where else could it be? And what did I do right before the dust showed up? I remember! I created a new dark library for PHD2 to use with the guide camera. Hmm, could it be? So I deleted the dark library and created a new one.
Yup, the dust is gone! So I had a bad dark library for some reason. Hmm, what did I do when I created it that was different than all of the other times, including the new one today? I know: I made the dark library in the middle of the afternoon! All of the others have been at night. So evidently even though I put the lens cap on the guide scope before creating the dark library, the Sun is bright enough to shine thru what now looks like really small pinholes in the cap. They might not be actual holes but just thin spots that will let the intense Arizona sun shine thru enough to muck up the dark library.
Something to remember for the future!
Fungus Eating Stars I was imaging the Trifid Nebula the other night. When I processed the subs in PixInsight, I got this crud that looks like some fungus eating the stars!
Some weird artifact.
PixInsight's BatchPreprocessing script is using some unknown parameters for integrating the registered subs into the master lights for each channel.
If I do the ImageIntegration by hand, I get a much better result.
Red Vignetting I keep getting red vignetting after doing flats and background neutralization.
I'm not sure what I'm doing wrong.
Time to reach out to the astrophotography community.
I forgot to do ABE (AutomaticBackgroundExtraction) before doing BackgroundNormalization!
M92 After doing M13, I had to do M92 since it was the next one in line.
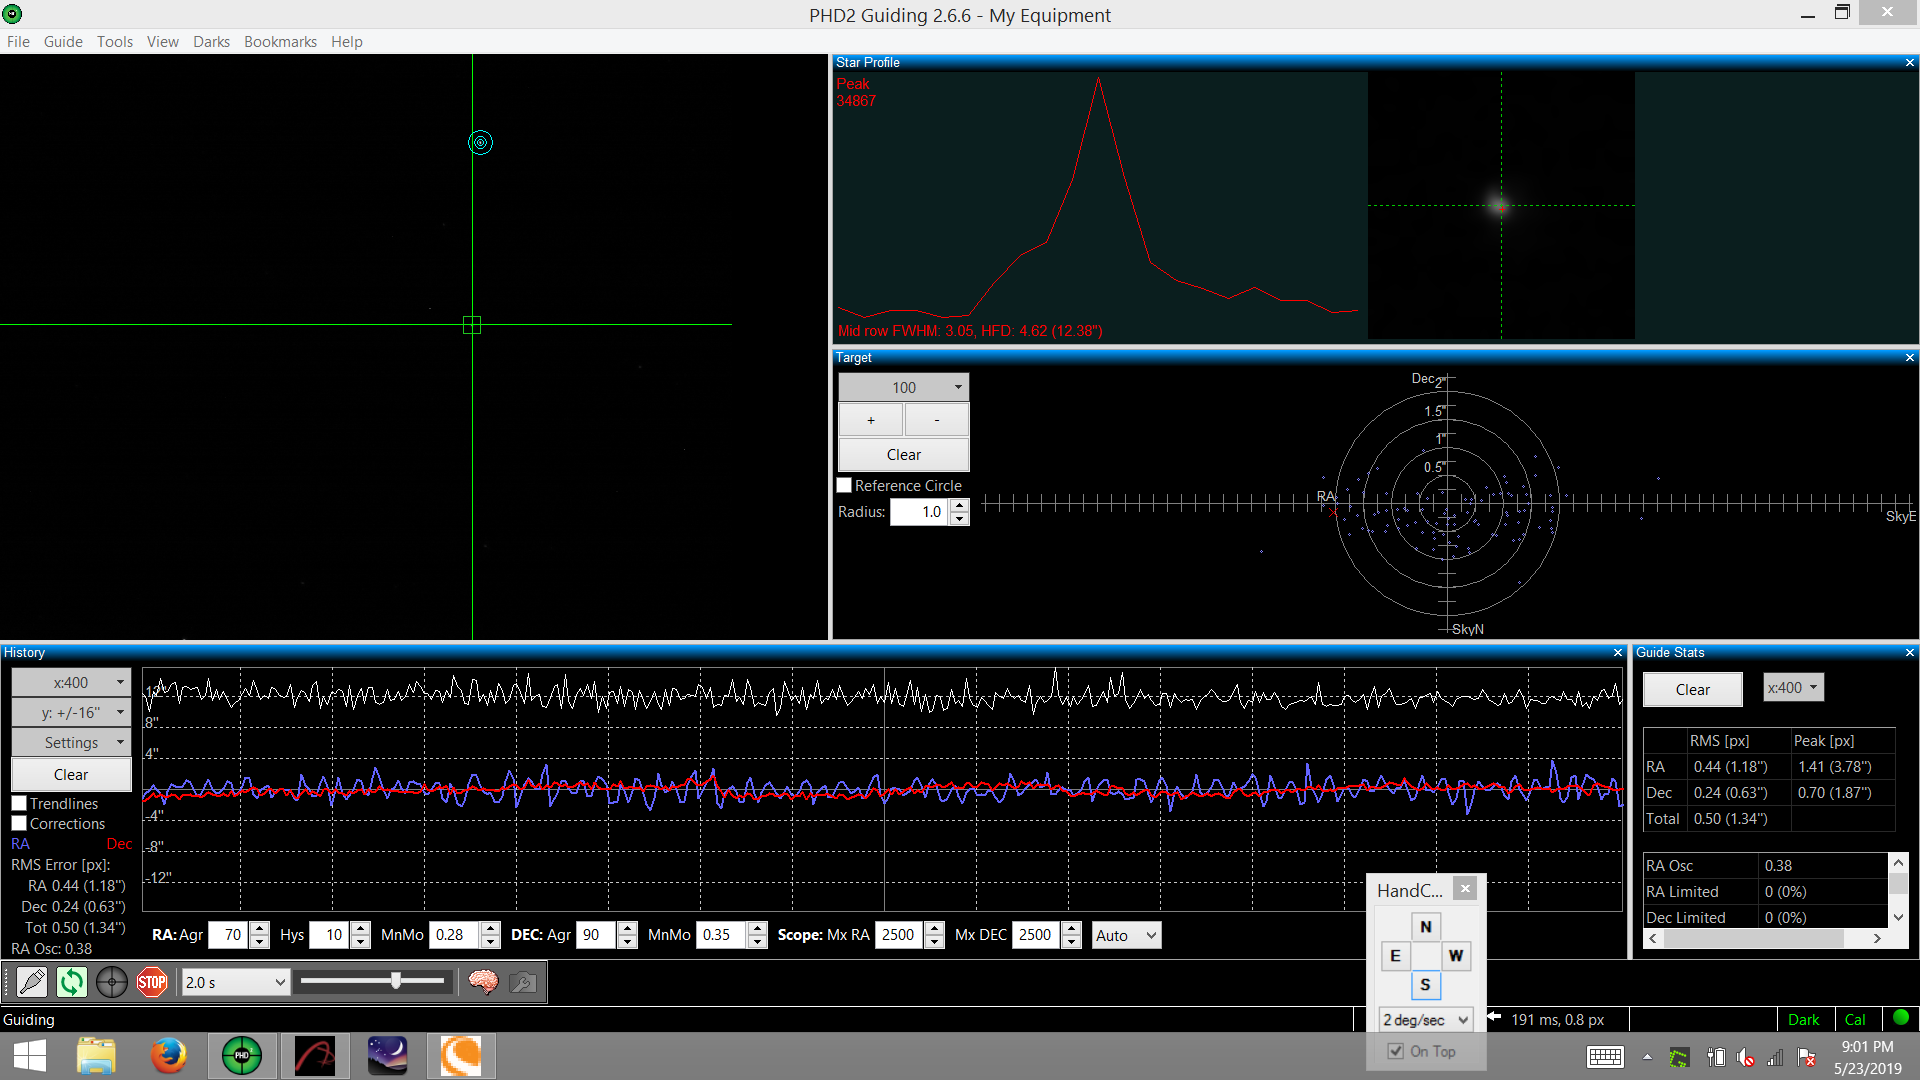
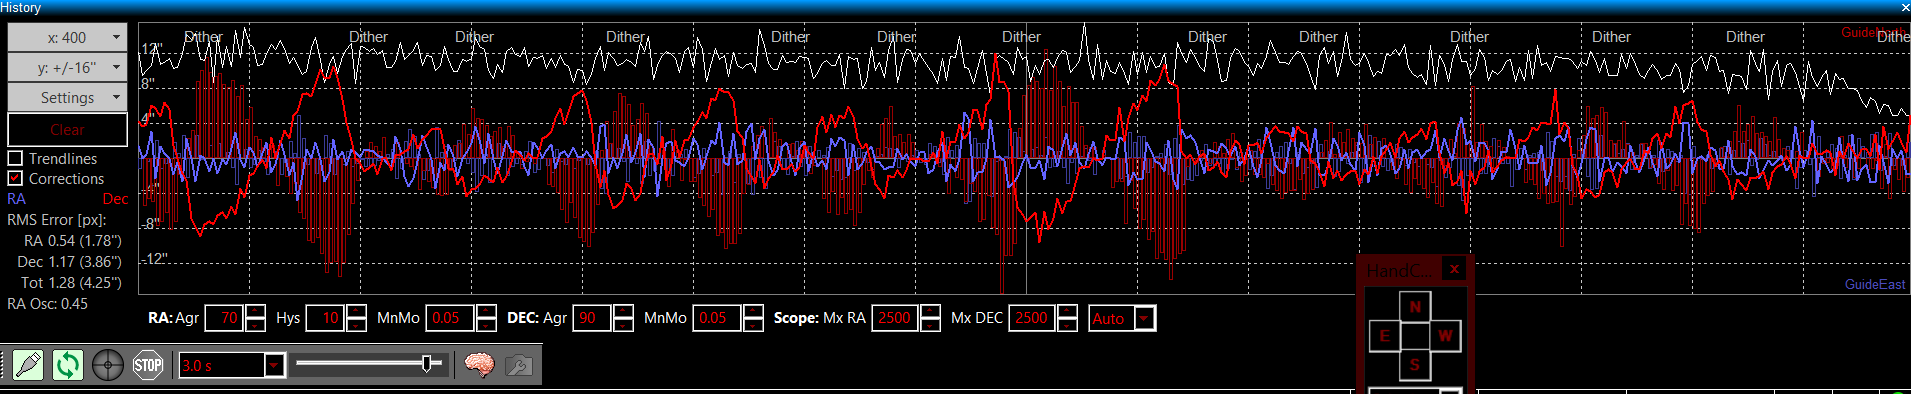
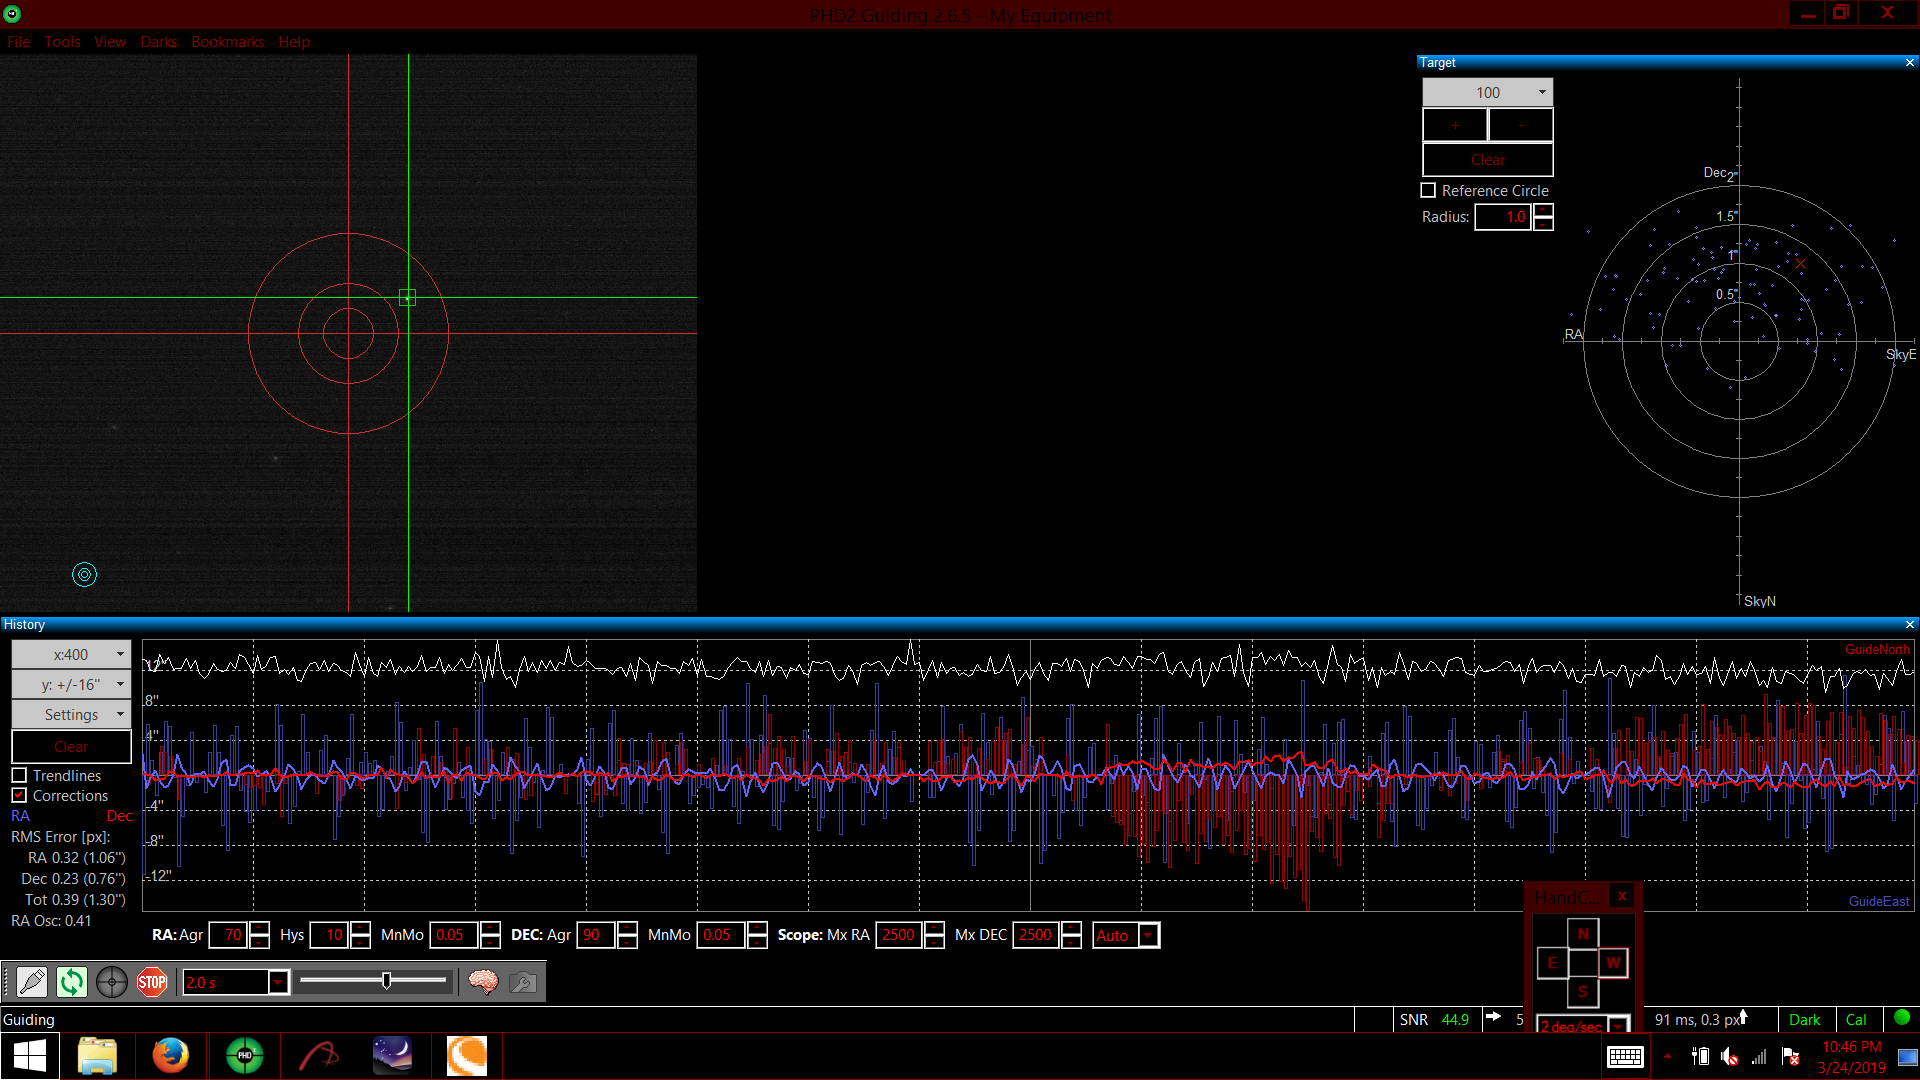
M13 I reset the settings on my AVX's hand controller and realigned the Dec spur gears. That greatly improved the PHD2 guiding as can be seen here. A half pixel RMS error is about as good as I'm going to get from my currect setup. Unfortunately, that's a half pixel on the guide scope, which equates to about a pixel and a half on the main scope. Until I switch to off axis guiding, I'm going to have to live with it. Binning 3x3 should help make the two pixel scales match better, at a lose of resolution in the final images.
The better guiding allowed me to try to takes some images of actually astronomical objects.
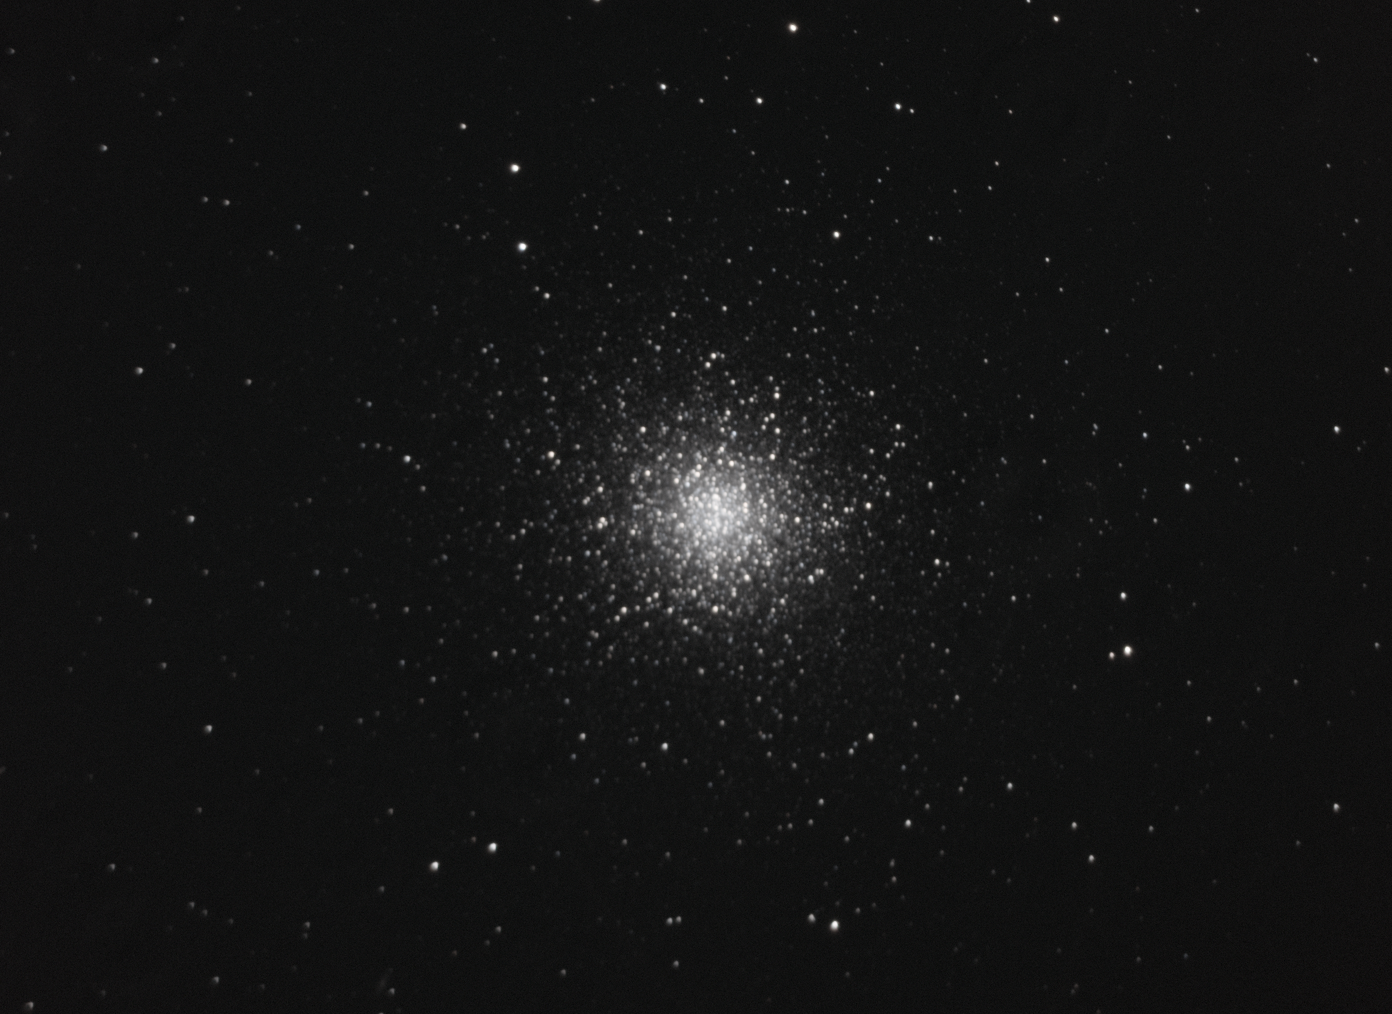
So I aimed for the tried and true M13 globular cluster.
The data came out pretty fine but I had dust spots.
So I went thru the process of creating flats for each channel and used PixInsight's BatchPreproccessing script to generate all of the masters.
I then combined them together using the LRGBCombination process.
That image still has dust spots from the L filter! Argh!
So then I recombined the masters, leaving the L channel out this time.
The results are much better with more pleasing colors.
The concensus on CloudyNight's is that the filter wheel was not returnign to the exact same spot due to the wheel supporting bidirectional travel. The suggestion was to force it to use only a single direction. That helps about half the time. The same night that I took the M13 image, I also took one of NGC 6888 - the Crescent Nebula. It doesn't have a dust spots left from the L filter! Although if I leave the L channel out again, I do get more staturated colors.
And that brings me full circle. It was the Crescent Nebula that started me on this whole astrophotography journey!
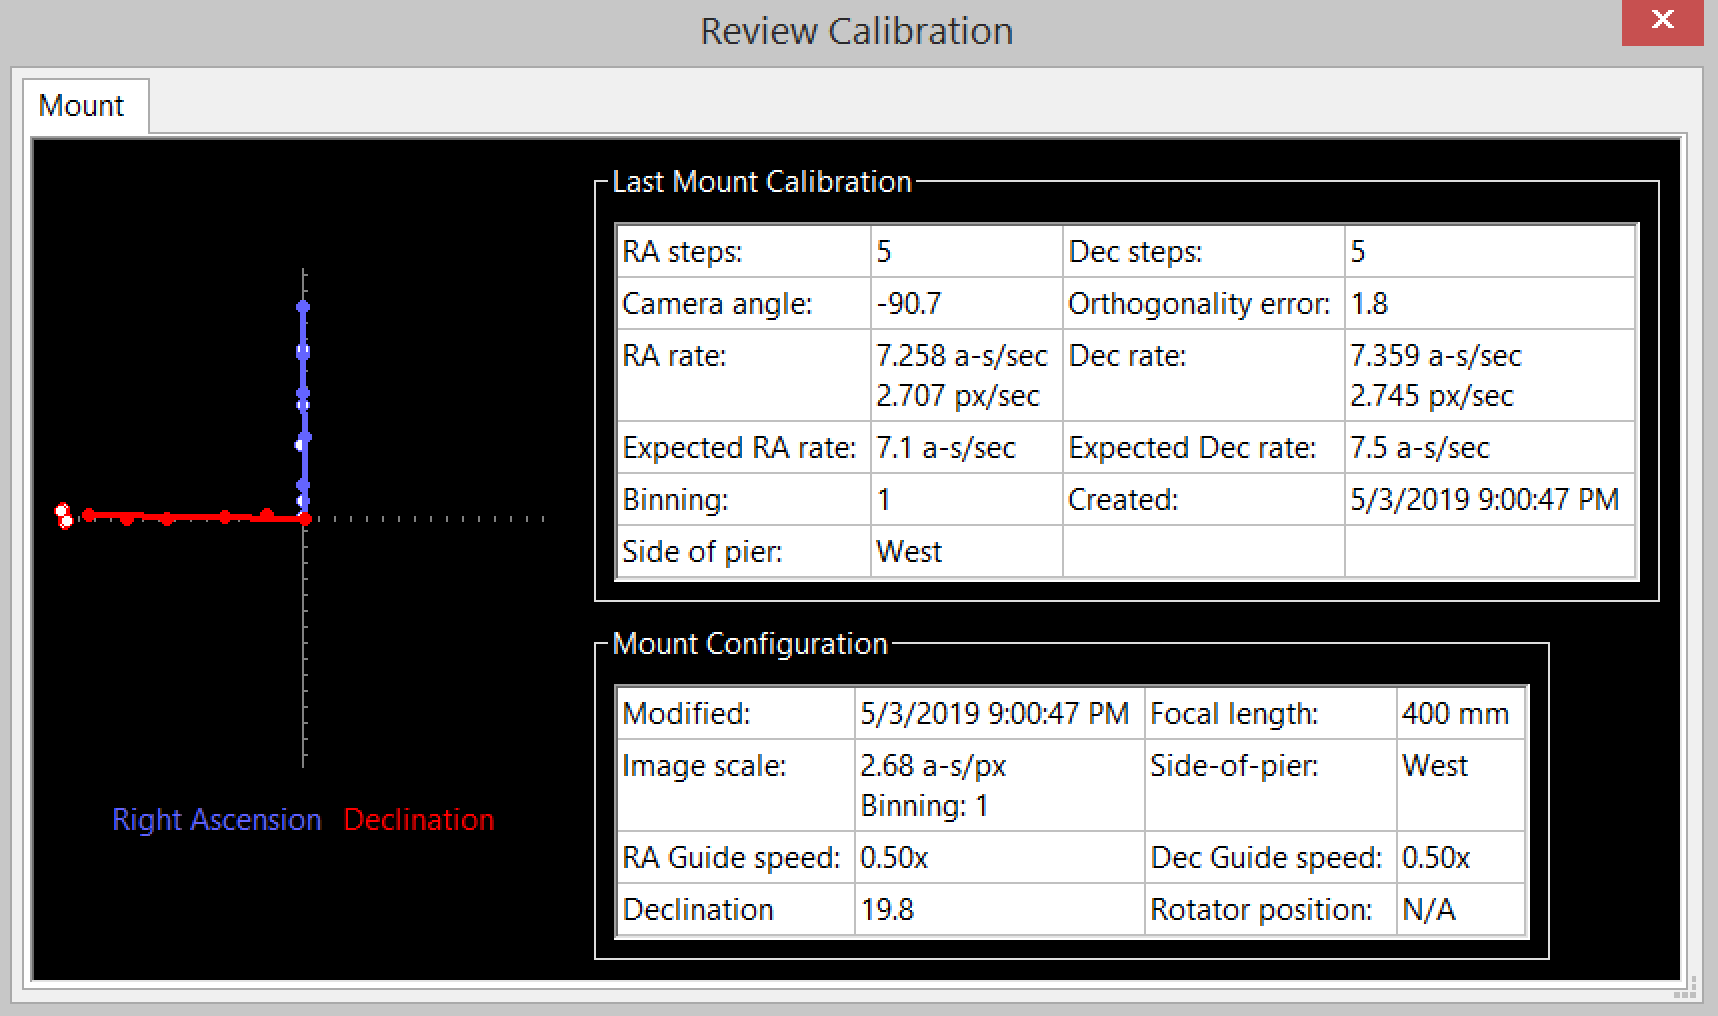
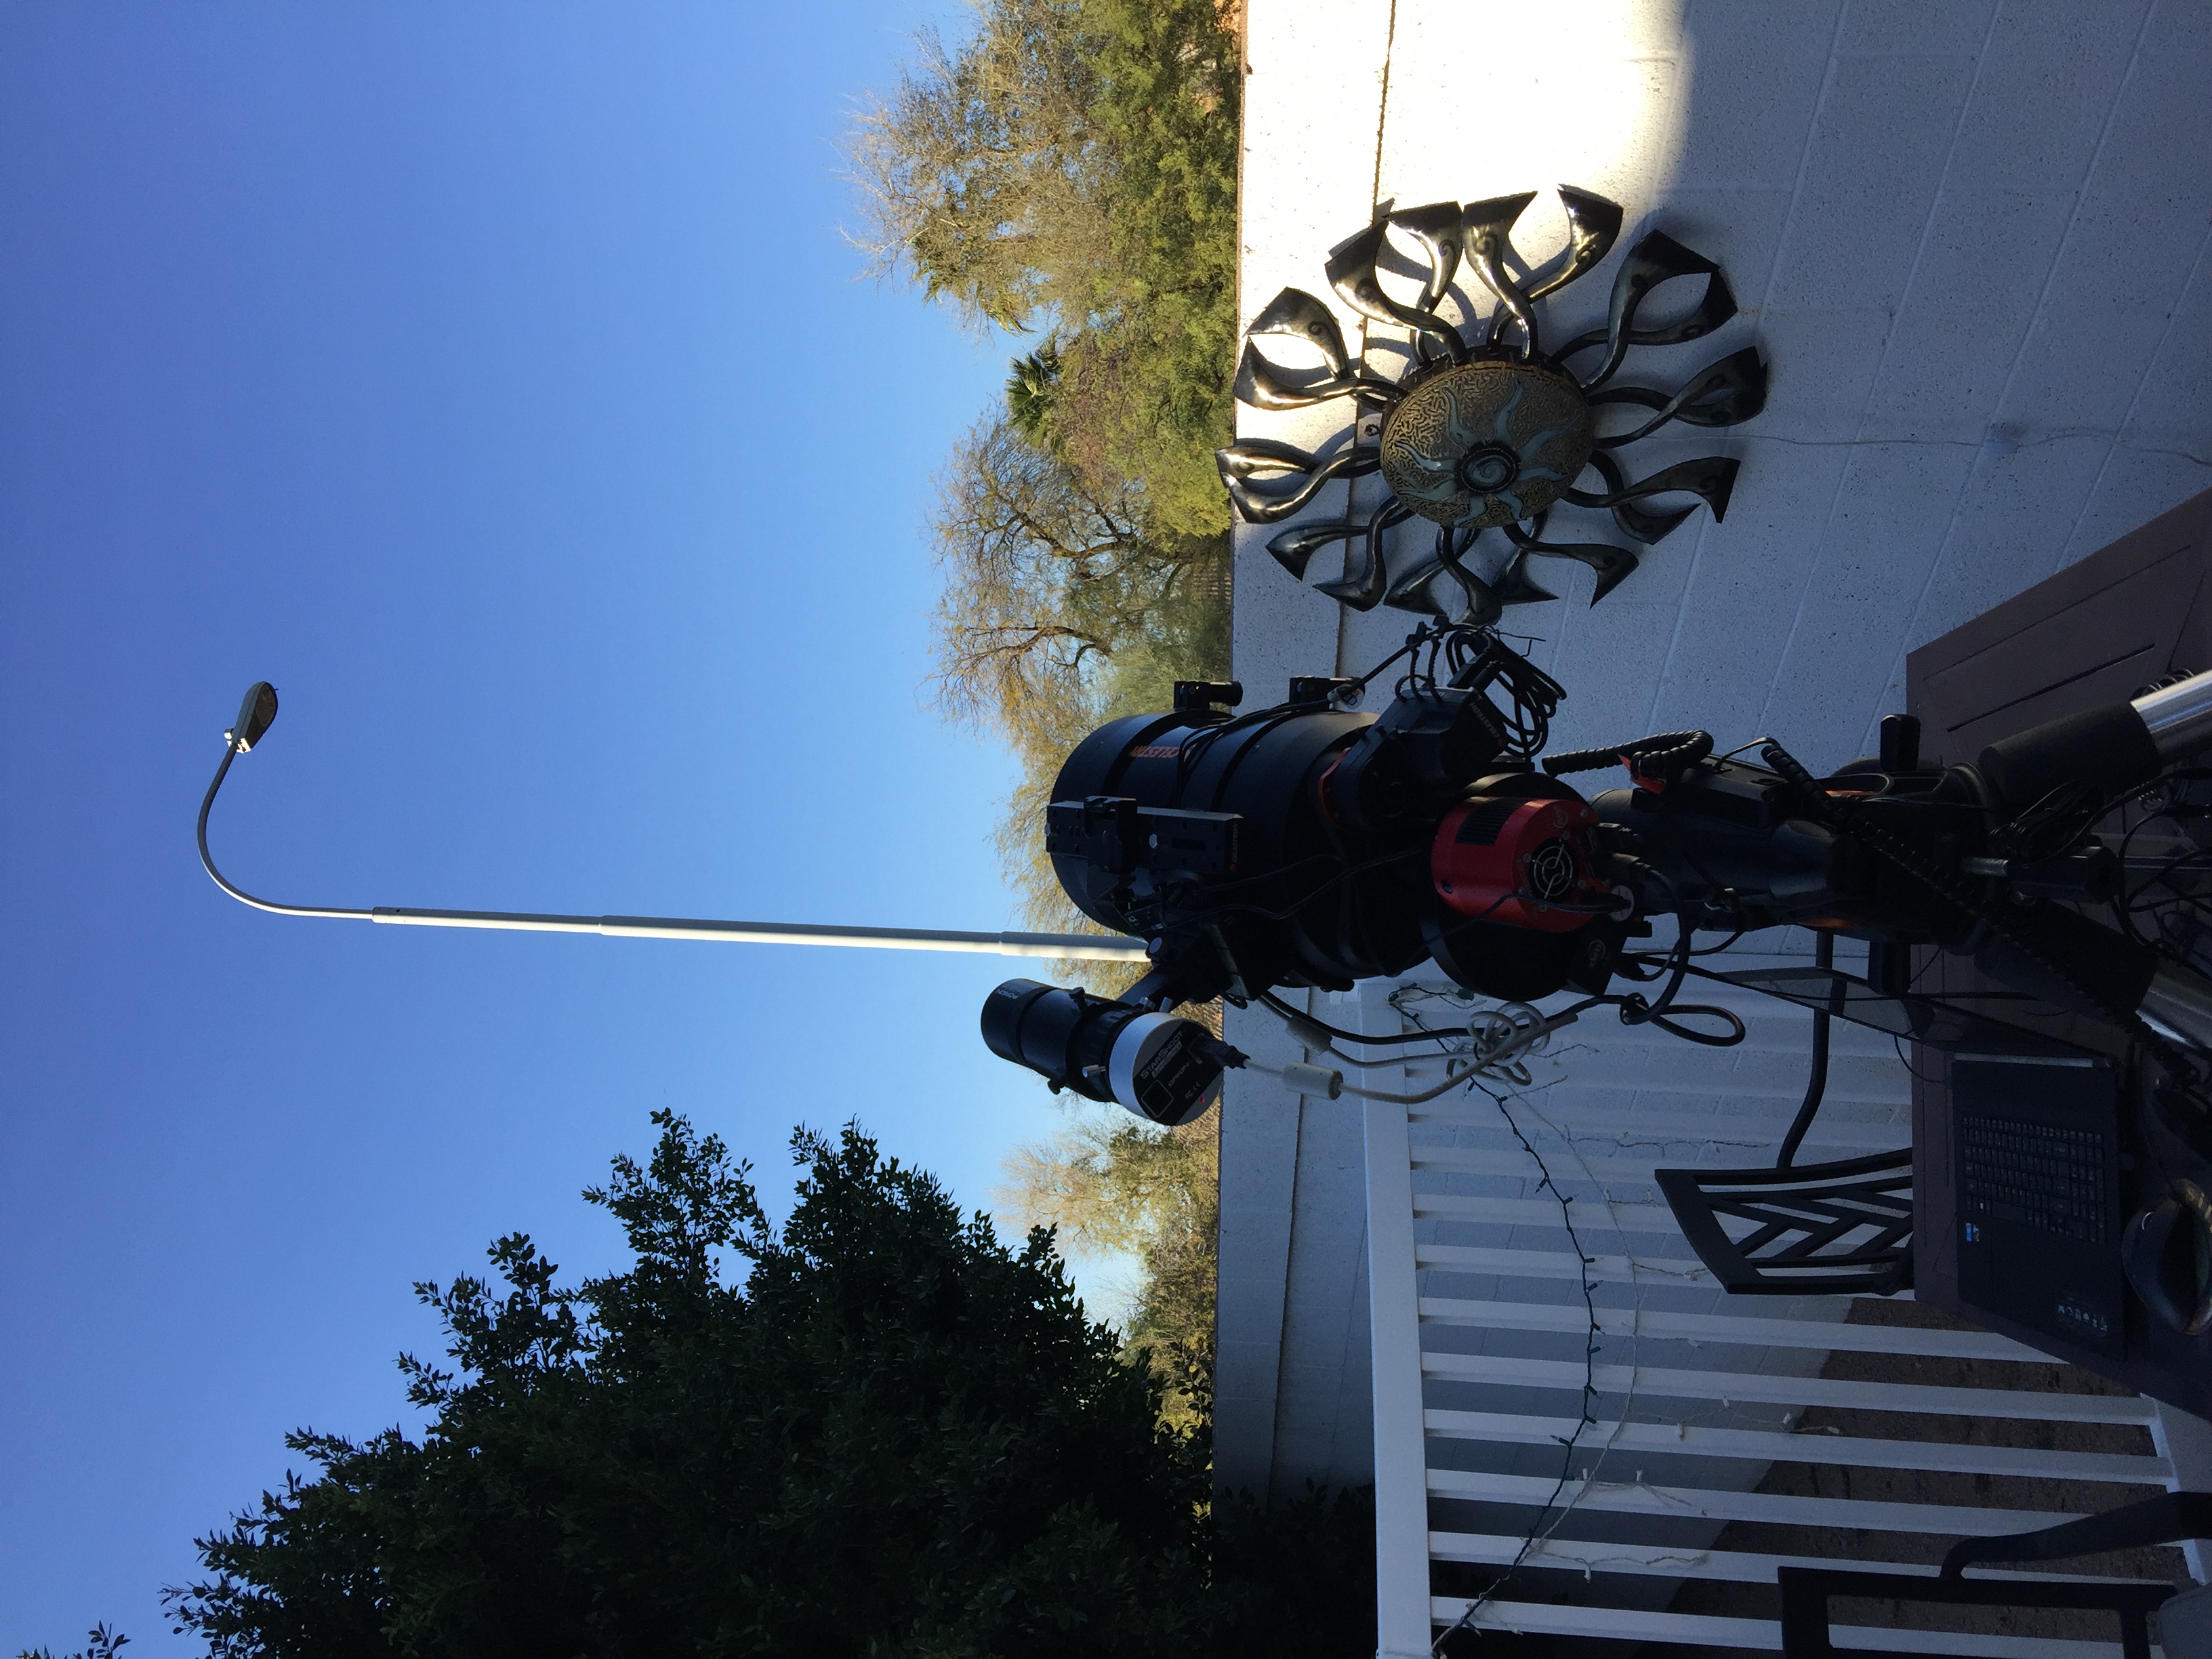
More guiding In order to try to get better guiding result, I chnaged my guiding scope to an Orion CT-80 with a 400mm focal length. It's brighter and has alonger focal length than my old Orion 50mm with a 2X Barlow on it. It's a lot bigger scope than I had anticipated!
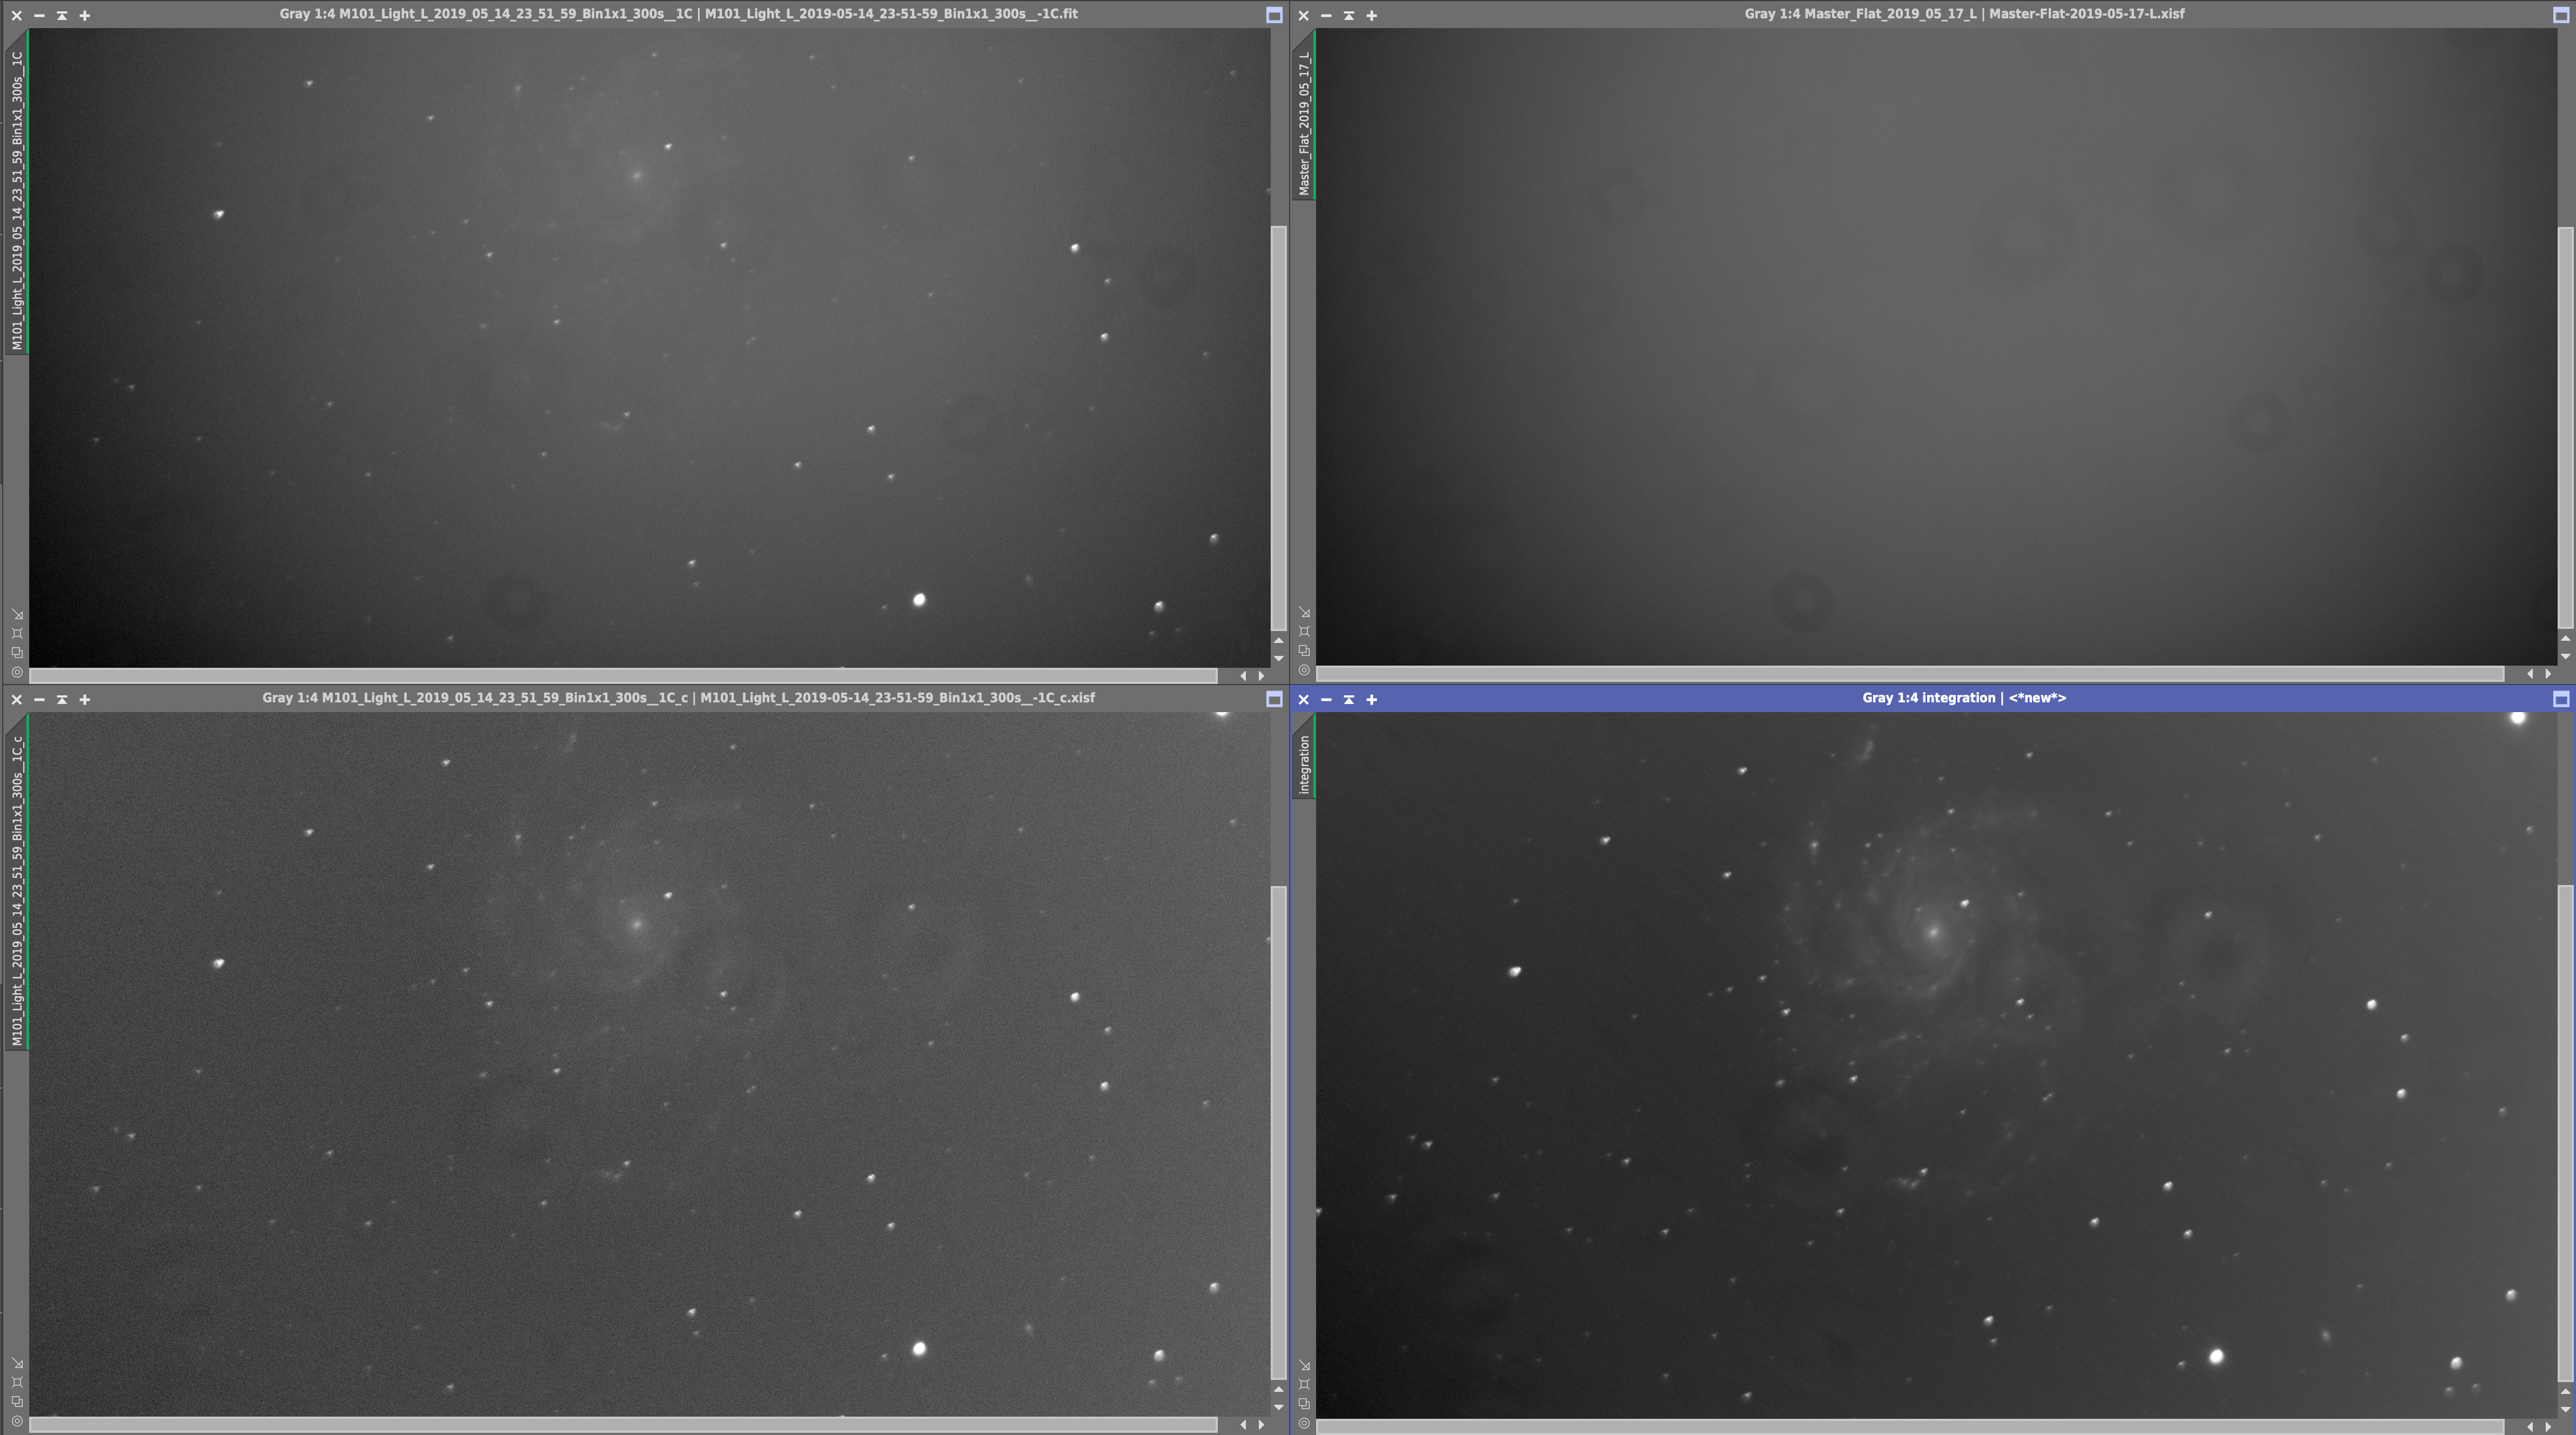
After doing a drift alignment on Friday night, I attempted to get PHD2 to calibrate my new setup. The calibration review looks good except all of the Dec return data points are stuck on the left end of the axis. And yes, PHD2 did give me an alert about no south movement being detected. It seems I have a severe backlash issue with my Declination axis. Everything points to this being a hardware issue with my Celestron AVX mount.
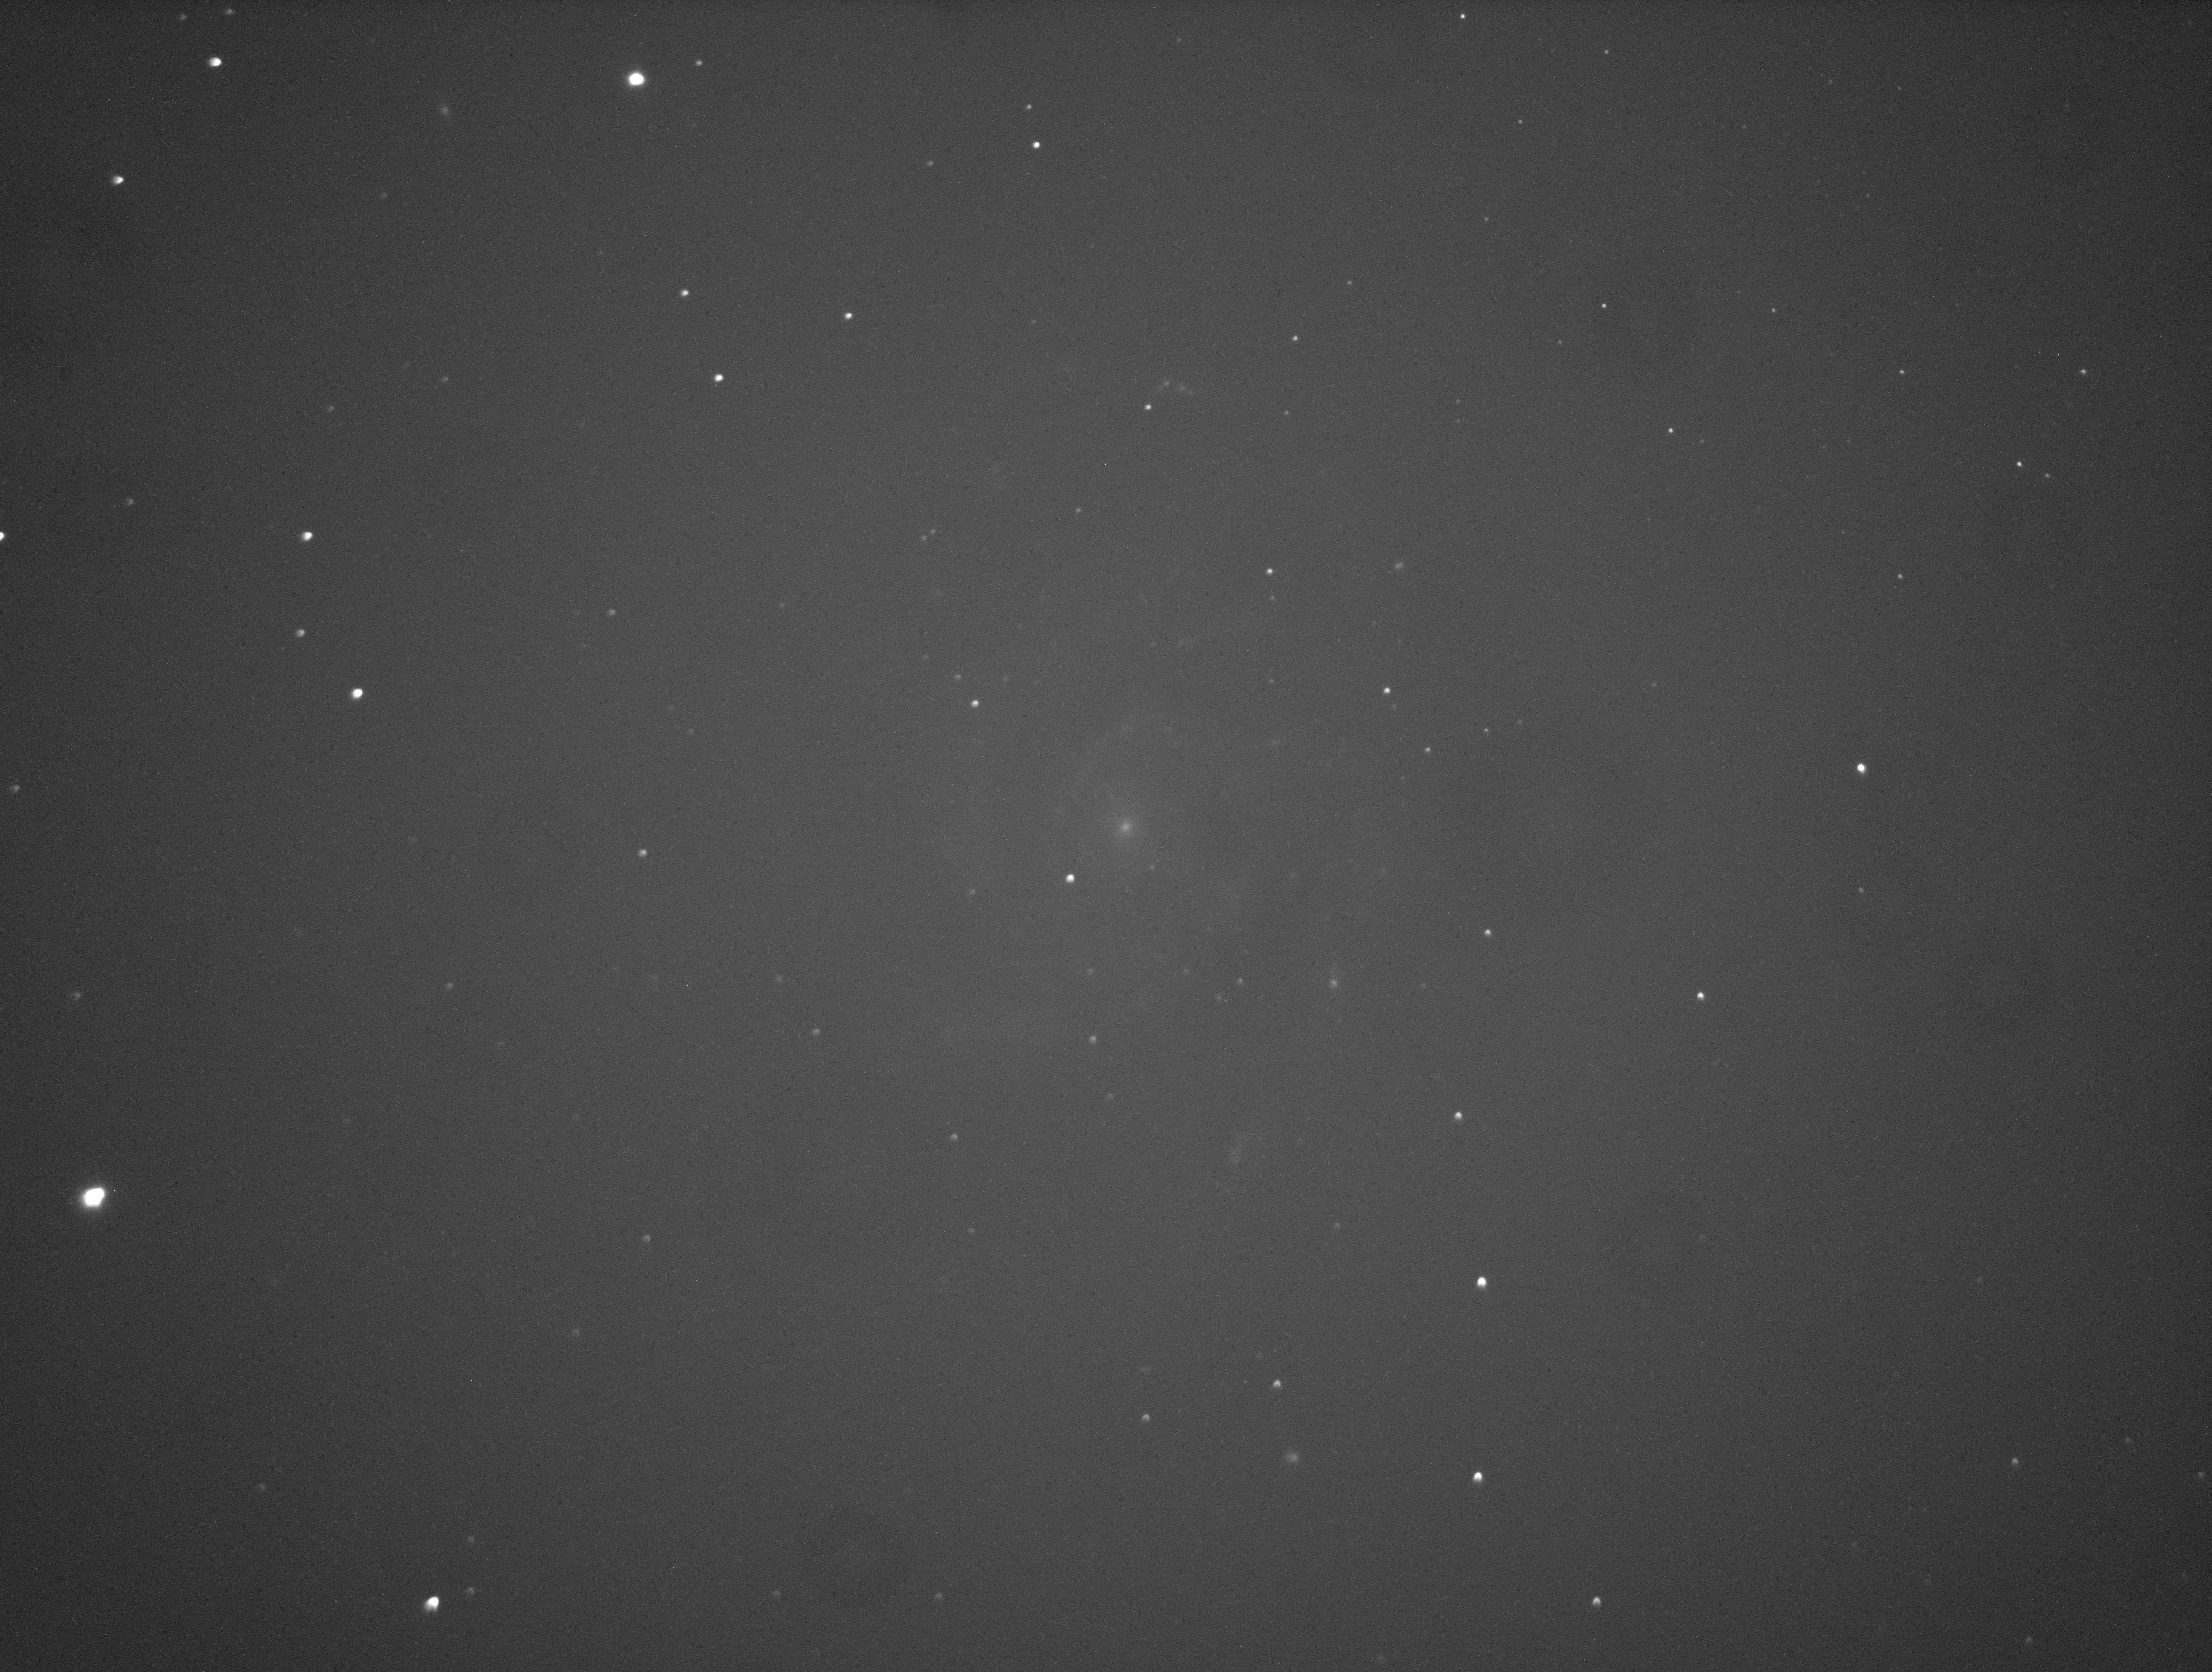
But despite the Dec issues, I went a head and did some 5 minute exposures of M101. The tracking in the subframes looked pretty good, especially in RA. The Dec history graph was showing too much jitter of up to 4 arc seconds on ocassion. It also appeared that PHD2 was having to work a lot harder to keep Dec under control with frequent corrections. A lot more frequent and more intense than what it needed for the RA axis. But despite all of that, this is some of the best and longest tracking I've attempted so far!
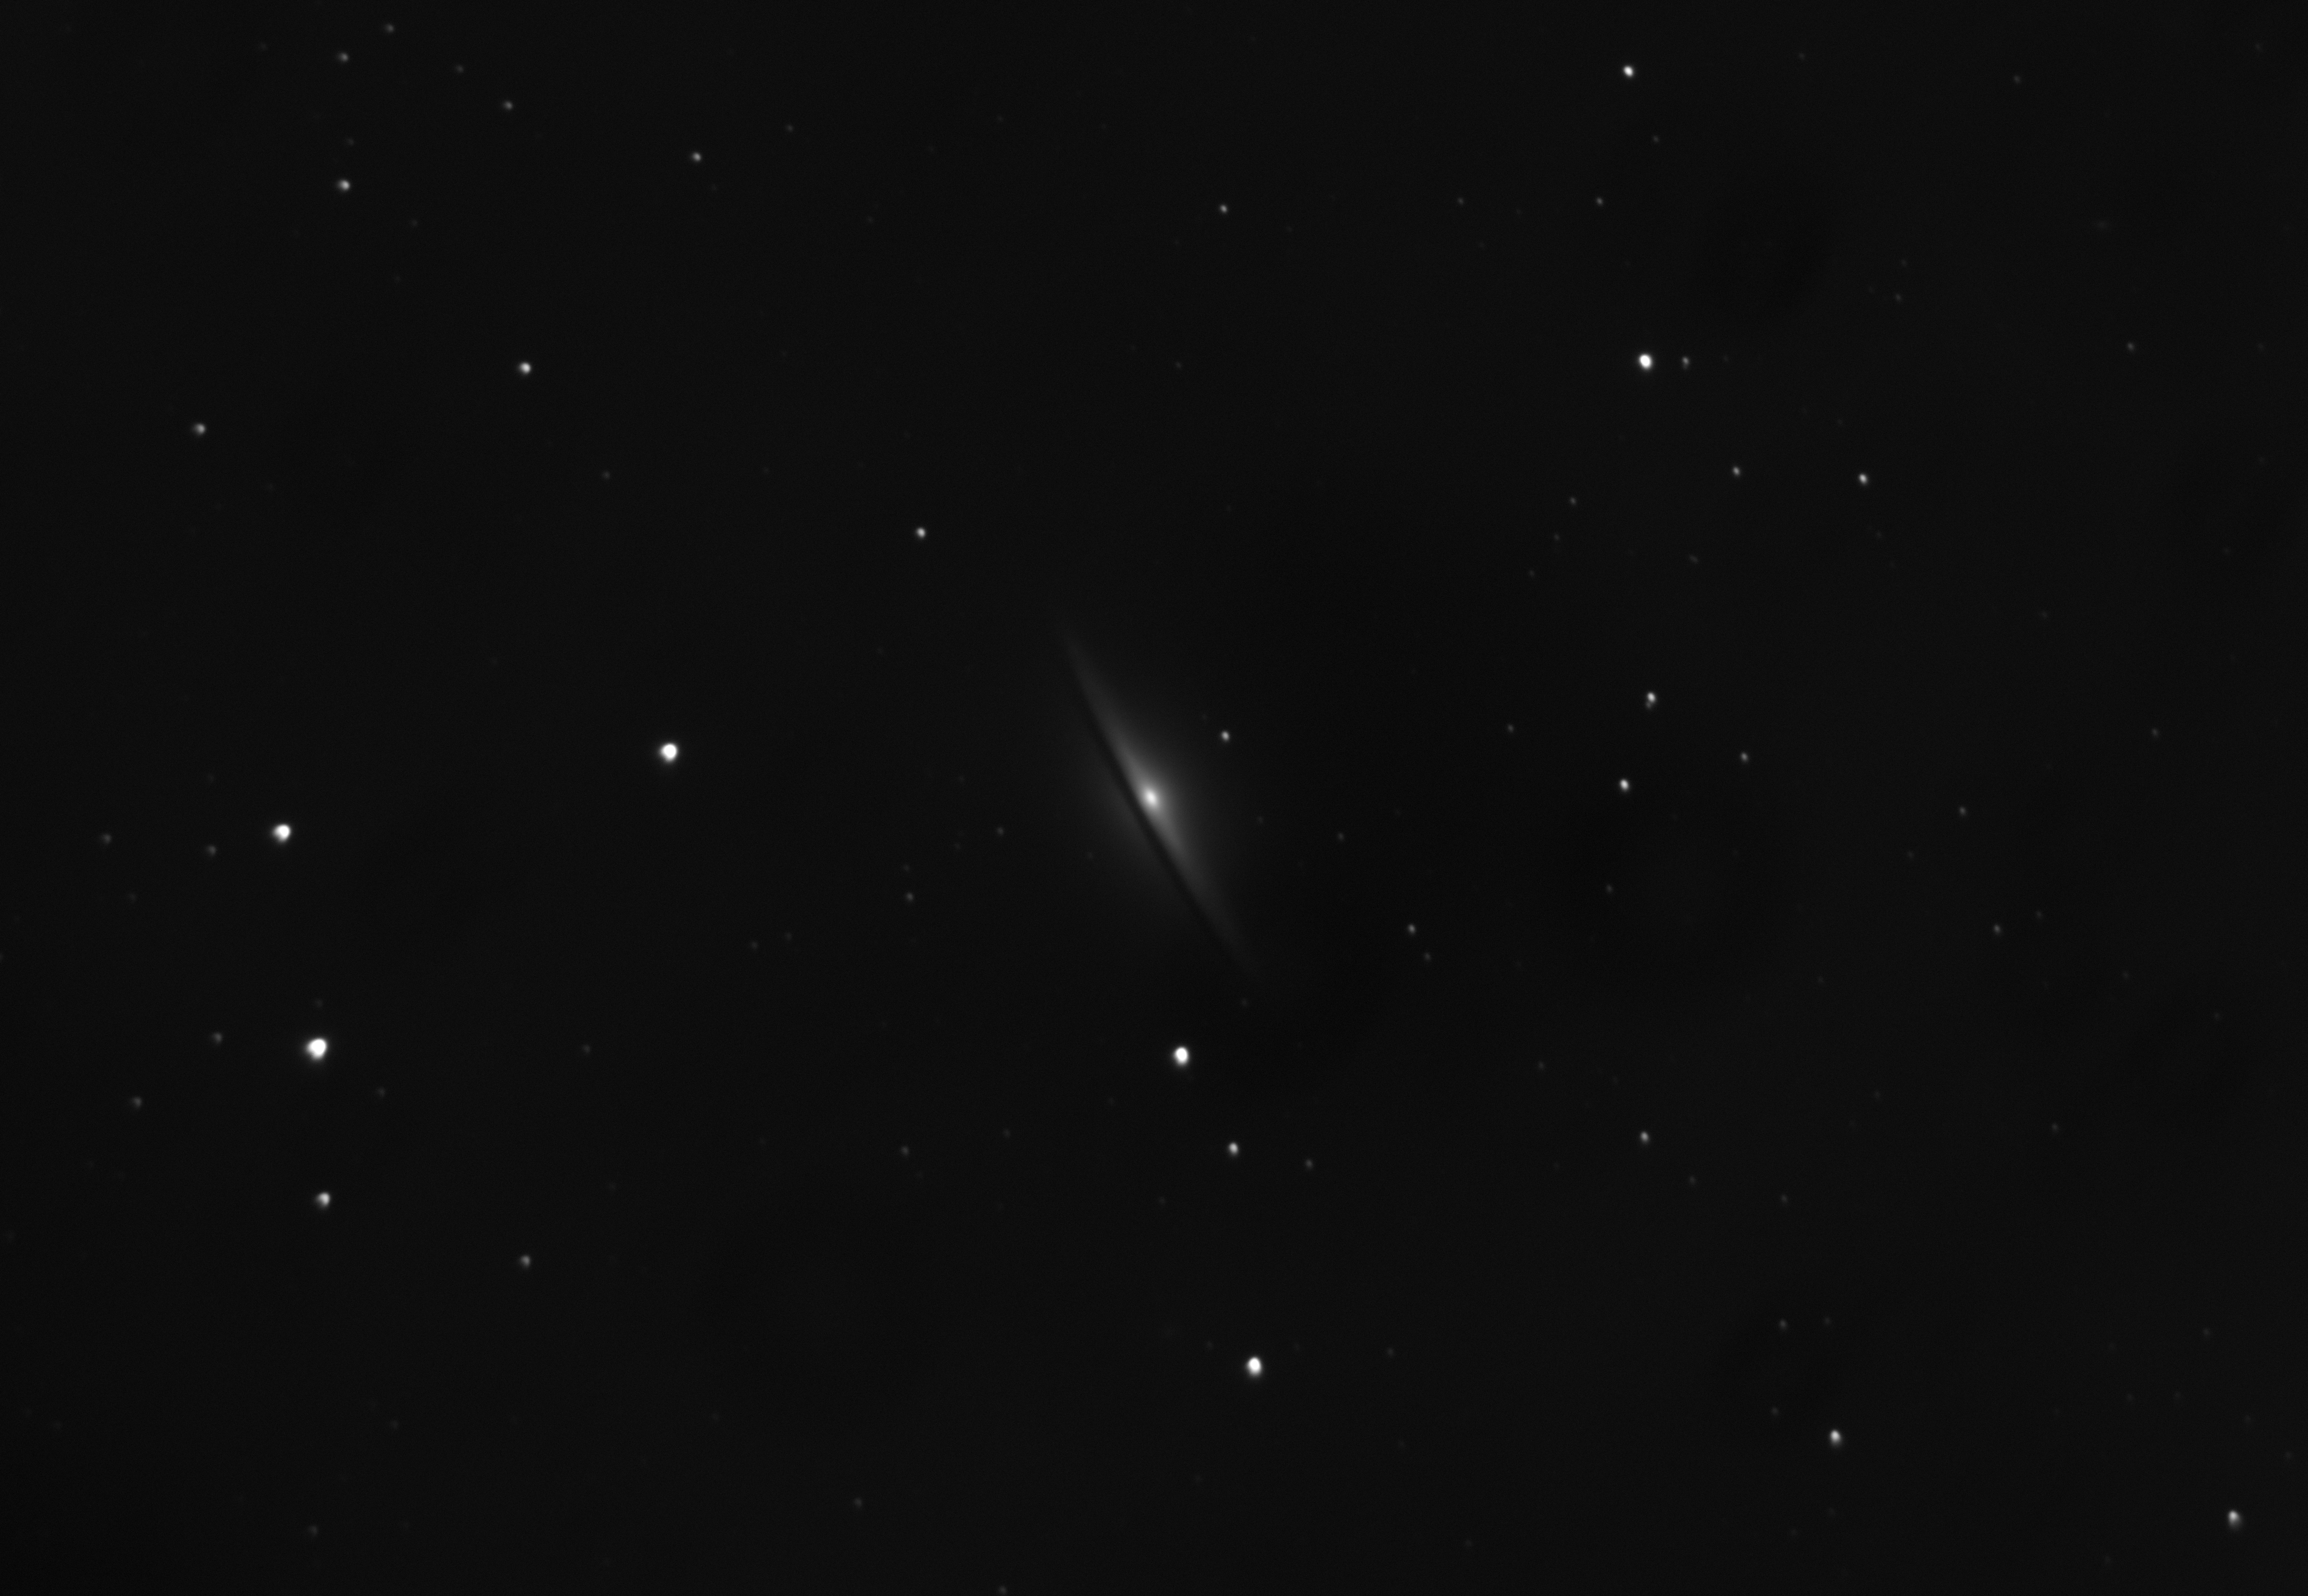
M104 Mono Here is a mono image of M104, also know as the Sombrero Nebula. This is thirty 90 second frames stacked together.
AVX Pier Adapter Here is a design for an adapter for my Celestron AVX mount to a permanent pier. There will be a bottom plate that this adapter bolts to thru the 4 outer 1/2" holes in this plate. Rev B is made out of two pieces.
My guiding typically sucks. It suffers from a sawtooth oscillation as shown here.
After some discussions with the AZ-Observing crowd, I decided I needed to learn how to do "drift alignment" in PHD2 since I can't see Polaris from my backyard.
I followed this PHD2 Drift Alignment Tool tutorial.
After some false starts because I was trying to start guiding before invoking the tool, I got much better results.
I also decided to train the PEC (Periodic Error Correction) of my AVX mount to try to minimize the guiding error.
I followed this CloudyNights post.
That was straight forward other than finding PEC Tool on Celestron's website.
Their search function wasn't able to find it no matter what I searched for.
So I went to the Downloads page and use my browser's text search.
It found PEC Tool right off the bat!
After doing the drift alignment and training the AVX mount's PEC, I got much better better.
This is with a single PEC training run.
One of these nights, I'll retrain it using PEC Tool to average 5 or 6 runs.
That's reported to give a much better characterization of the worm gear's periodic error.
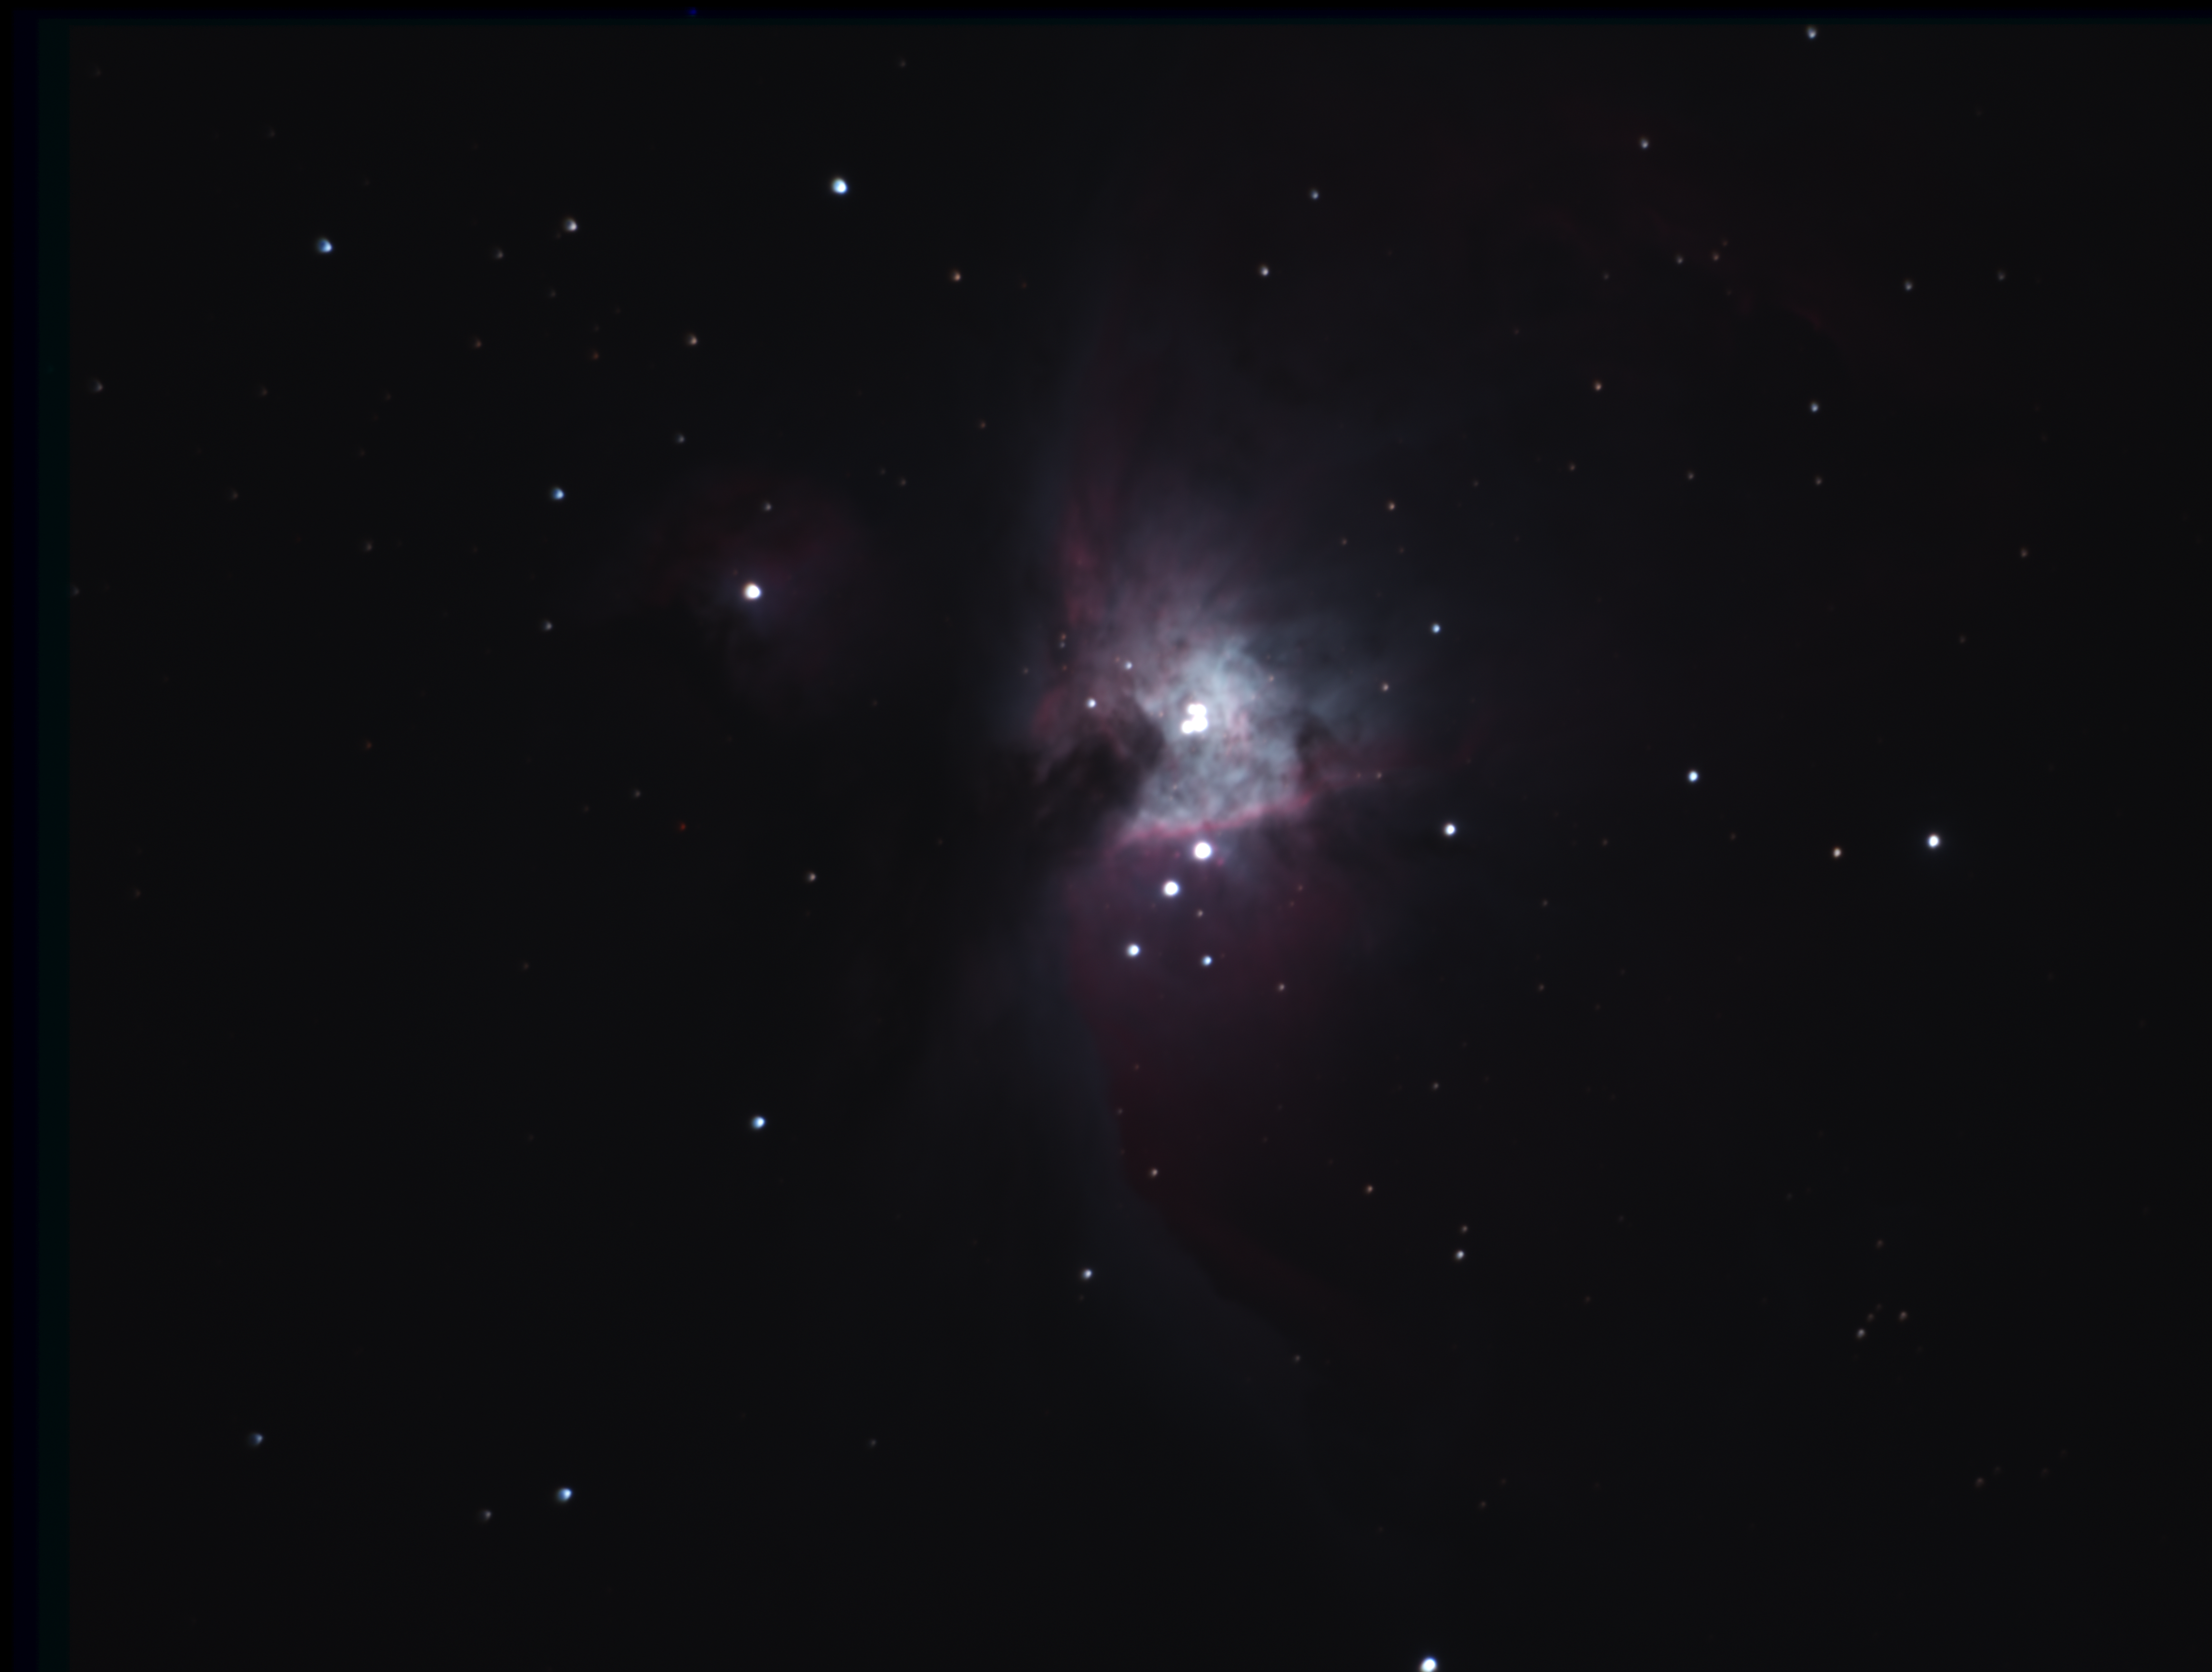
M42 Orion 20190227 - A reshot Orion with PHD2 guiding working. I think it's a much better image than last month's. This is composed of fifteen 90 seconds exposures for each RGB channel. Or increase the contrast a bit more.
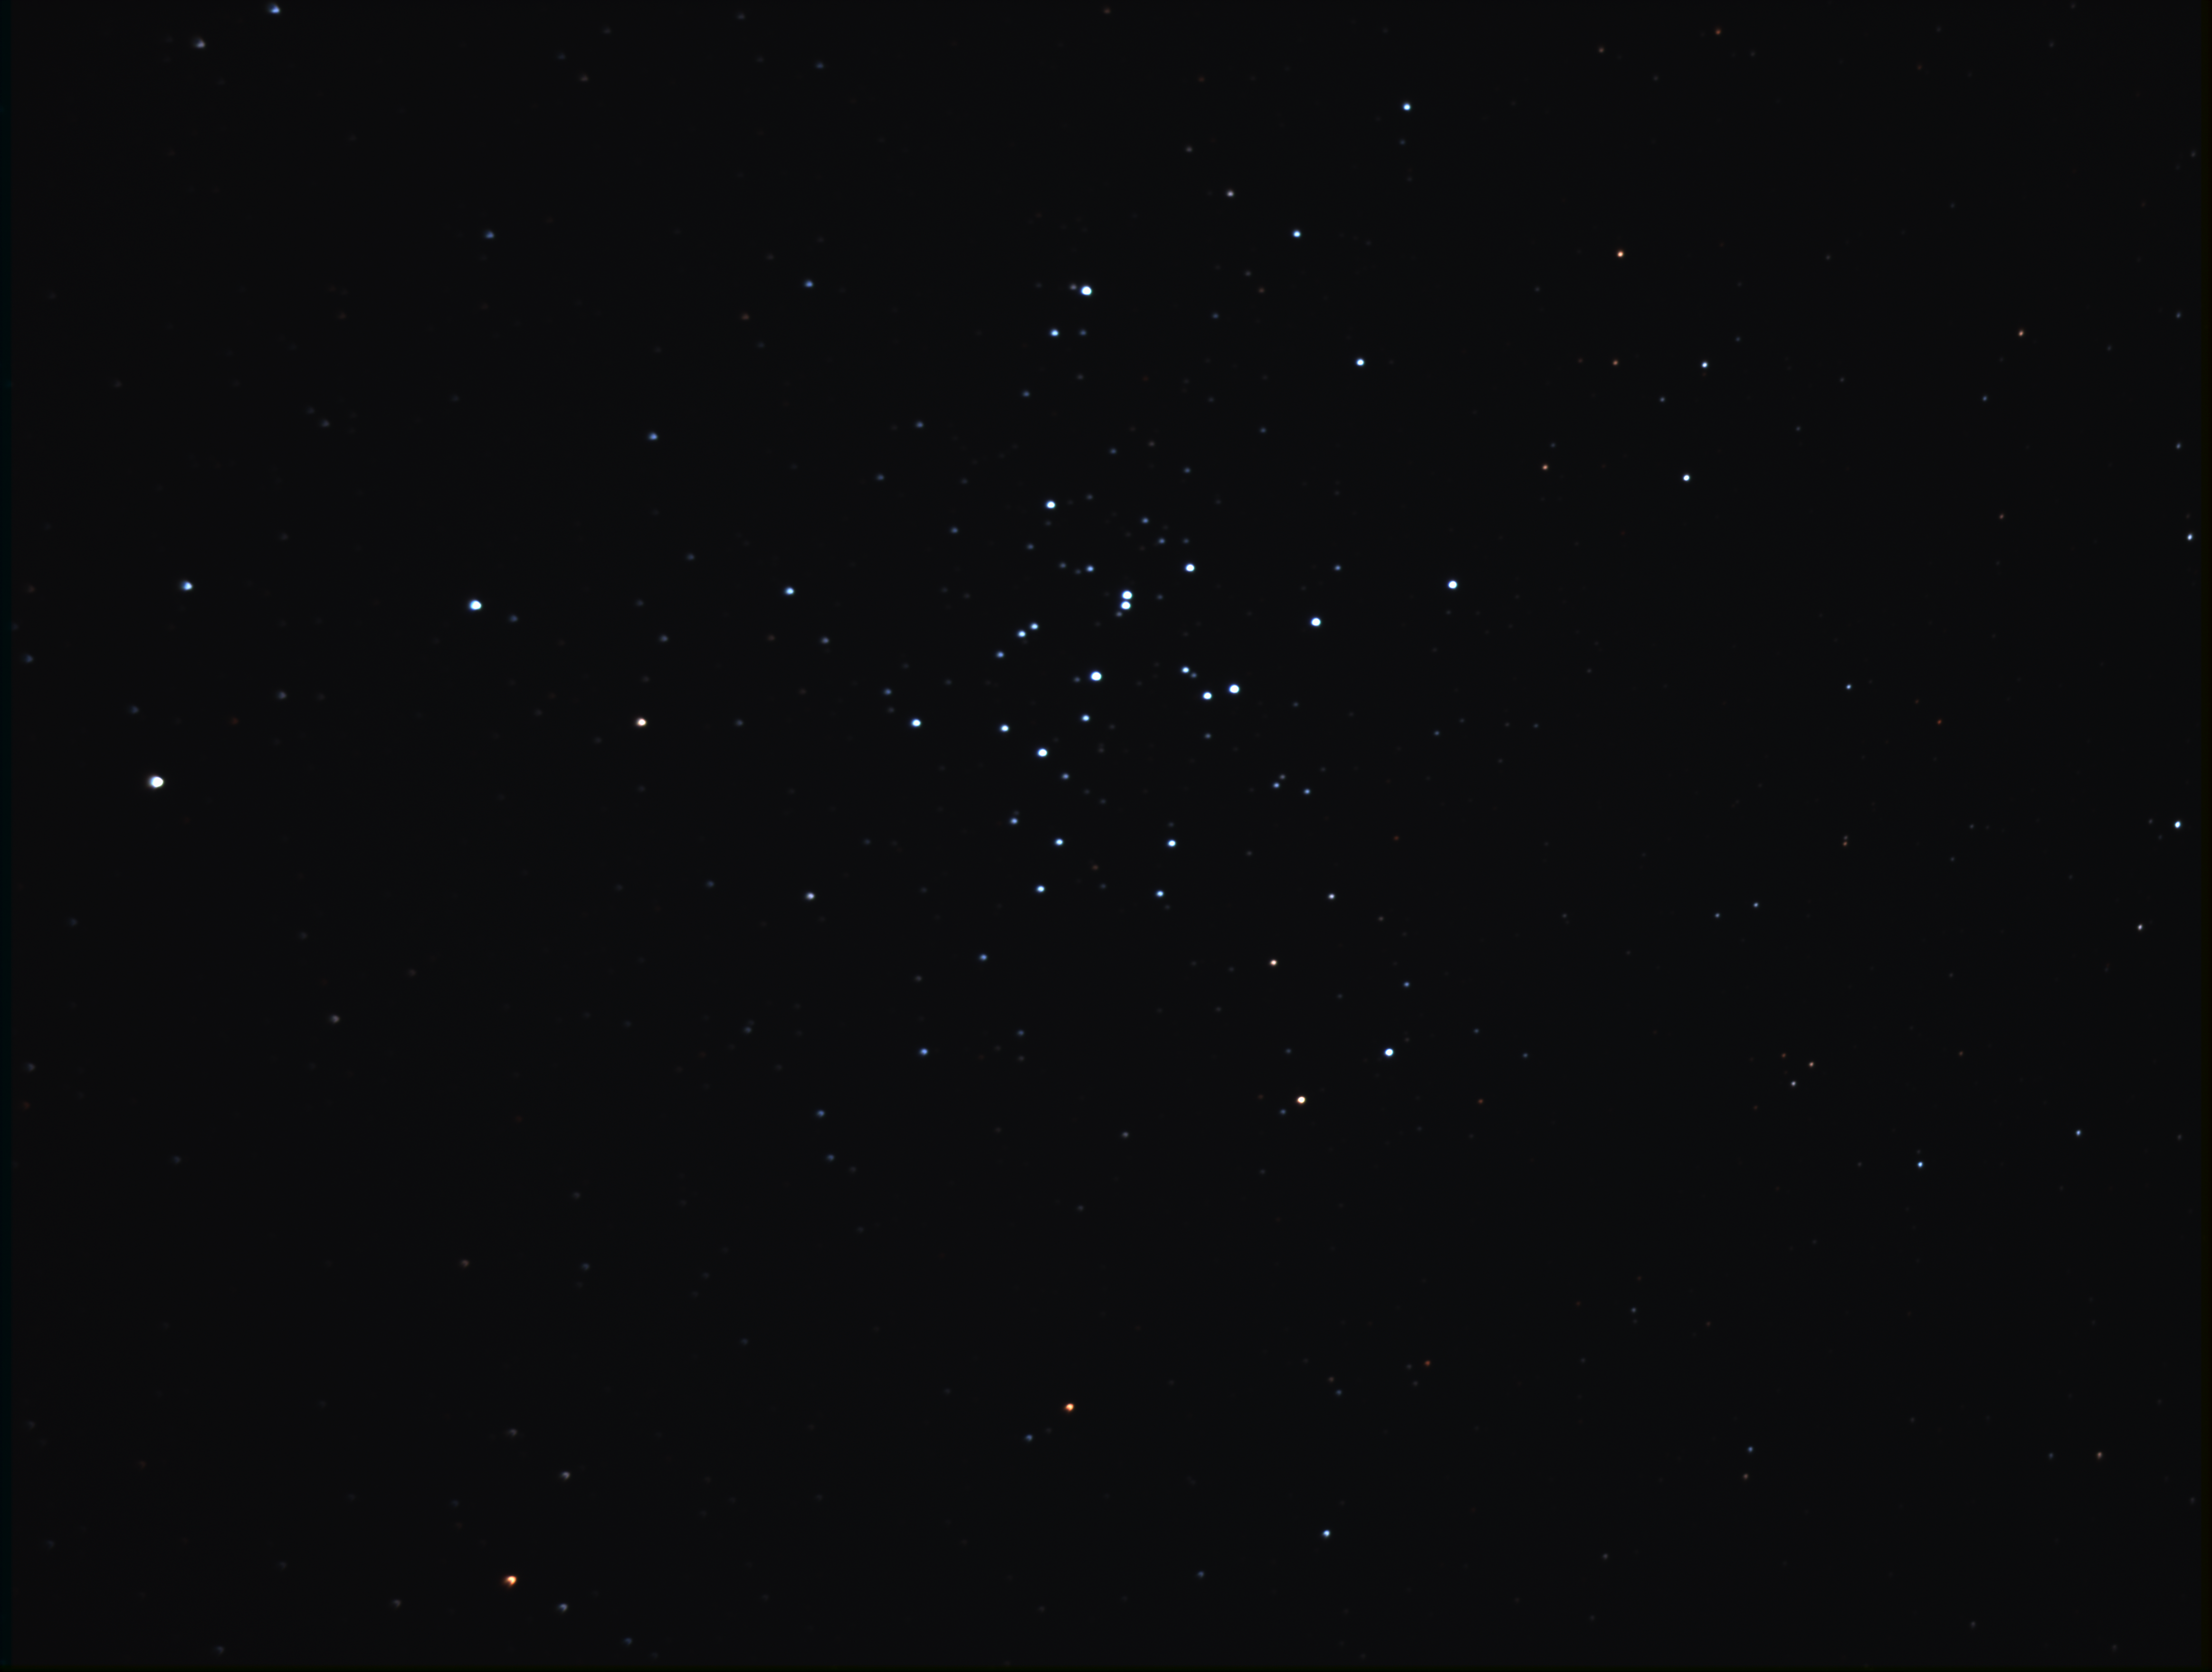
M36 - The open cluster M36. I find open clusters to be kind of boring. But the tracking was good. Ten 60 second exposures for each RGB channel.
NGC2024 Flame Nebula - This is a pretty poor image. It's the one that suffered from "water spots" which were identified as dust by the AZ-Observing guys. Most of the dust spots were deminished in the normal PixInsight processing but the image still has a lot of "grain" in it. This is five 90 second exposures for each RGB channel. I don't know why Alnitak has a purple/green fringe.
M42 Orion 20190124 - My first attempt at doing separate RGB channels. I clibrated, registered, and integrated each channel seperately in PixInsight. Then I registered each of the channel masters and combined them together into a single RGB image. I probably should have calibrated and regsiters ALL of the images together in one operation. Then integrate each channel and finally combine them together into a single color image. I'll try that next. And yes, I have the blow out in the center of Orion that is common in simple images of it.
Pleiades-20181005 - Seven 3 minute subframes stacked, taken at the 2018 All Arizona Star Party.
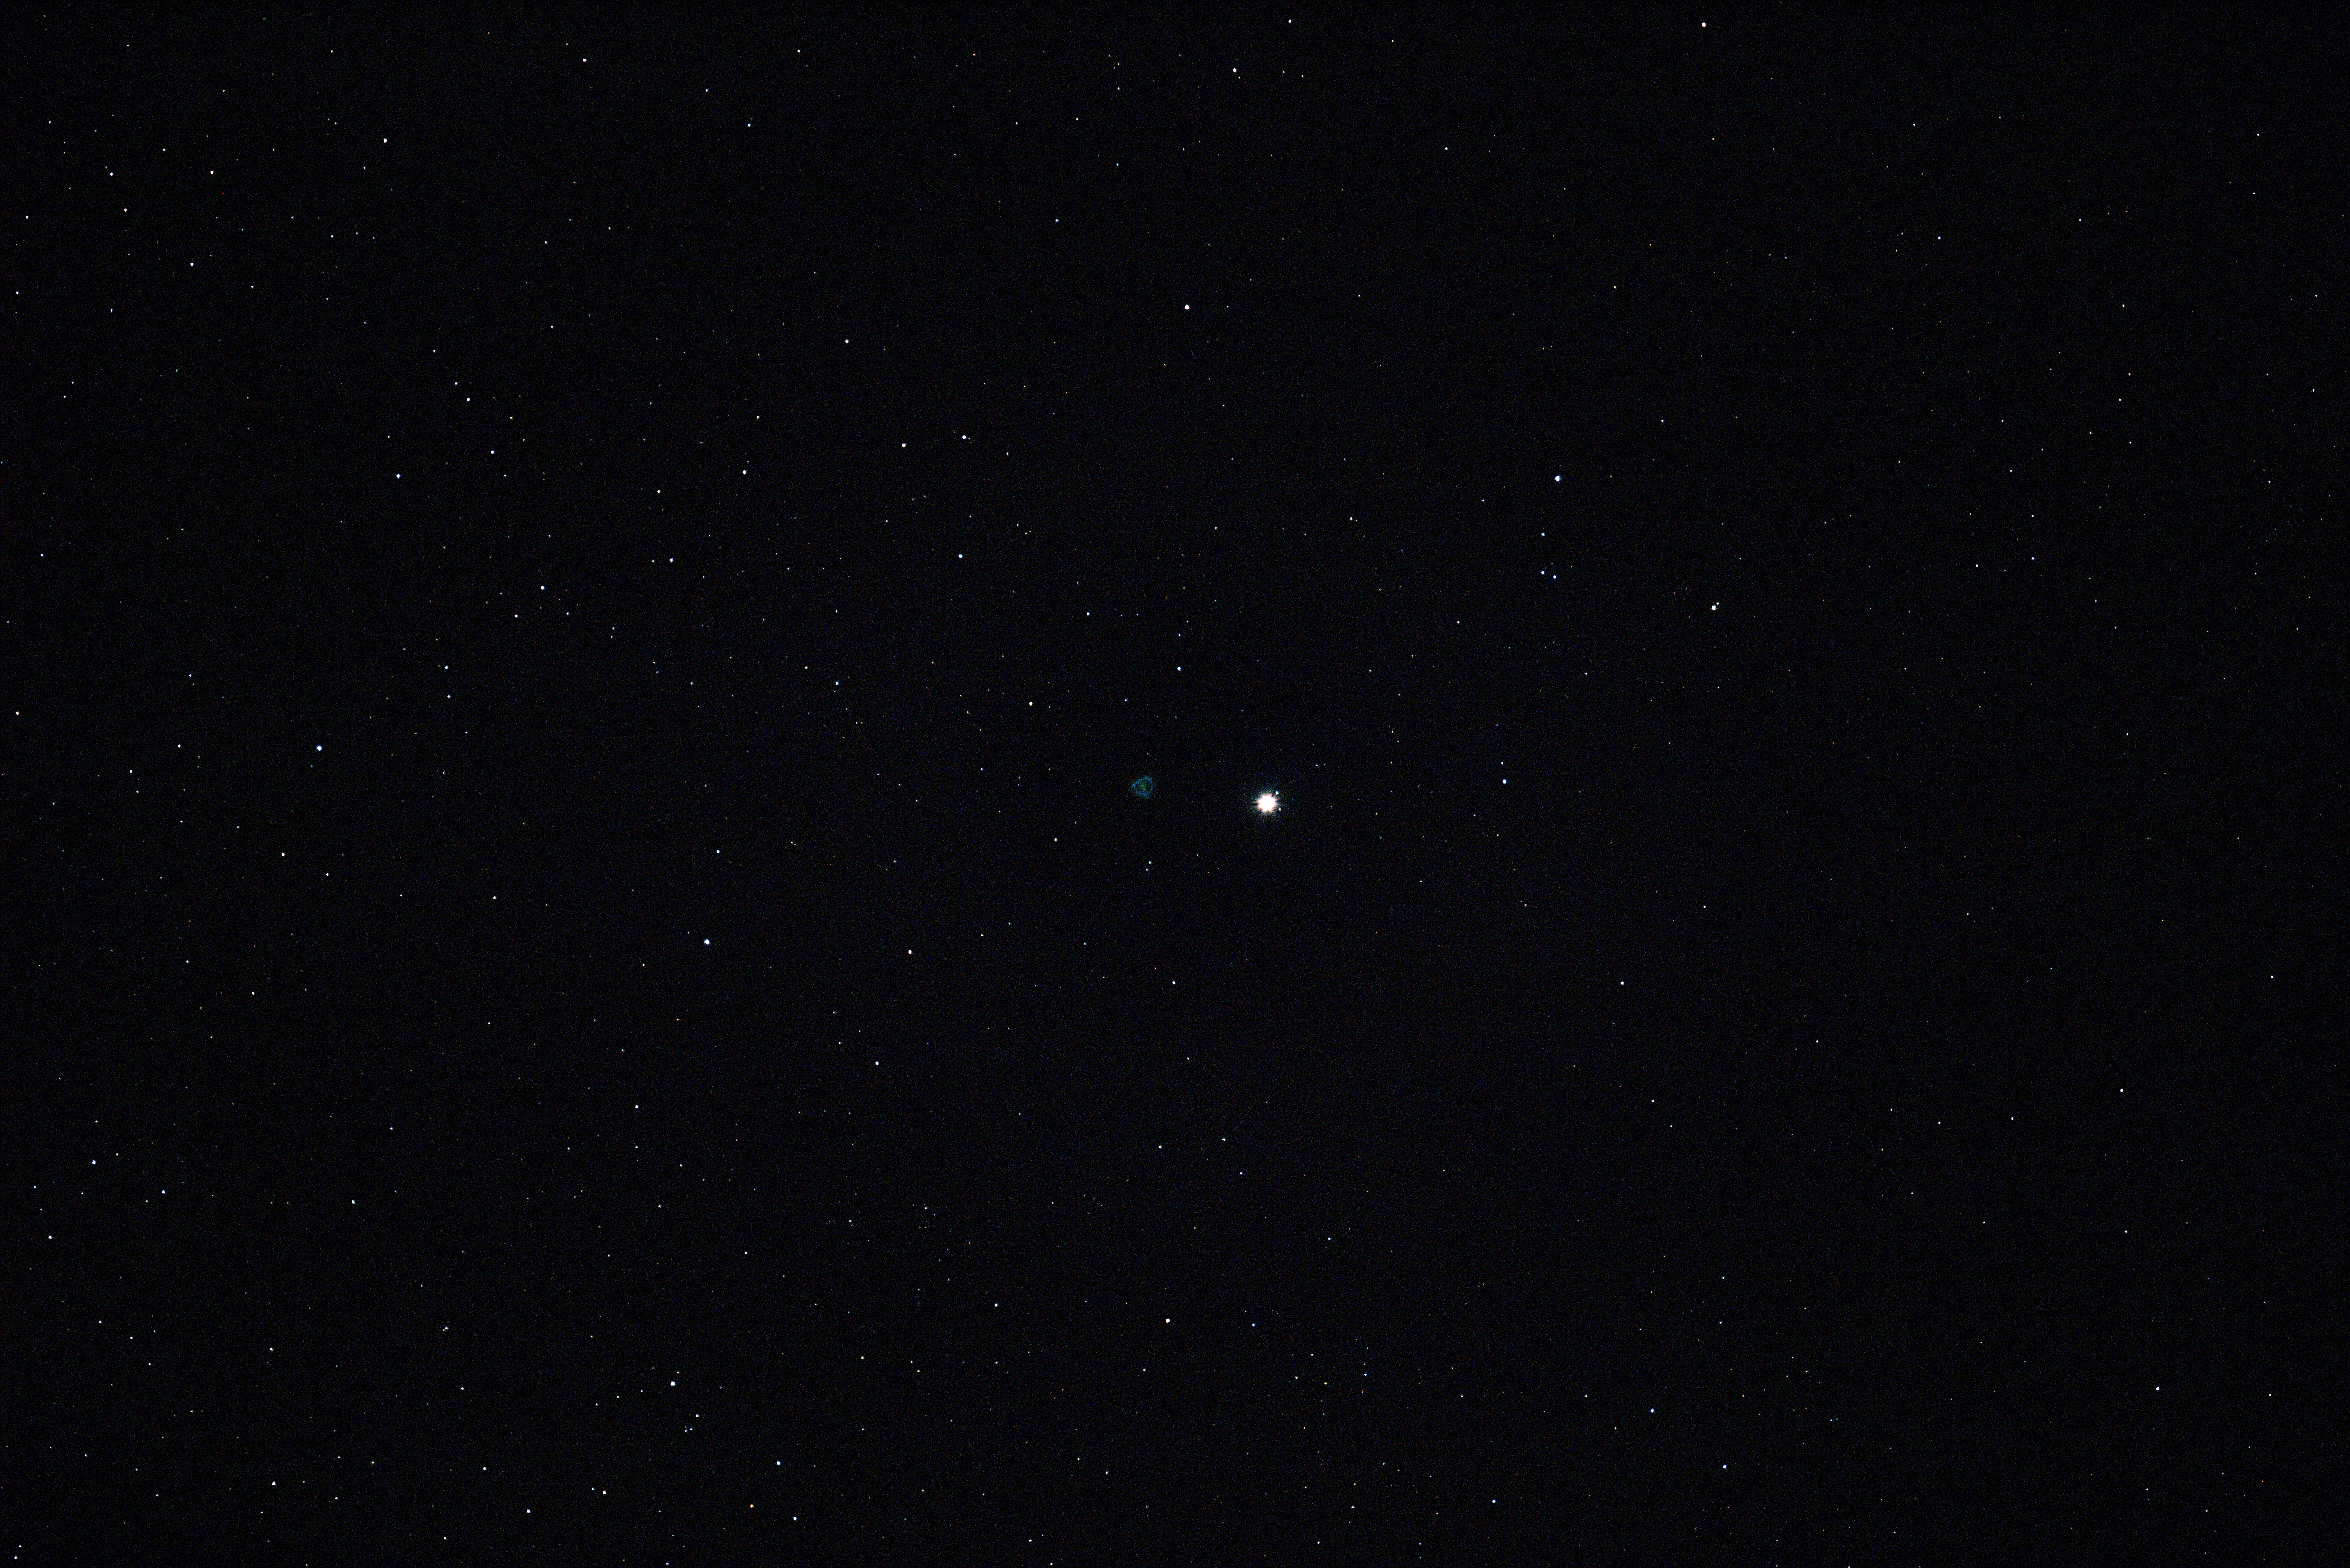
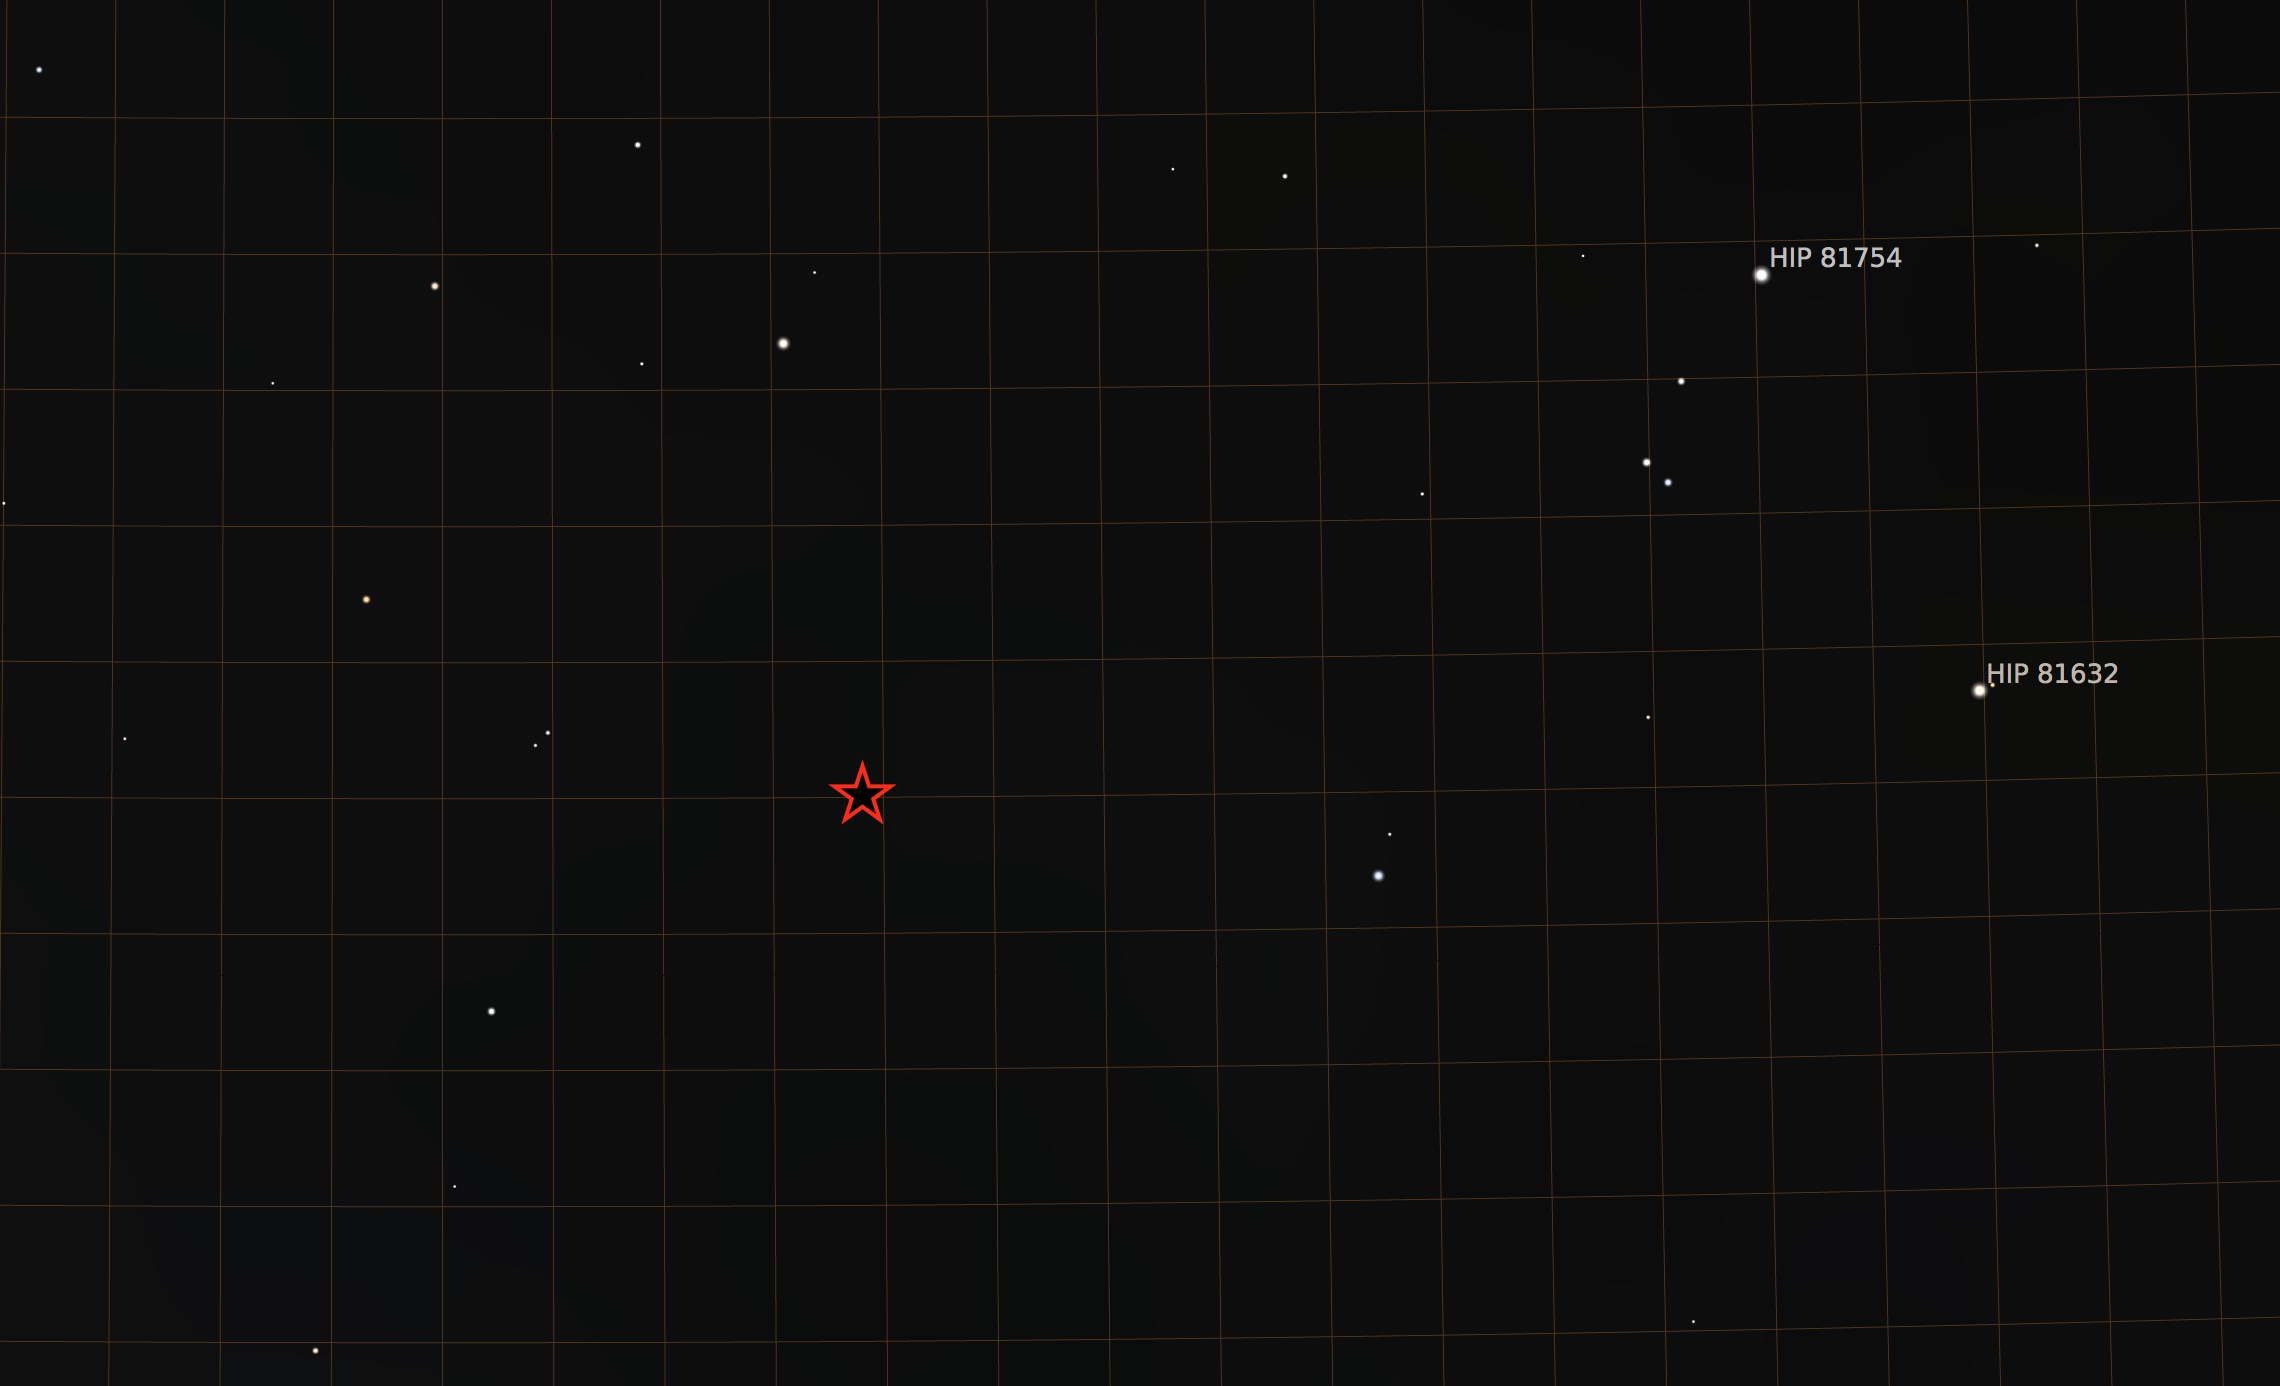
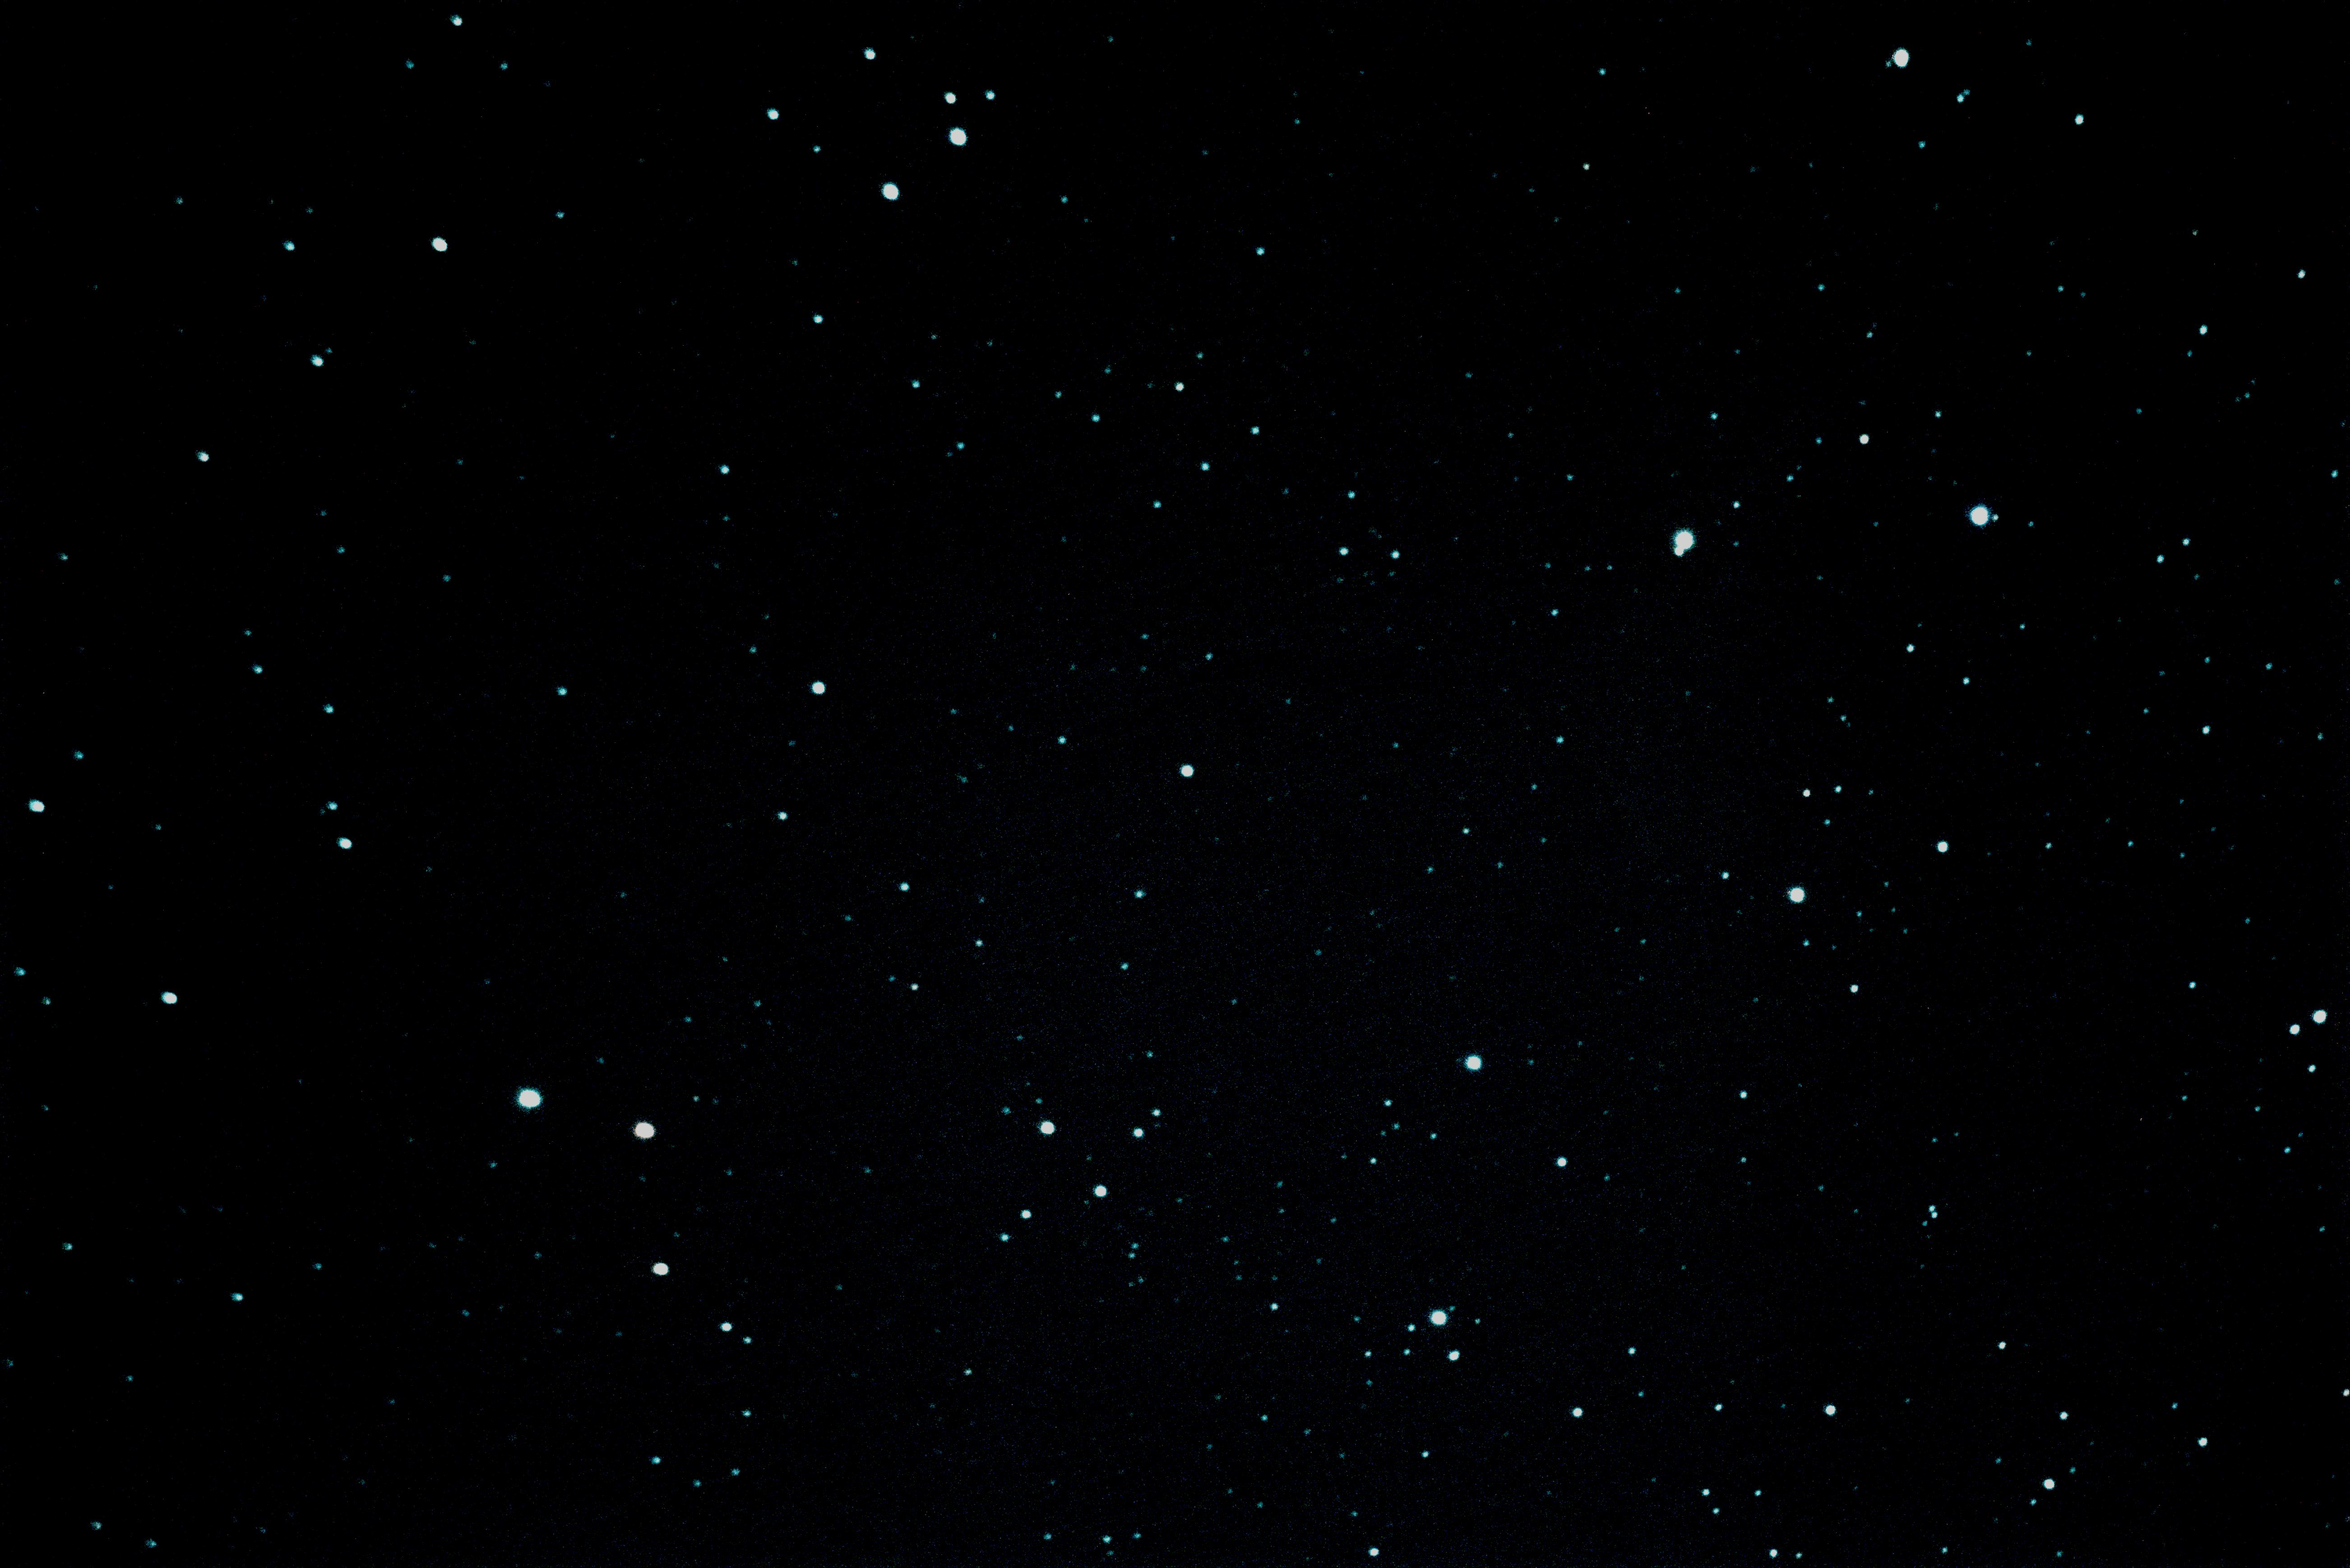
What is it? - Old image I found. What is it? Is it real? The guys on AZ-Observing think it's lens flare. But the bright star doesn't show up in Stellarium. The two to the upper right of the bright center object are HIP 81754 and HIP 81632 according to Astrometry.net. So I'm still puzzled.
And this is where I think it is on Stellarium's star map.
One of the guys on AZ-Observing figured it out. That bright "star" is Saturn! And that explains the ring shaped reflection just to the left of it. I have to remember that static star maps don't show those "wanderers" unless you have the correct date entered.
Pleides-20161023 - Single frame 60s @ f2.8, ISO 800
Crescent2-20180623 - Better processing in PixInsight
Crescent2-20180623 - Decent, needs beter processing
M13-20180611-raw - Noisey
Crescent-20180610 - Bad focus!
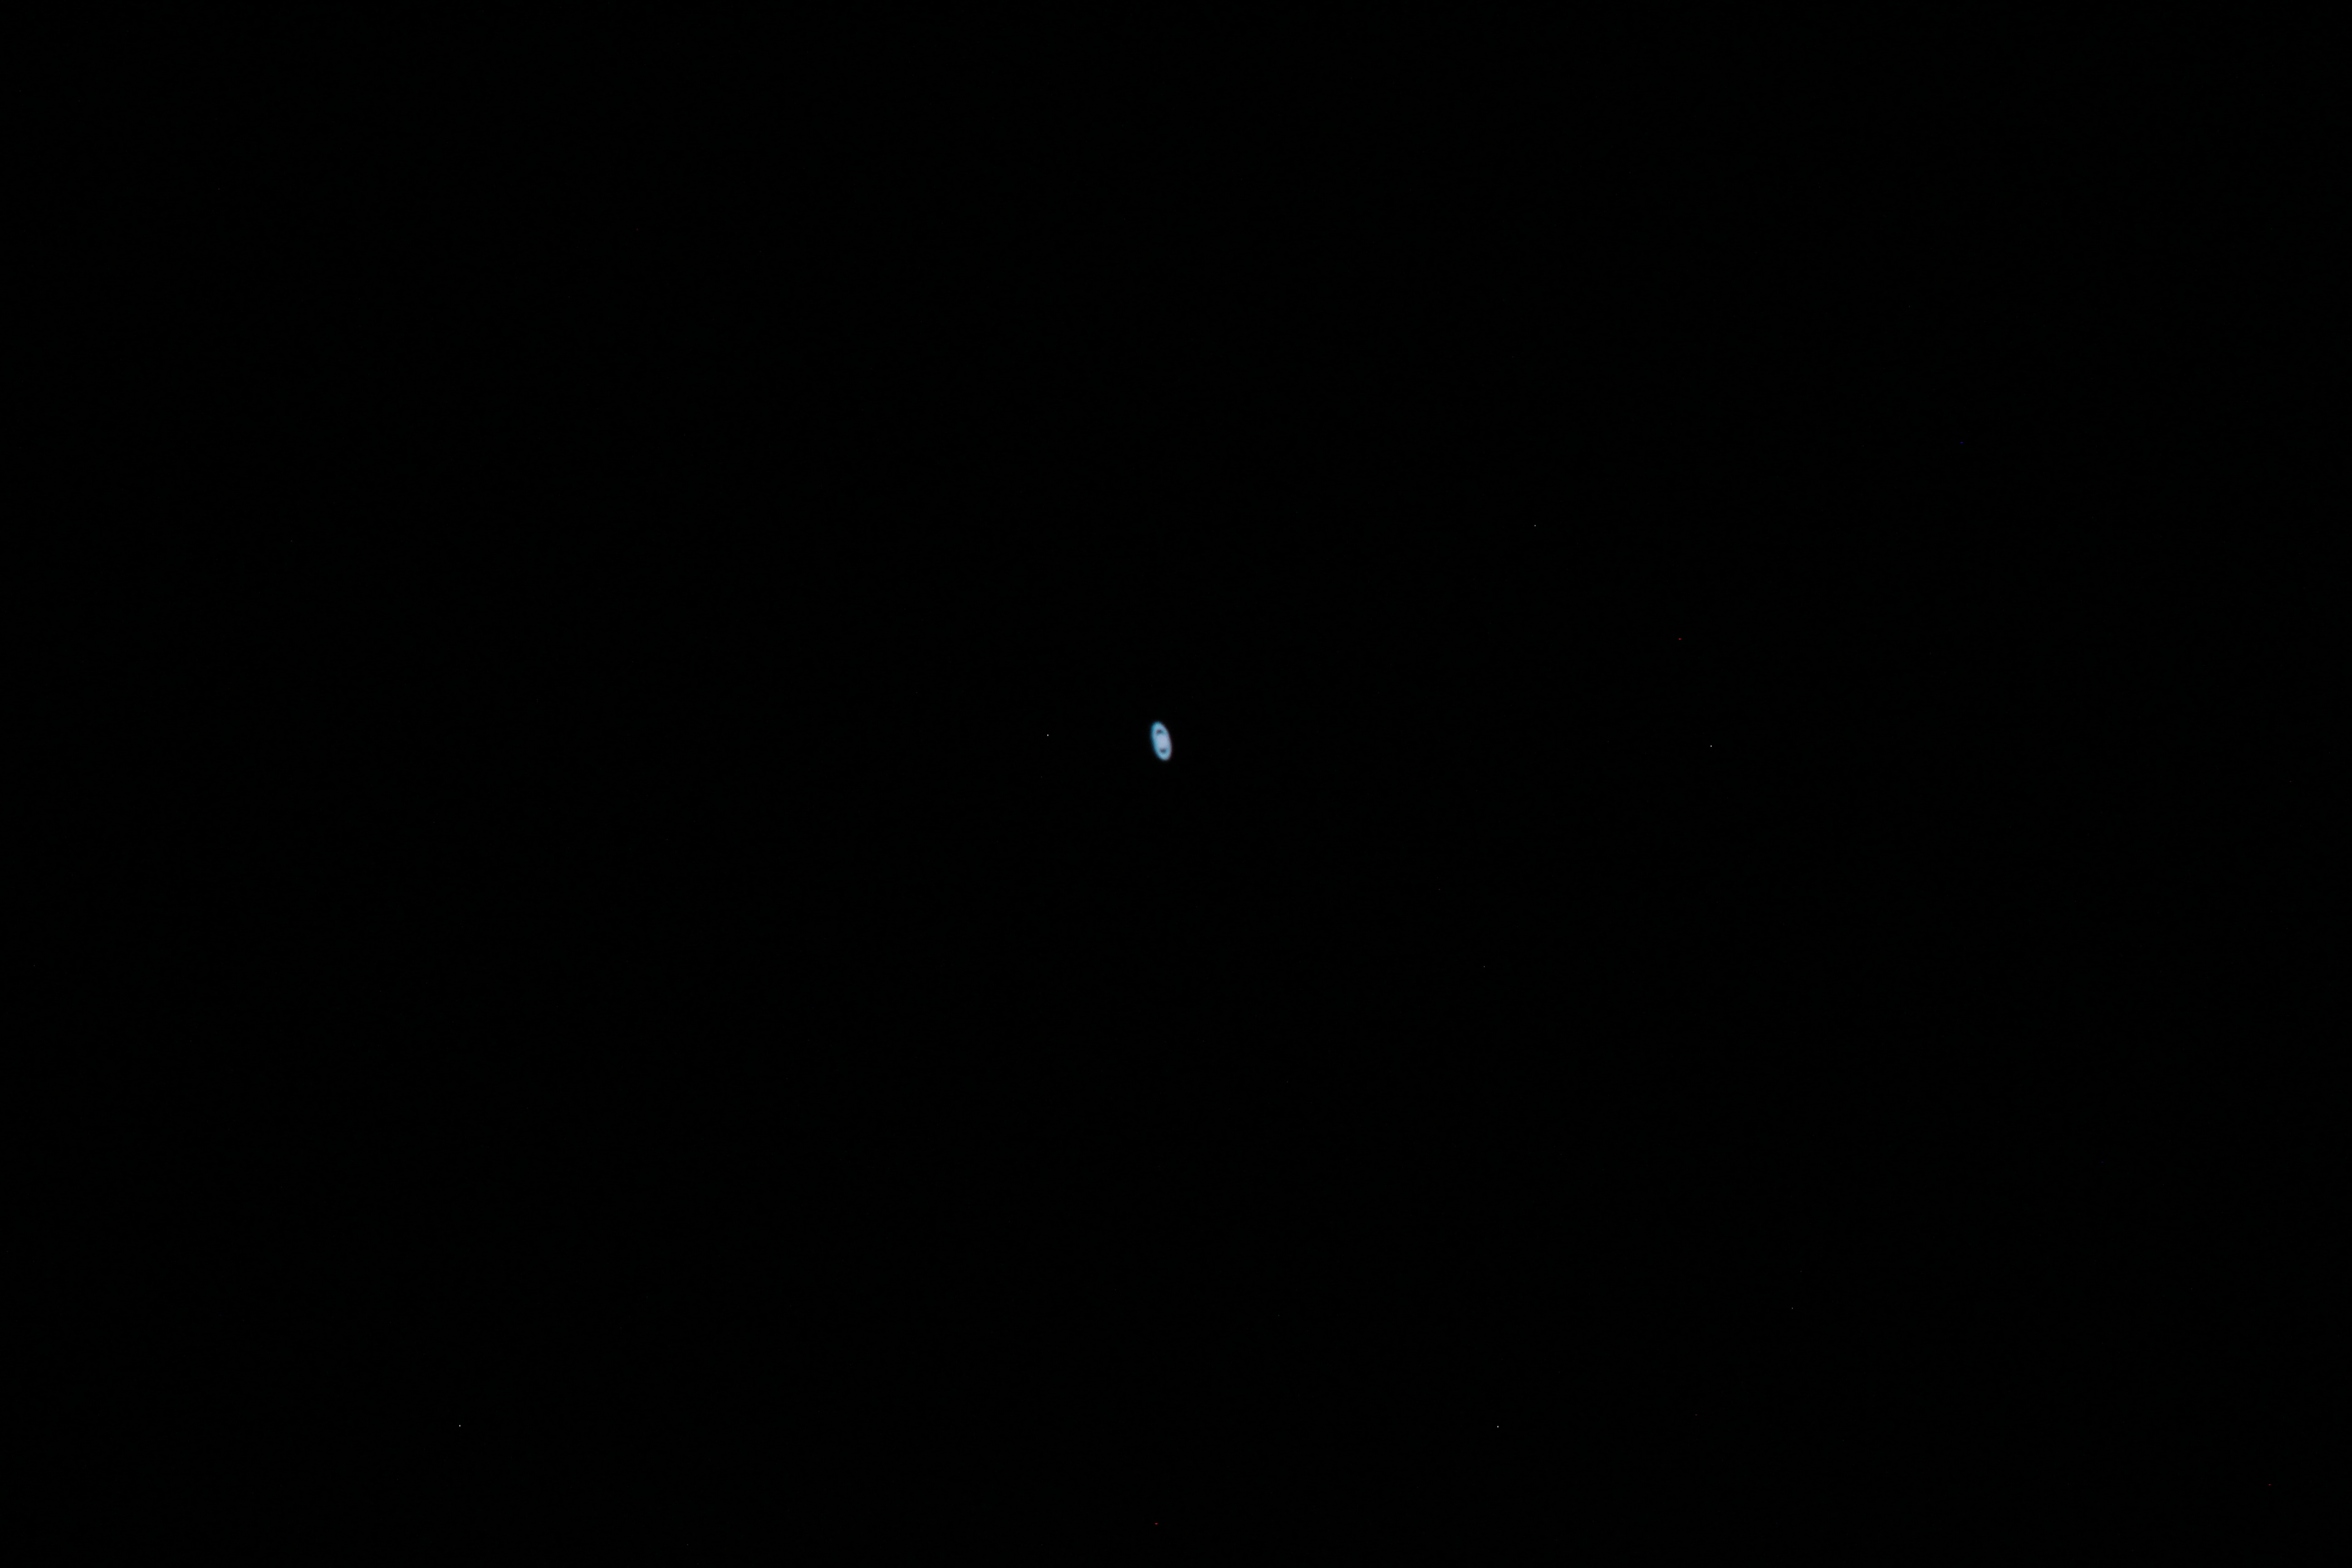
Saturn-20180609 - Rings and a moon!


